Now that we have all the components of our page type, let’s make it work! This means.
Creating a reusable Page Type in the Concrete CMS Page Types Dashboard Interface
Configuring the Composer form for easy posting of content.
Placing default content blocks on the output page to map our composer blocks to their outputs.
Testing the Publishing of a Page Type
Finally, exporting the page type to CIF XML, for inclusion in our package when we install it.
Create the Project Page Type
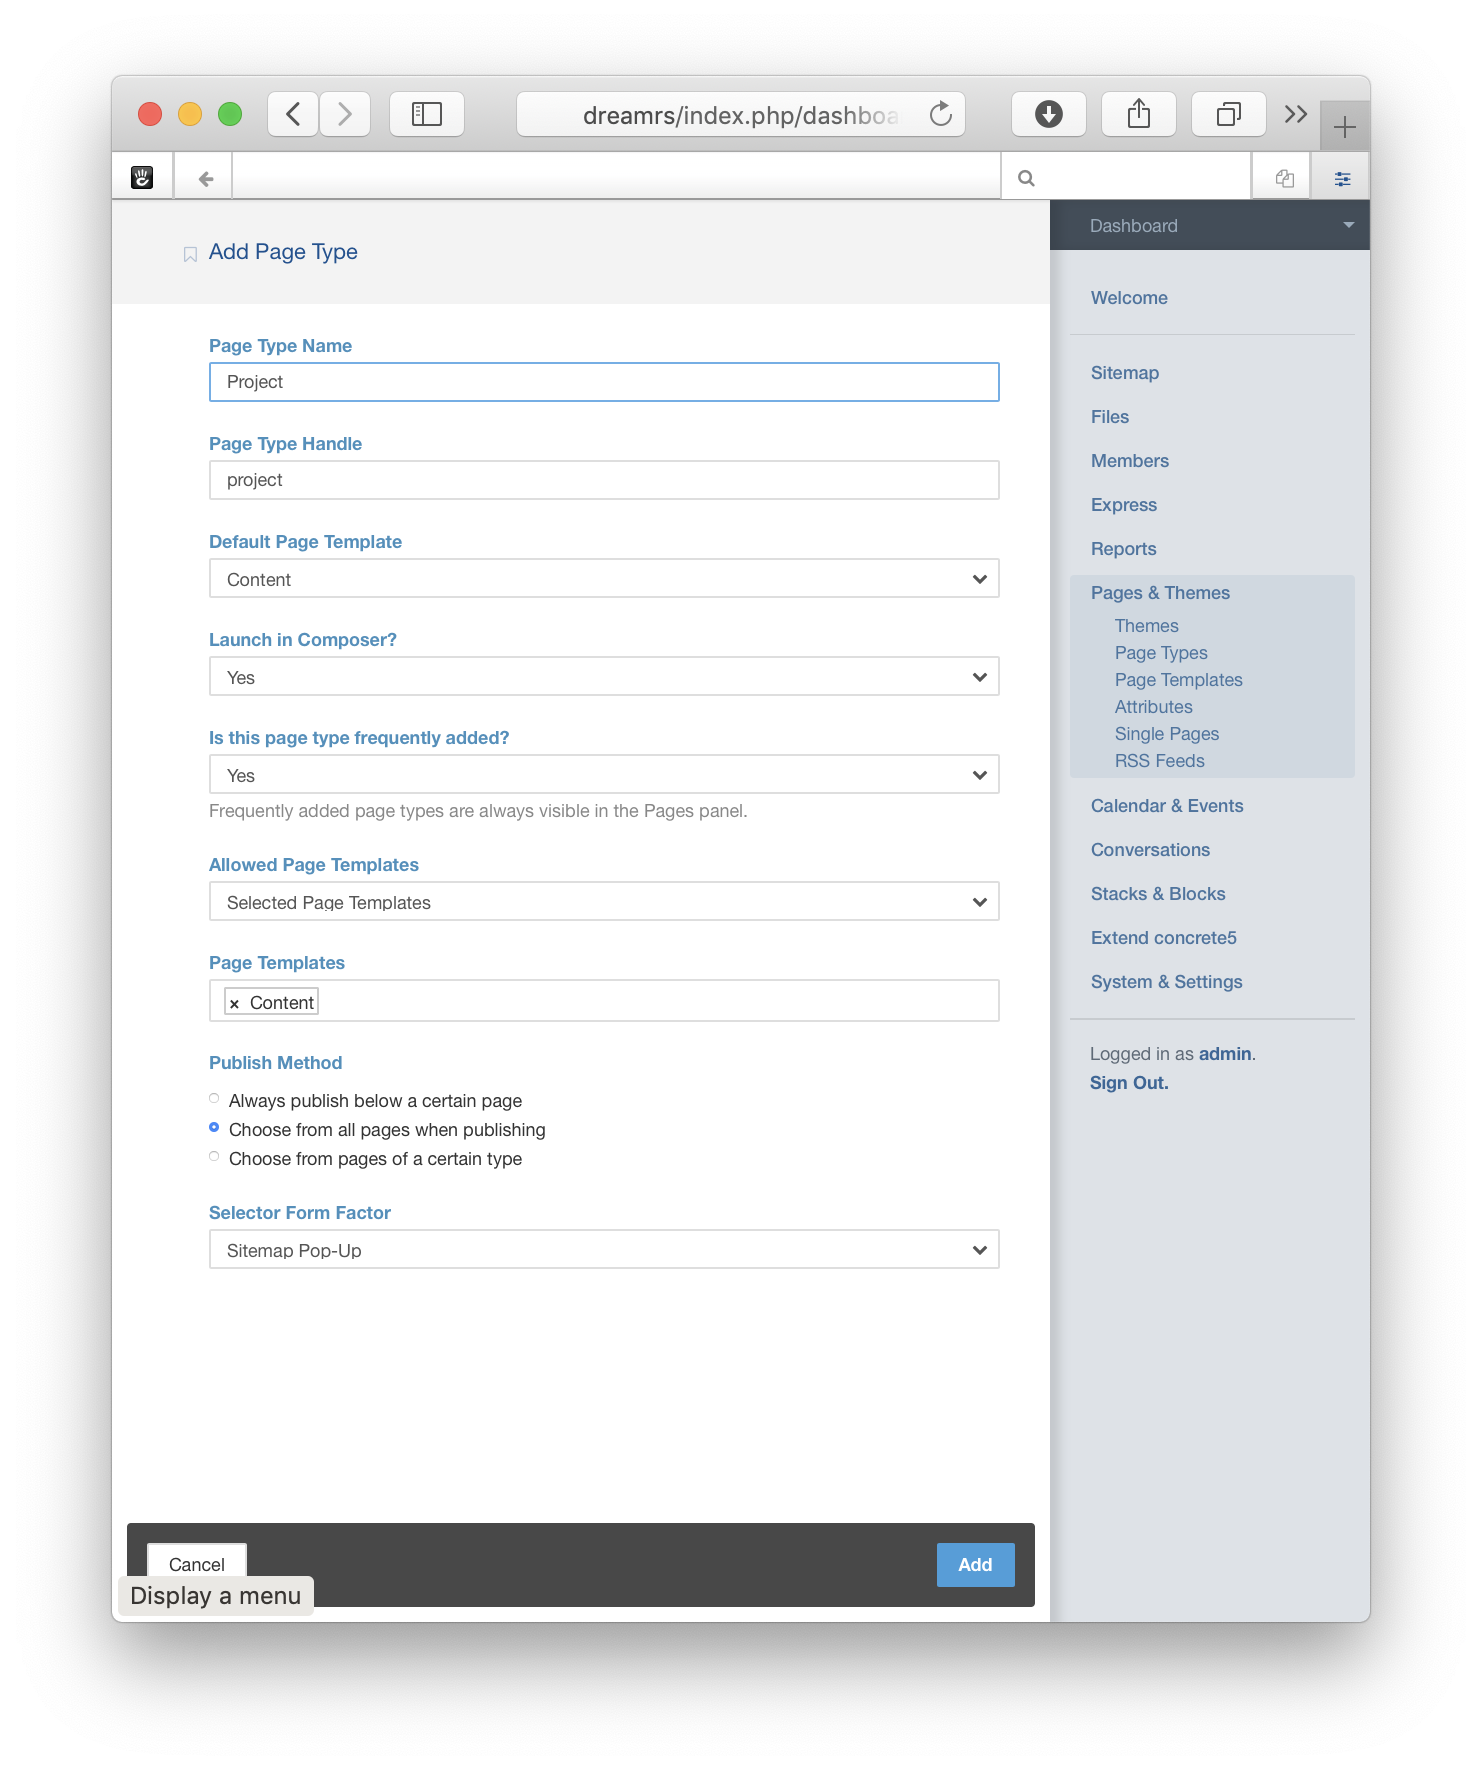
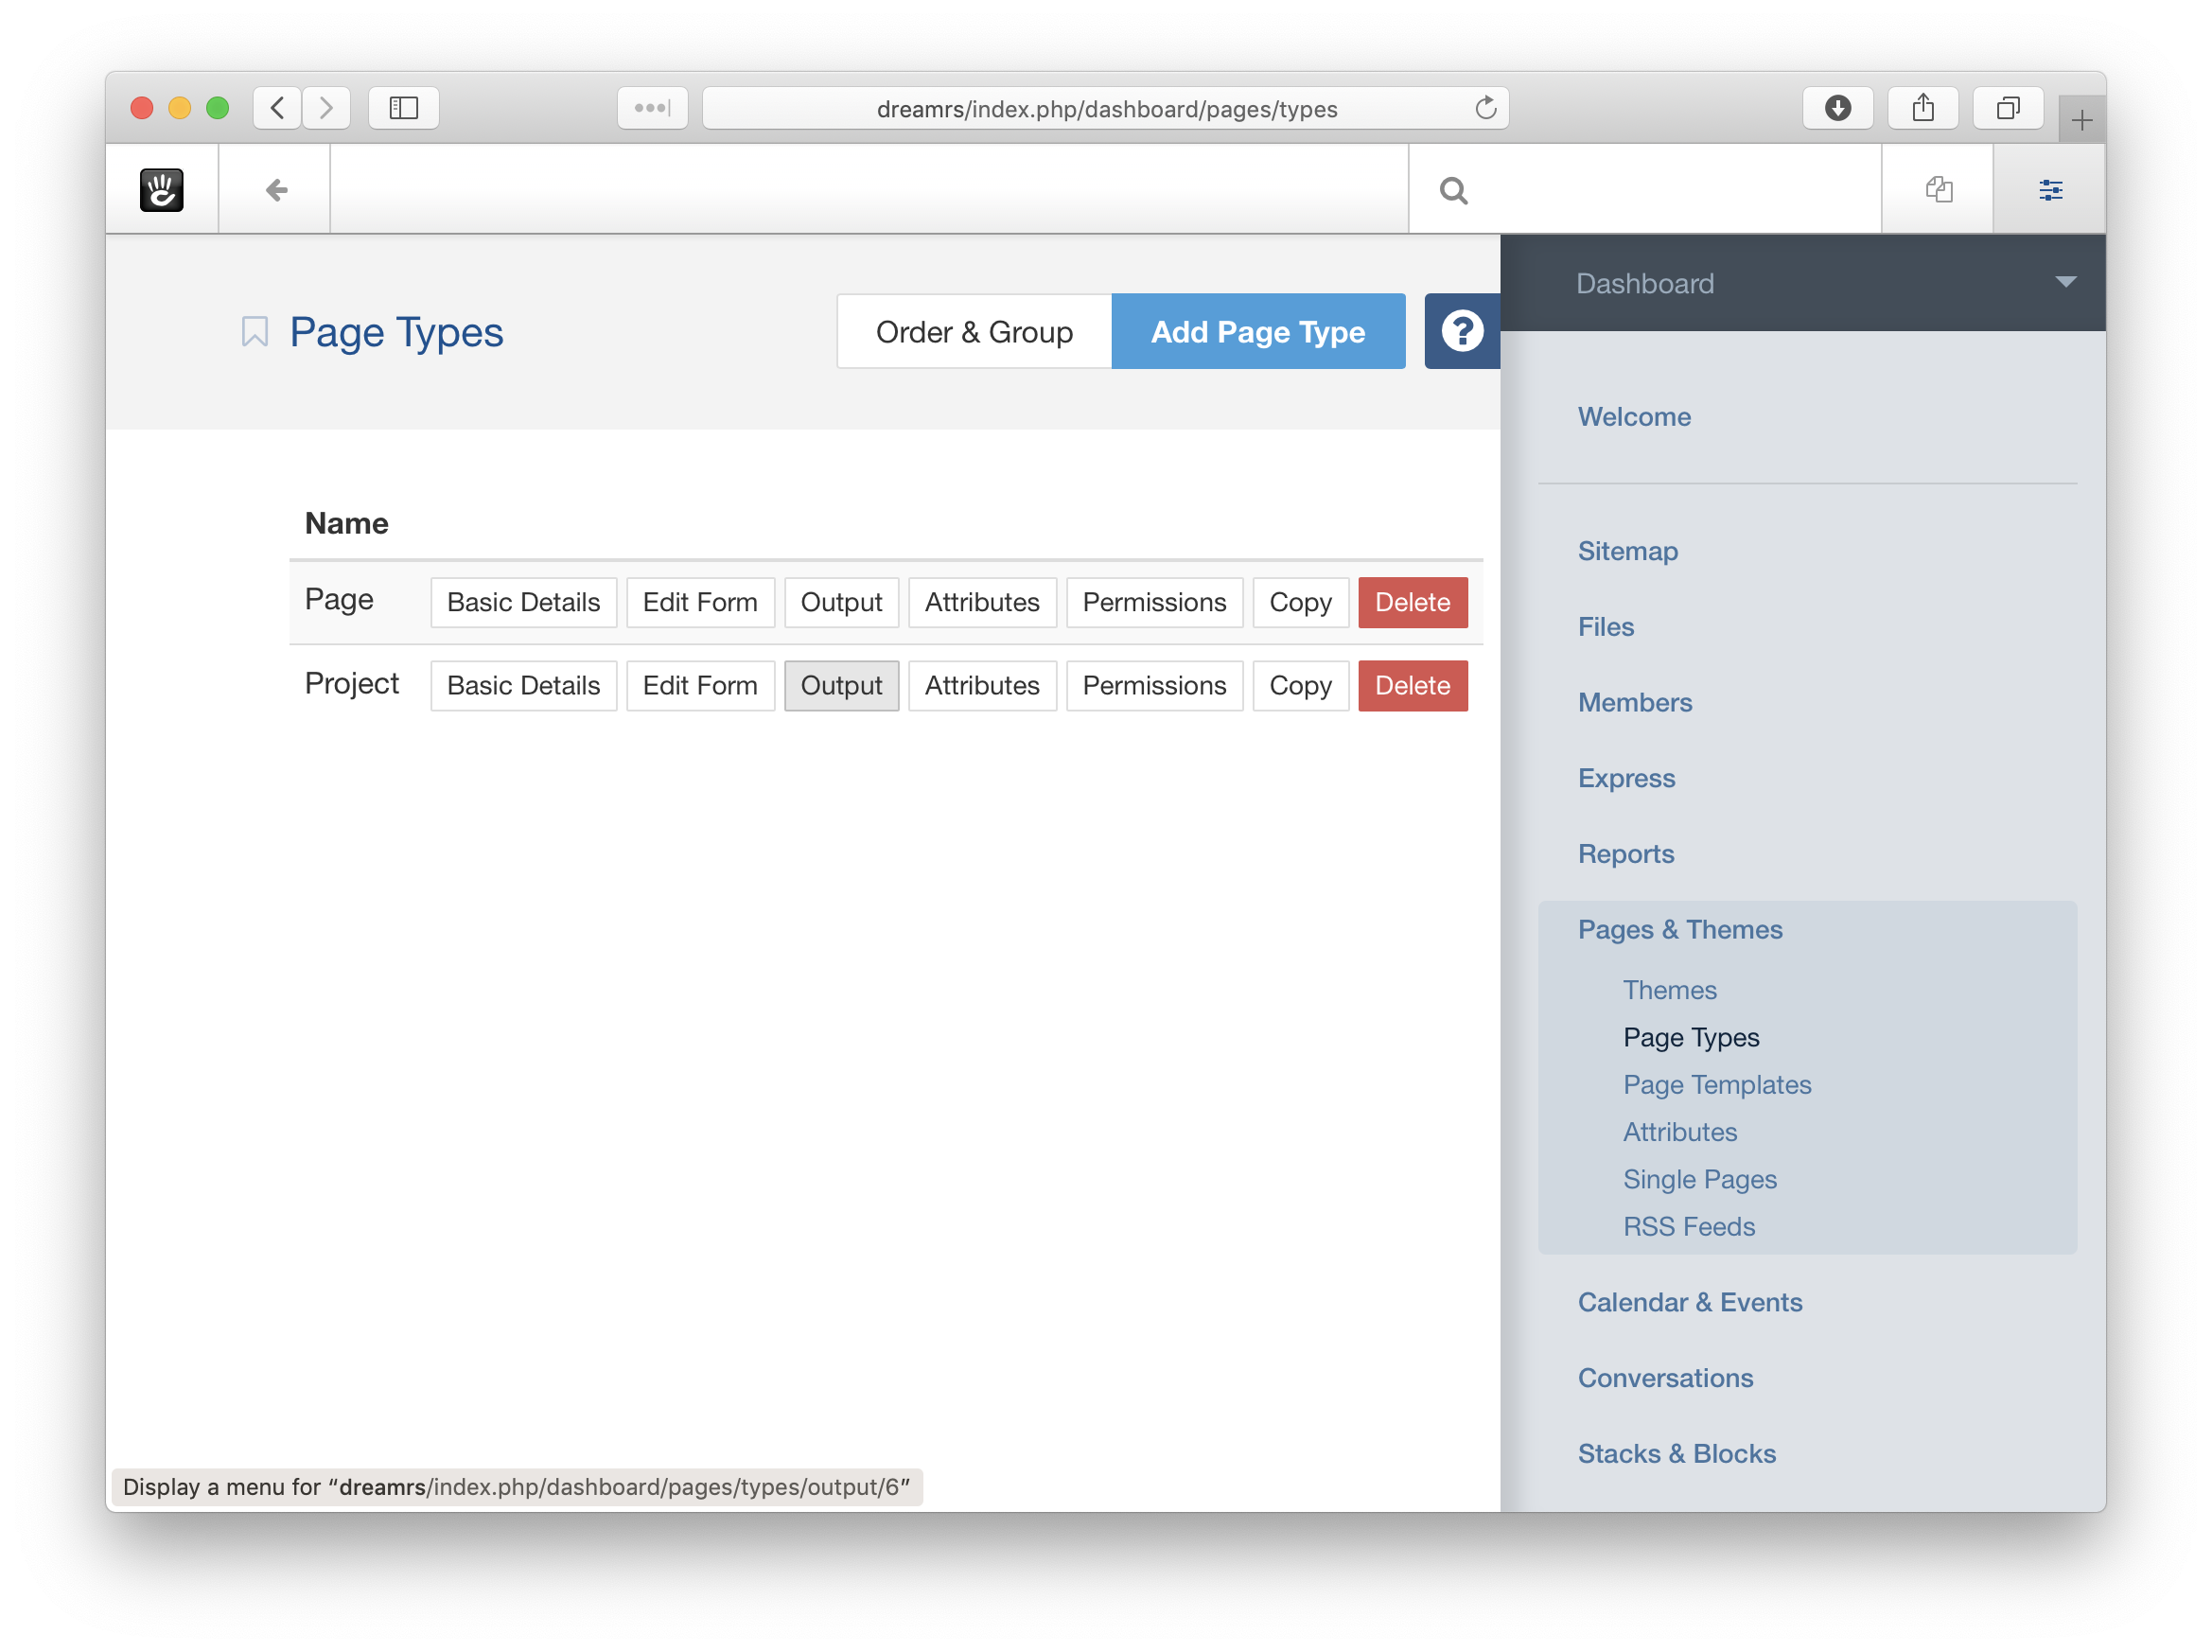
First, let’s create the Project Page Type. Head to Dashboard > Pages & Themes > Page Types. Add a Page Type named Project, and configure it to use the Content Page Type:
Once you’ve made this, you can set up the Composer Form. This is the form displayed when a page is edited in composer -- and by default, if the page type settings default to composer form (which is what we have set up.)
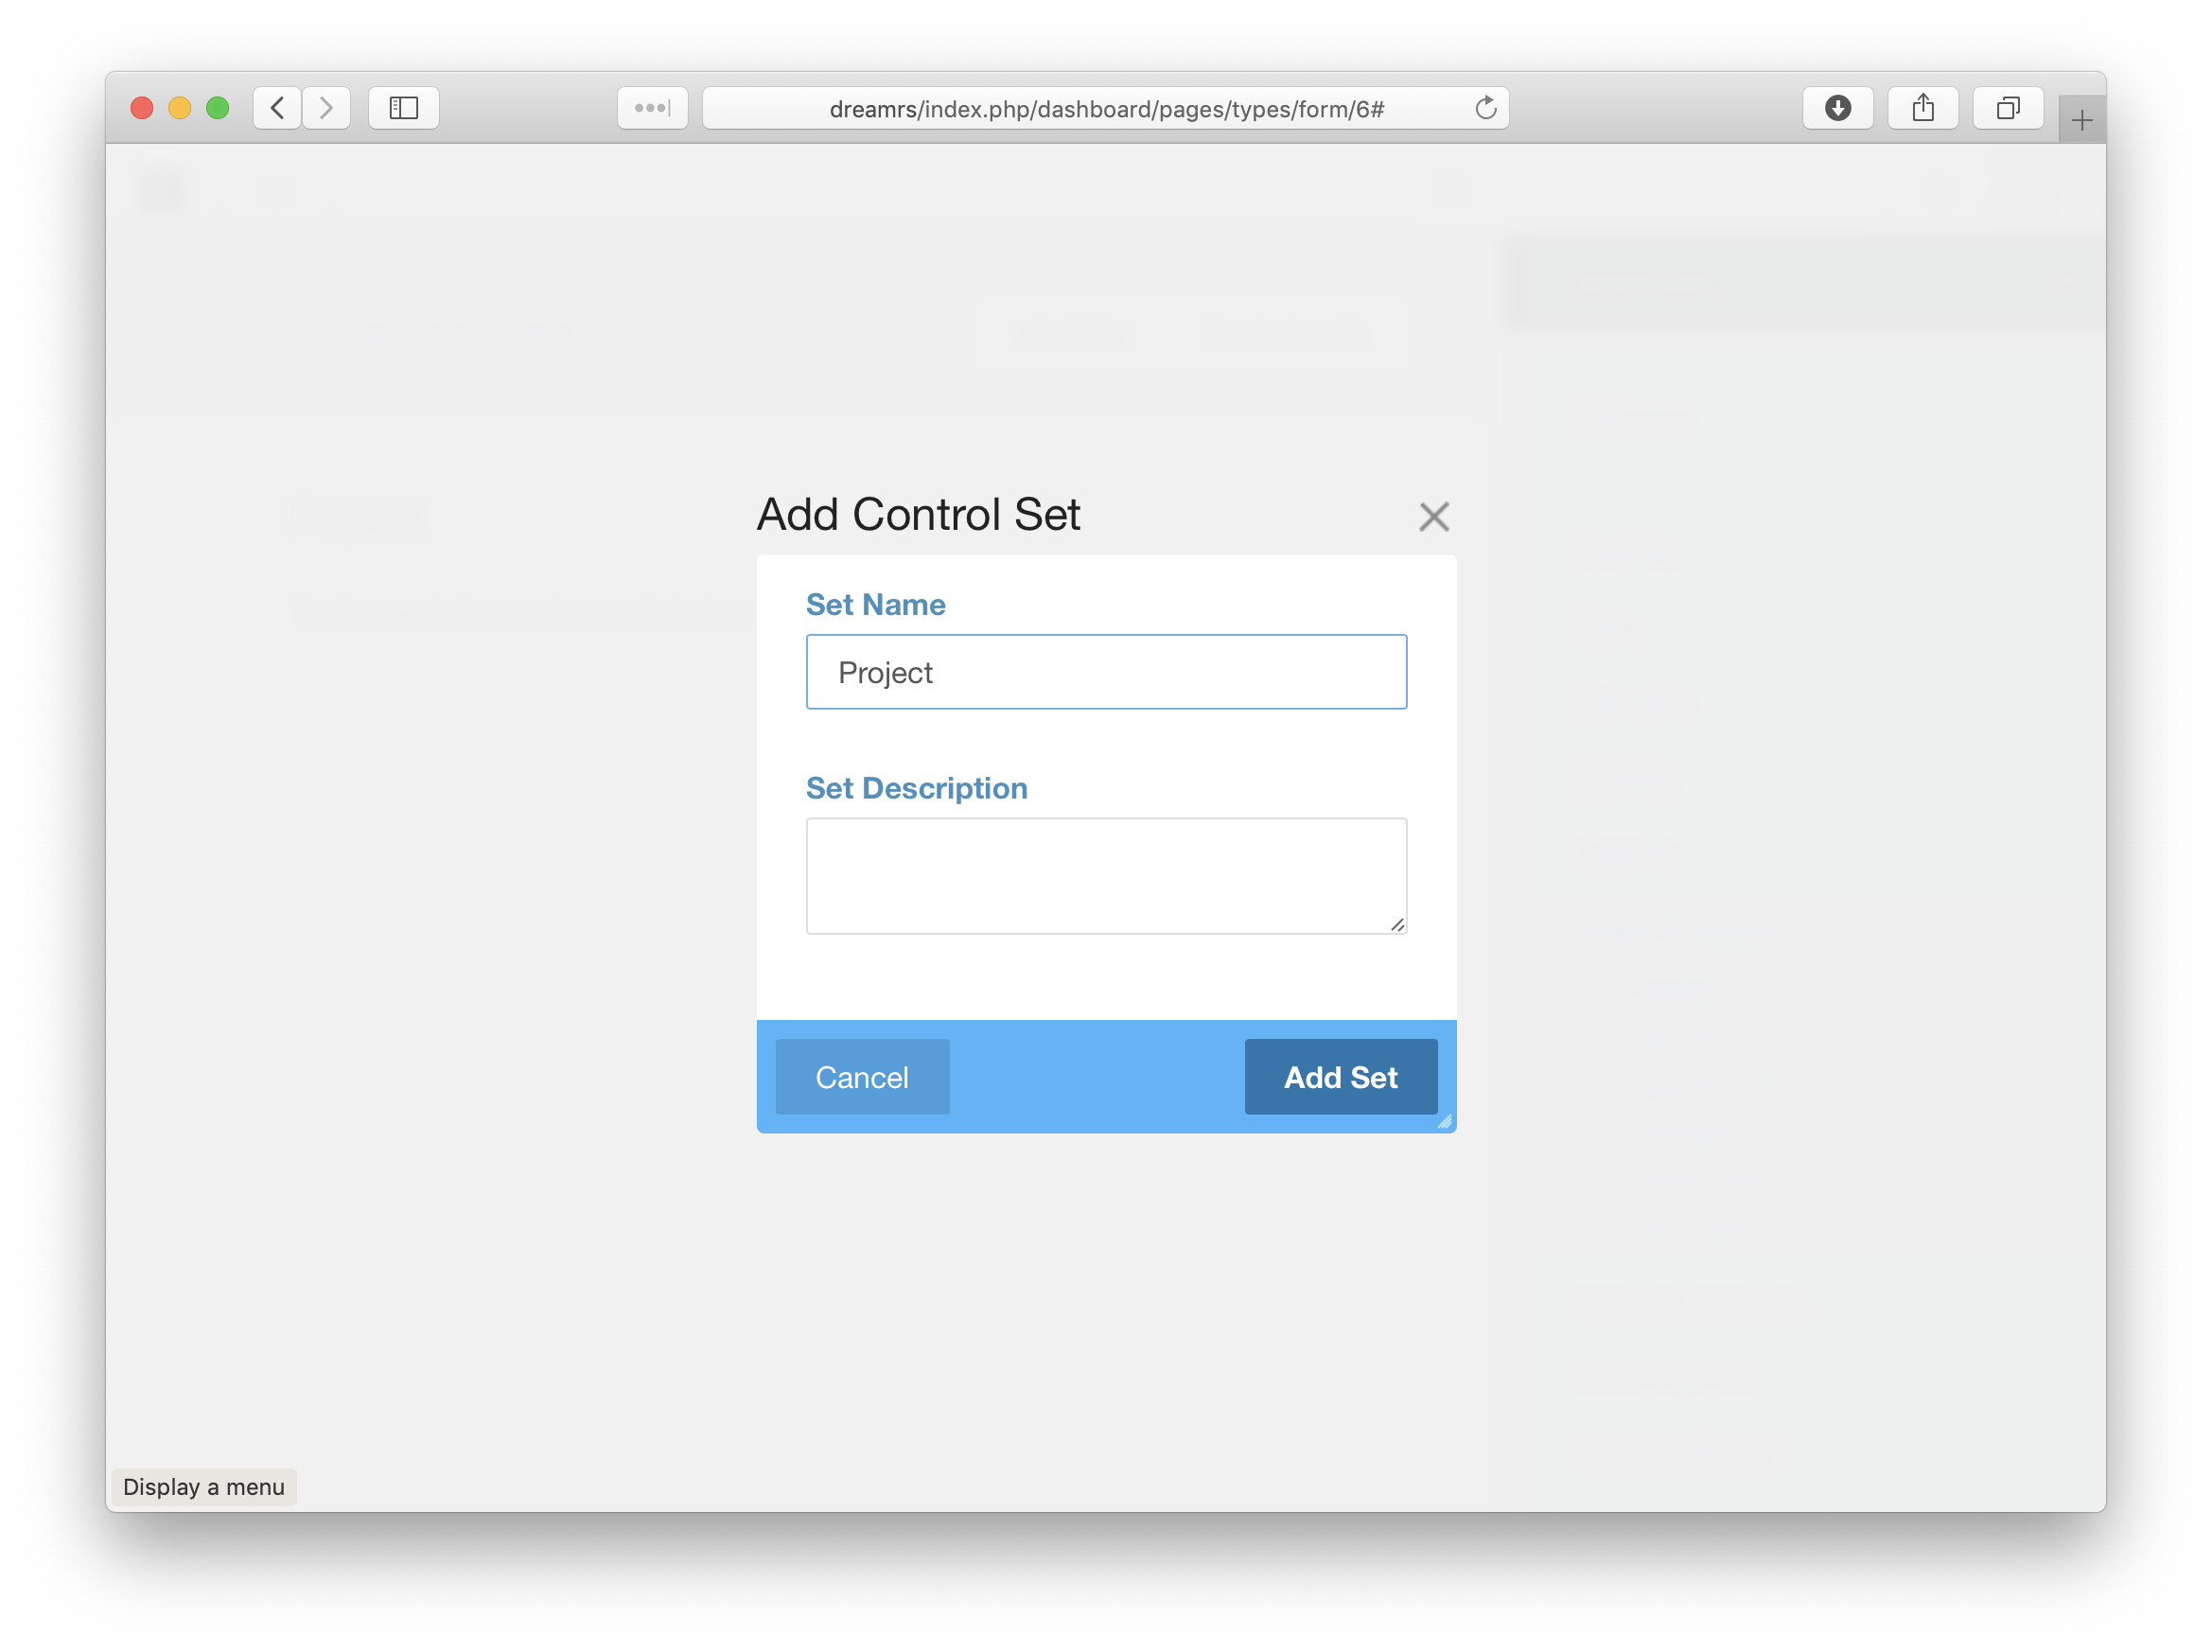
First, add a Field Set to group your form controls:
Then, let’s add Form controls for the core page properties that we absolutely must have in this form:
- Page Name
- URL Slug
- Page Template
- Parent Page
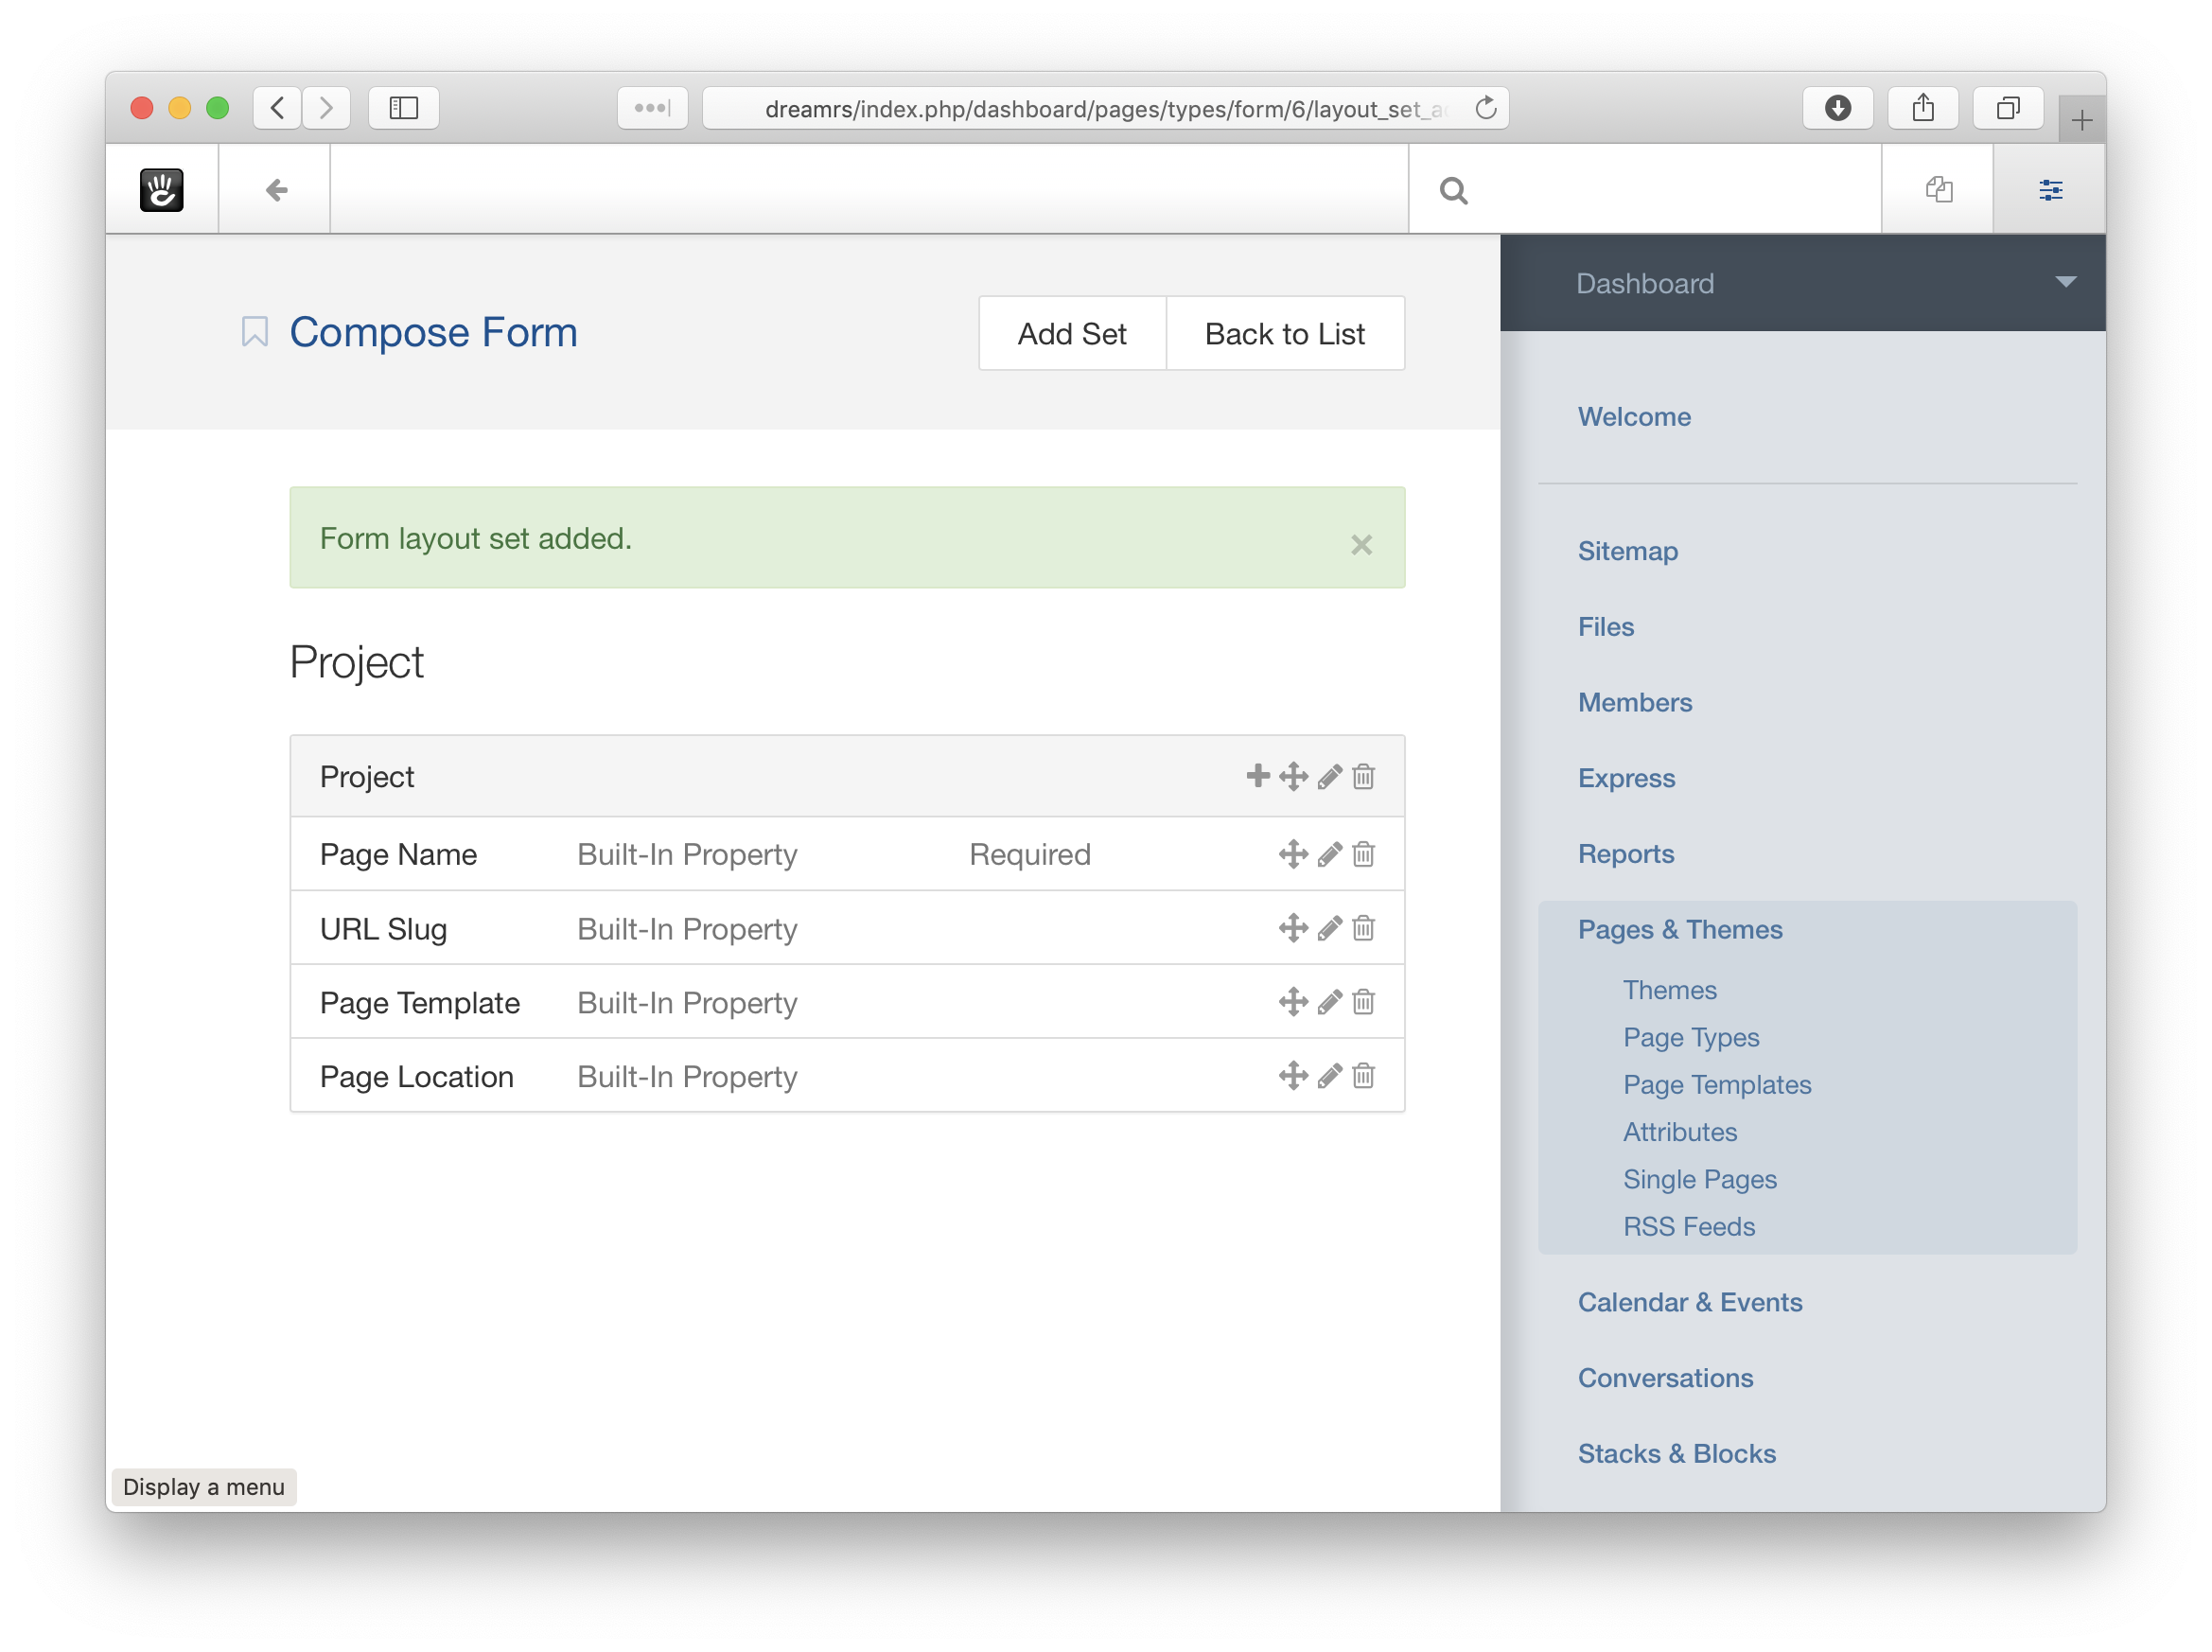
These are the basic elements of a Compose form. They let us easily specify the name of our page, its URL slug (which is required for it live publicly in the site), the page template it wil use, and its page location. Some of these may be omitted based on the configuration of the page type, but for our purposes let’s specify them all here.
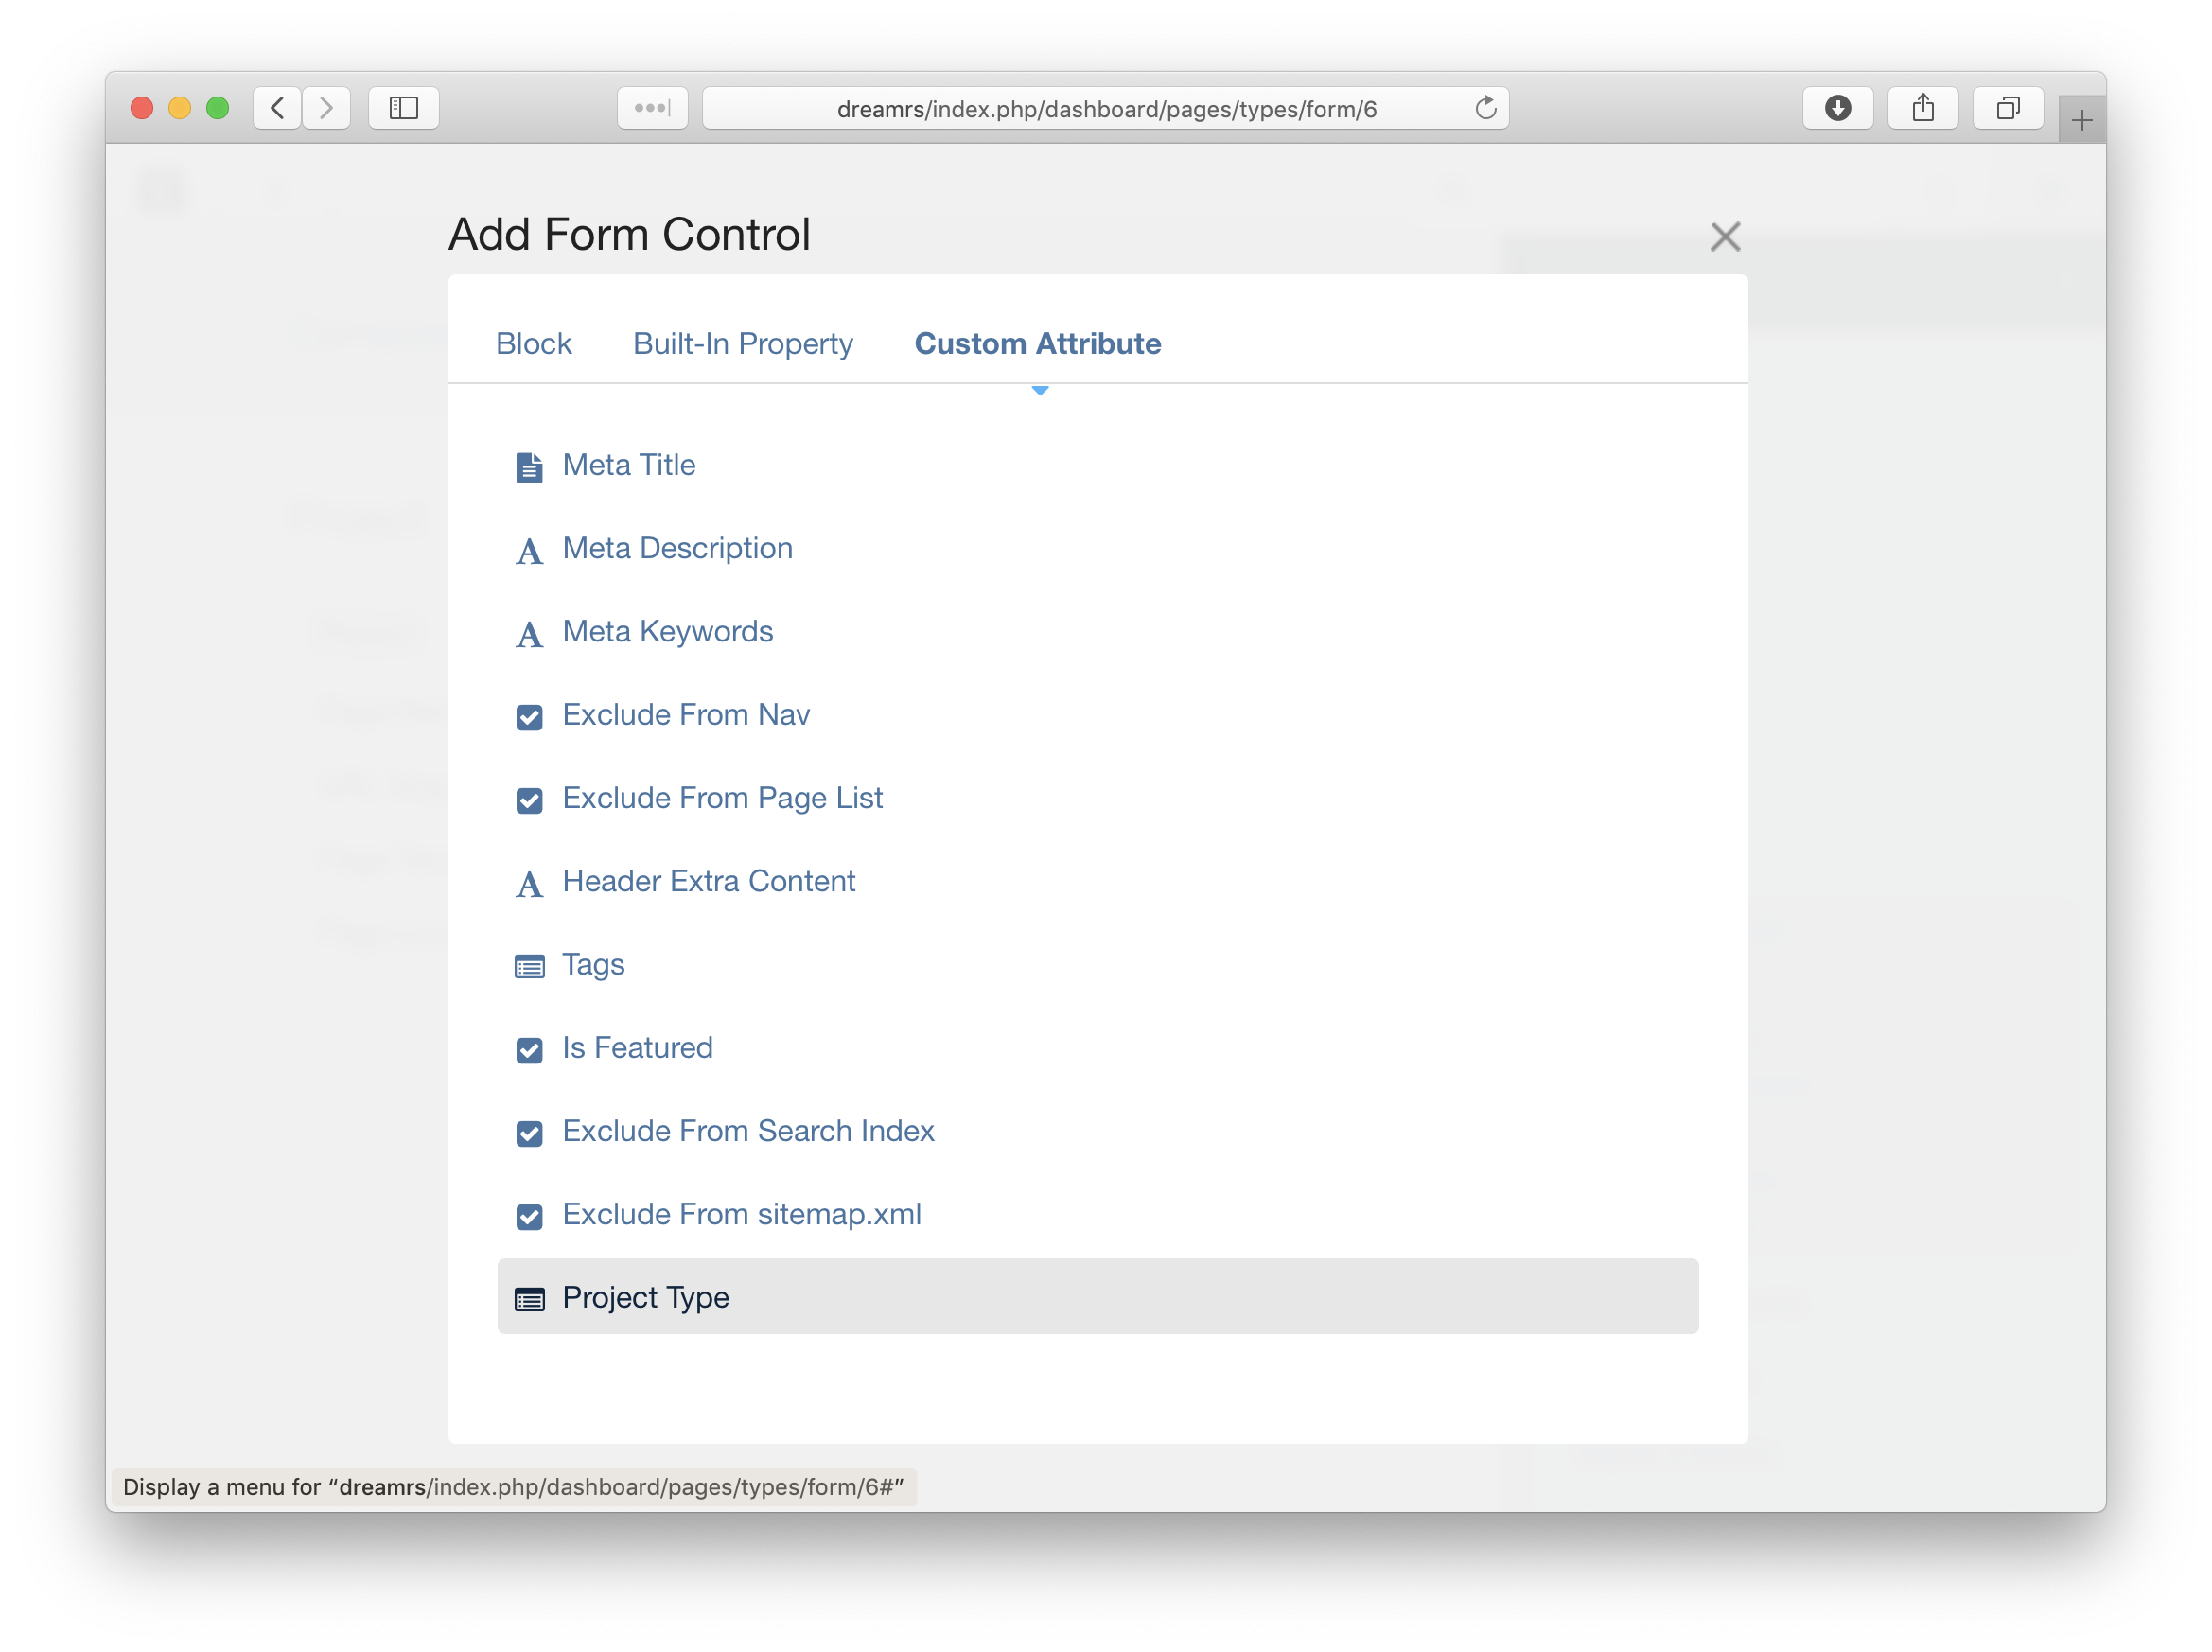
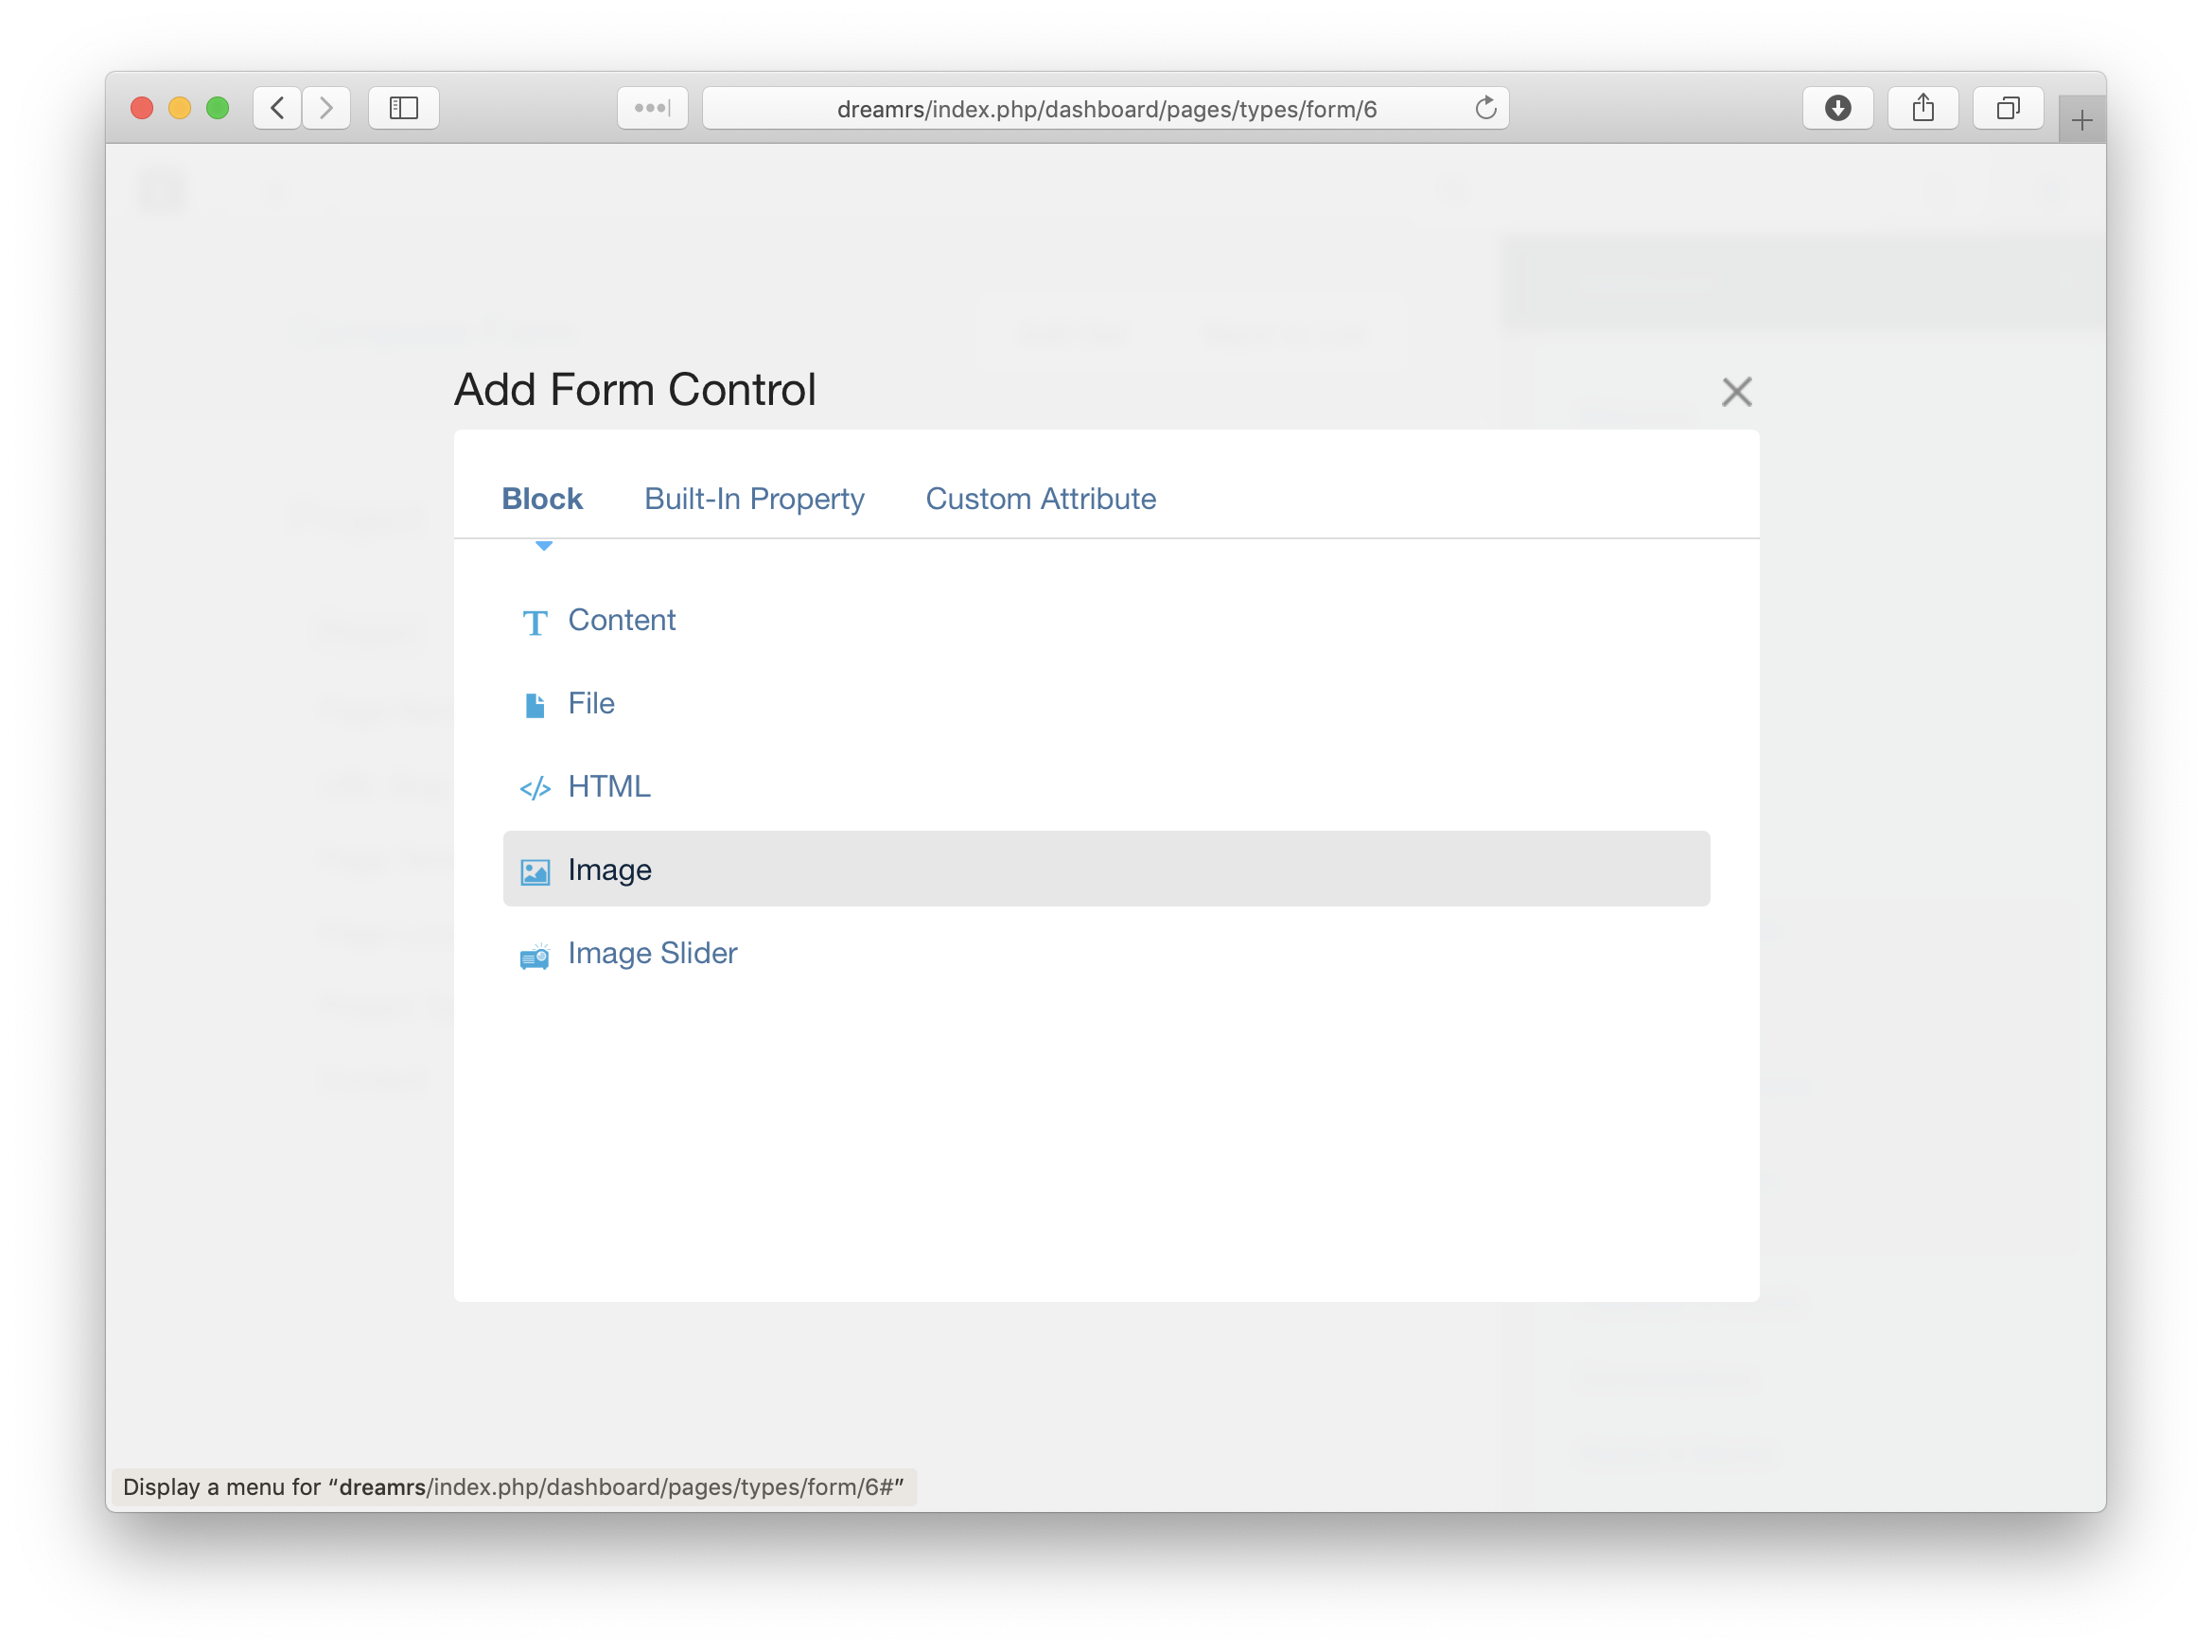
Now, let’s make it so that the Composer form contains the Project Type custom attribute, and a Content block. Why? Because these are the core components of the Project page type. First, add the Project Type custom attribute:
Then, add an Image block to the form:
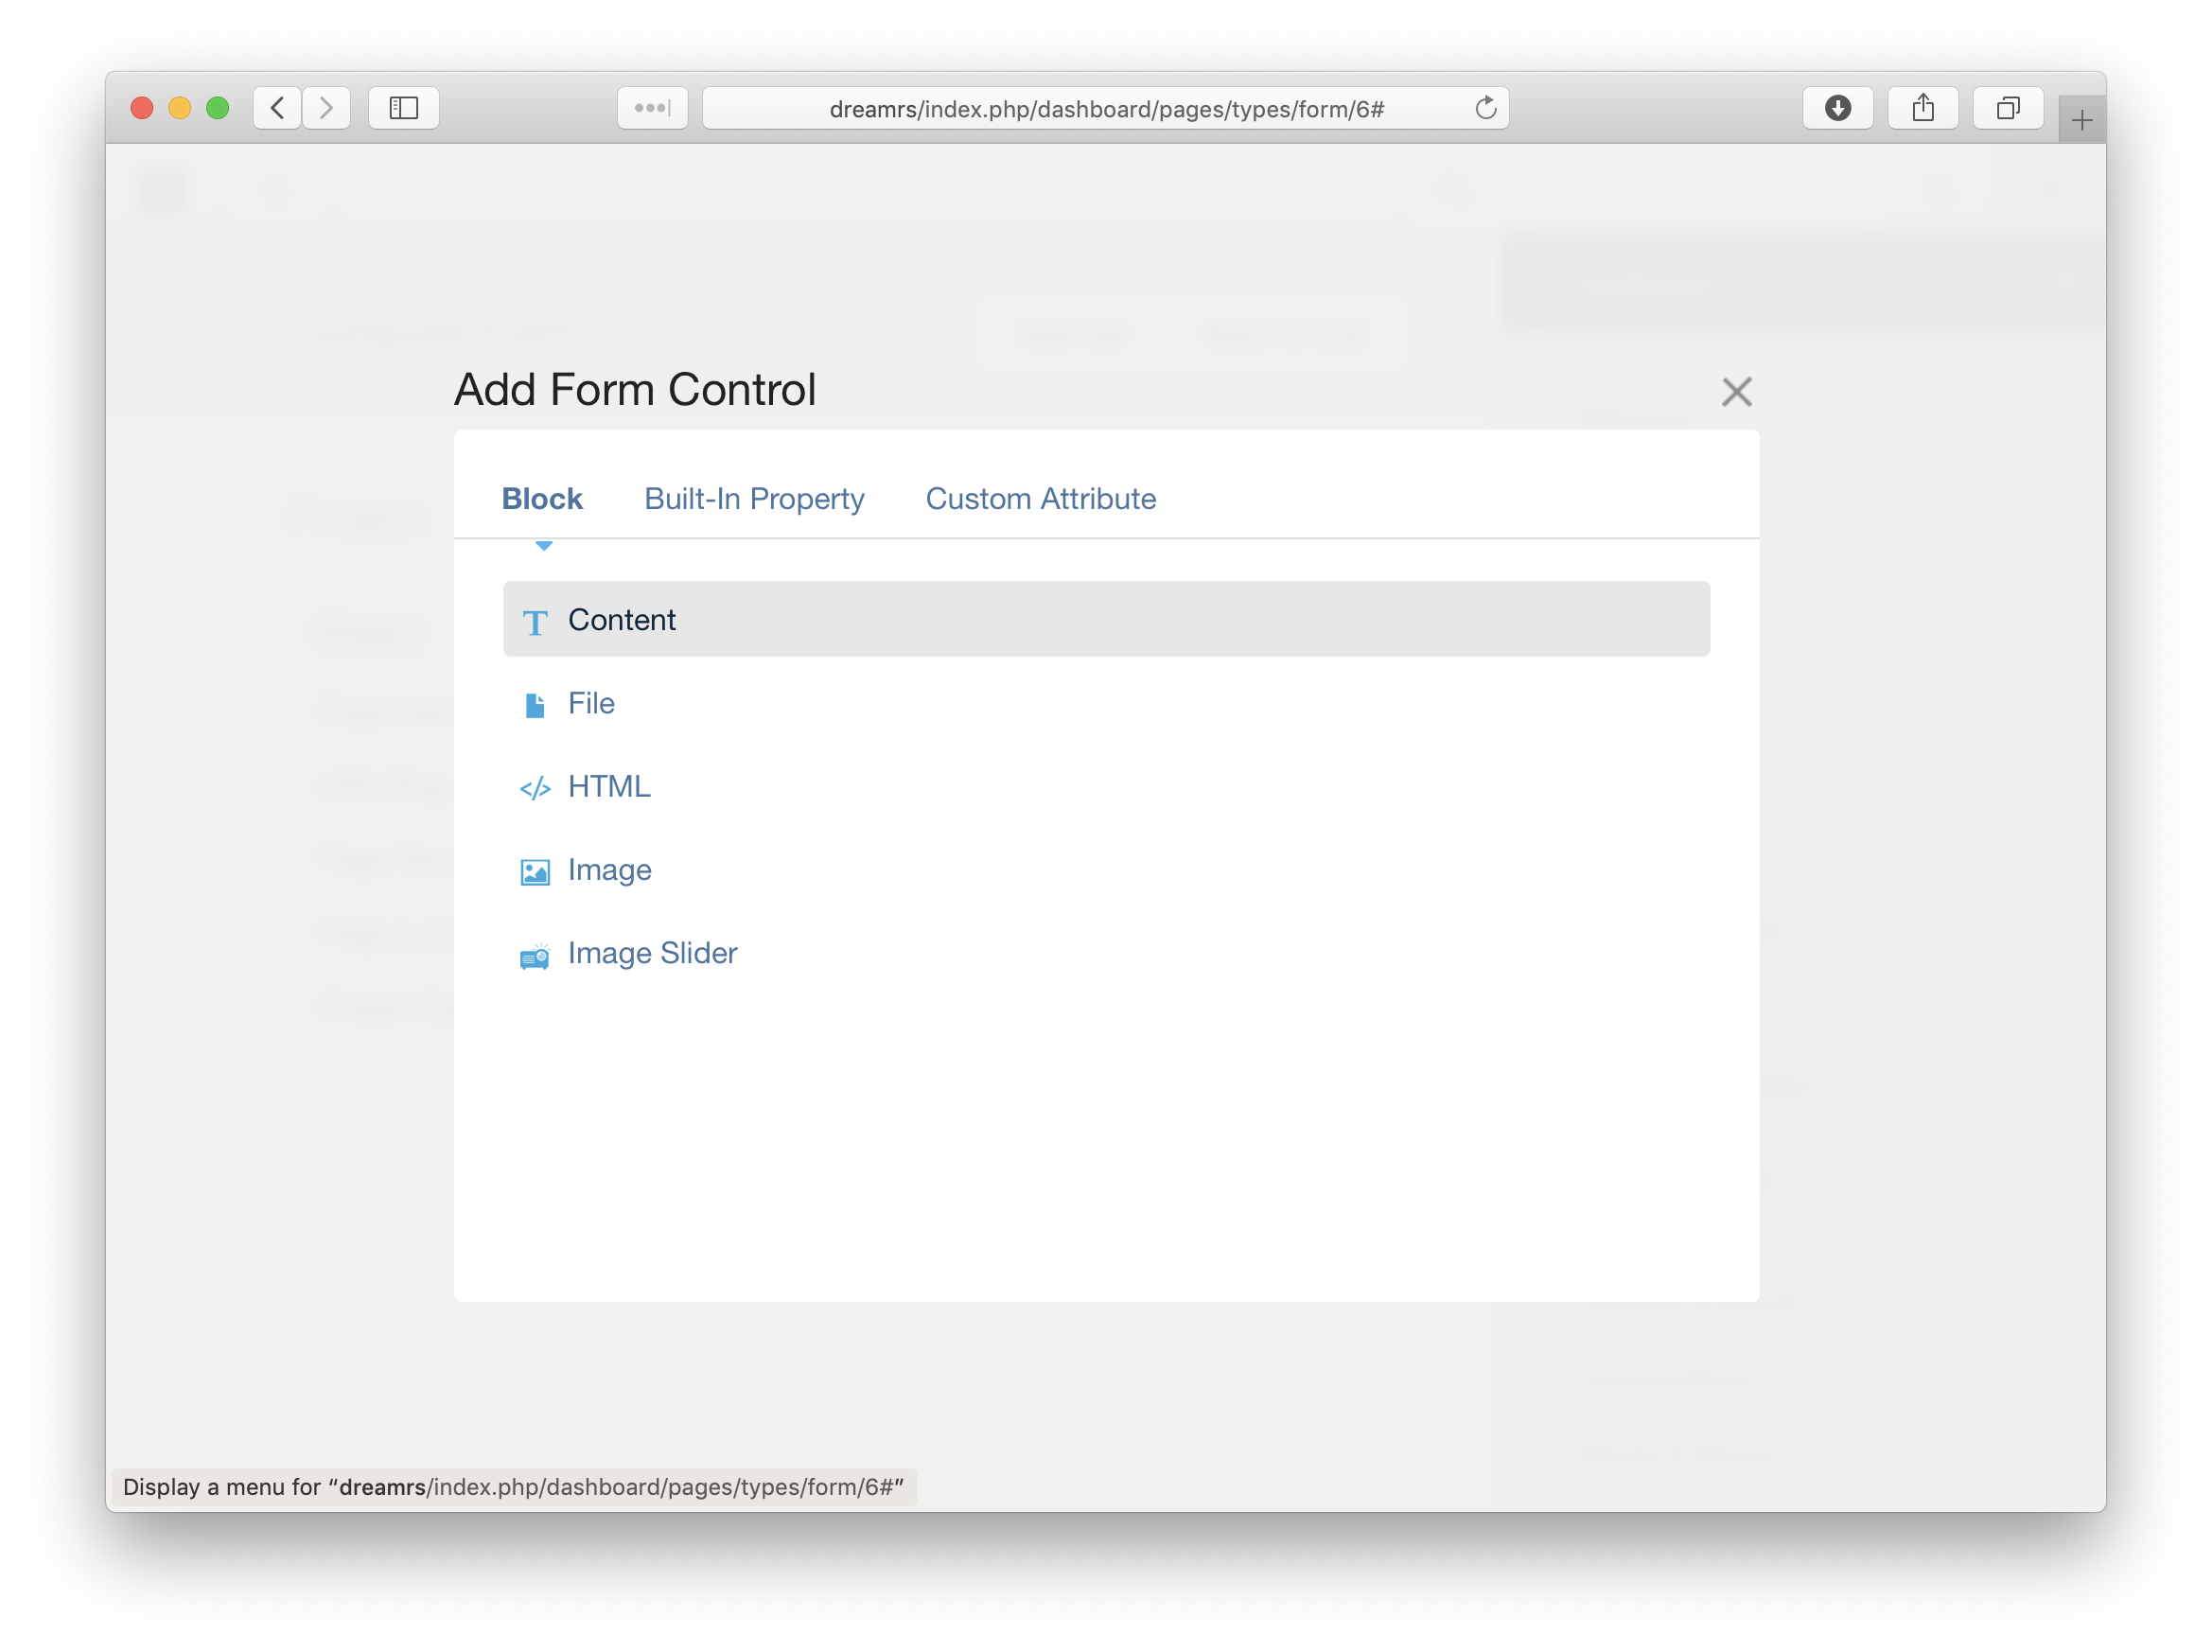
Next, add a Content block to the form:
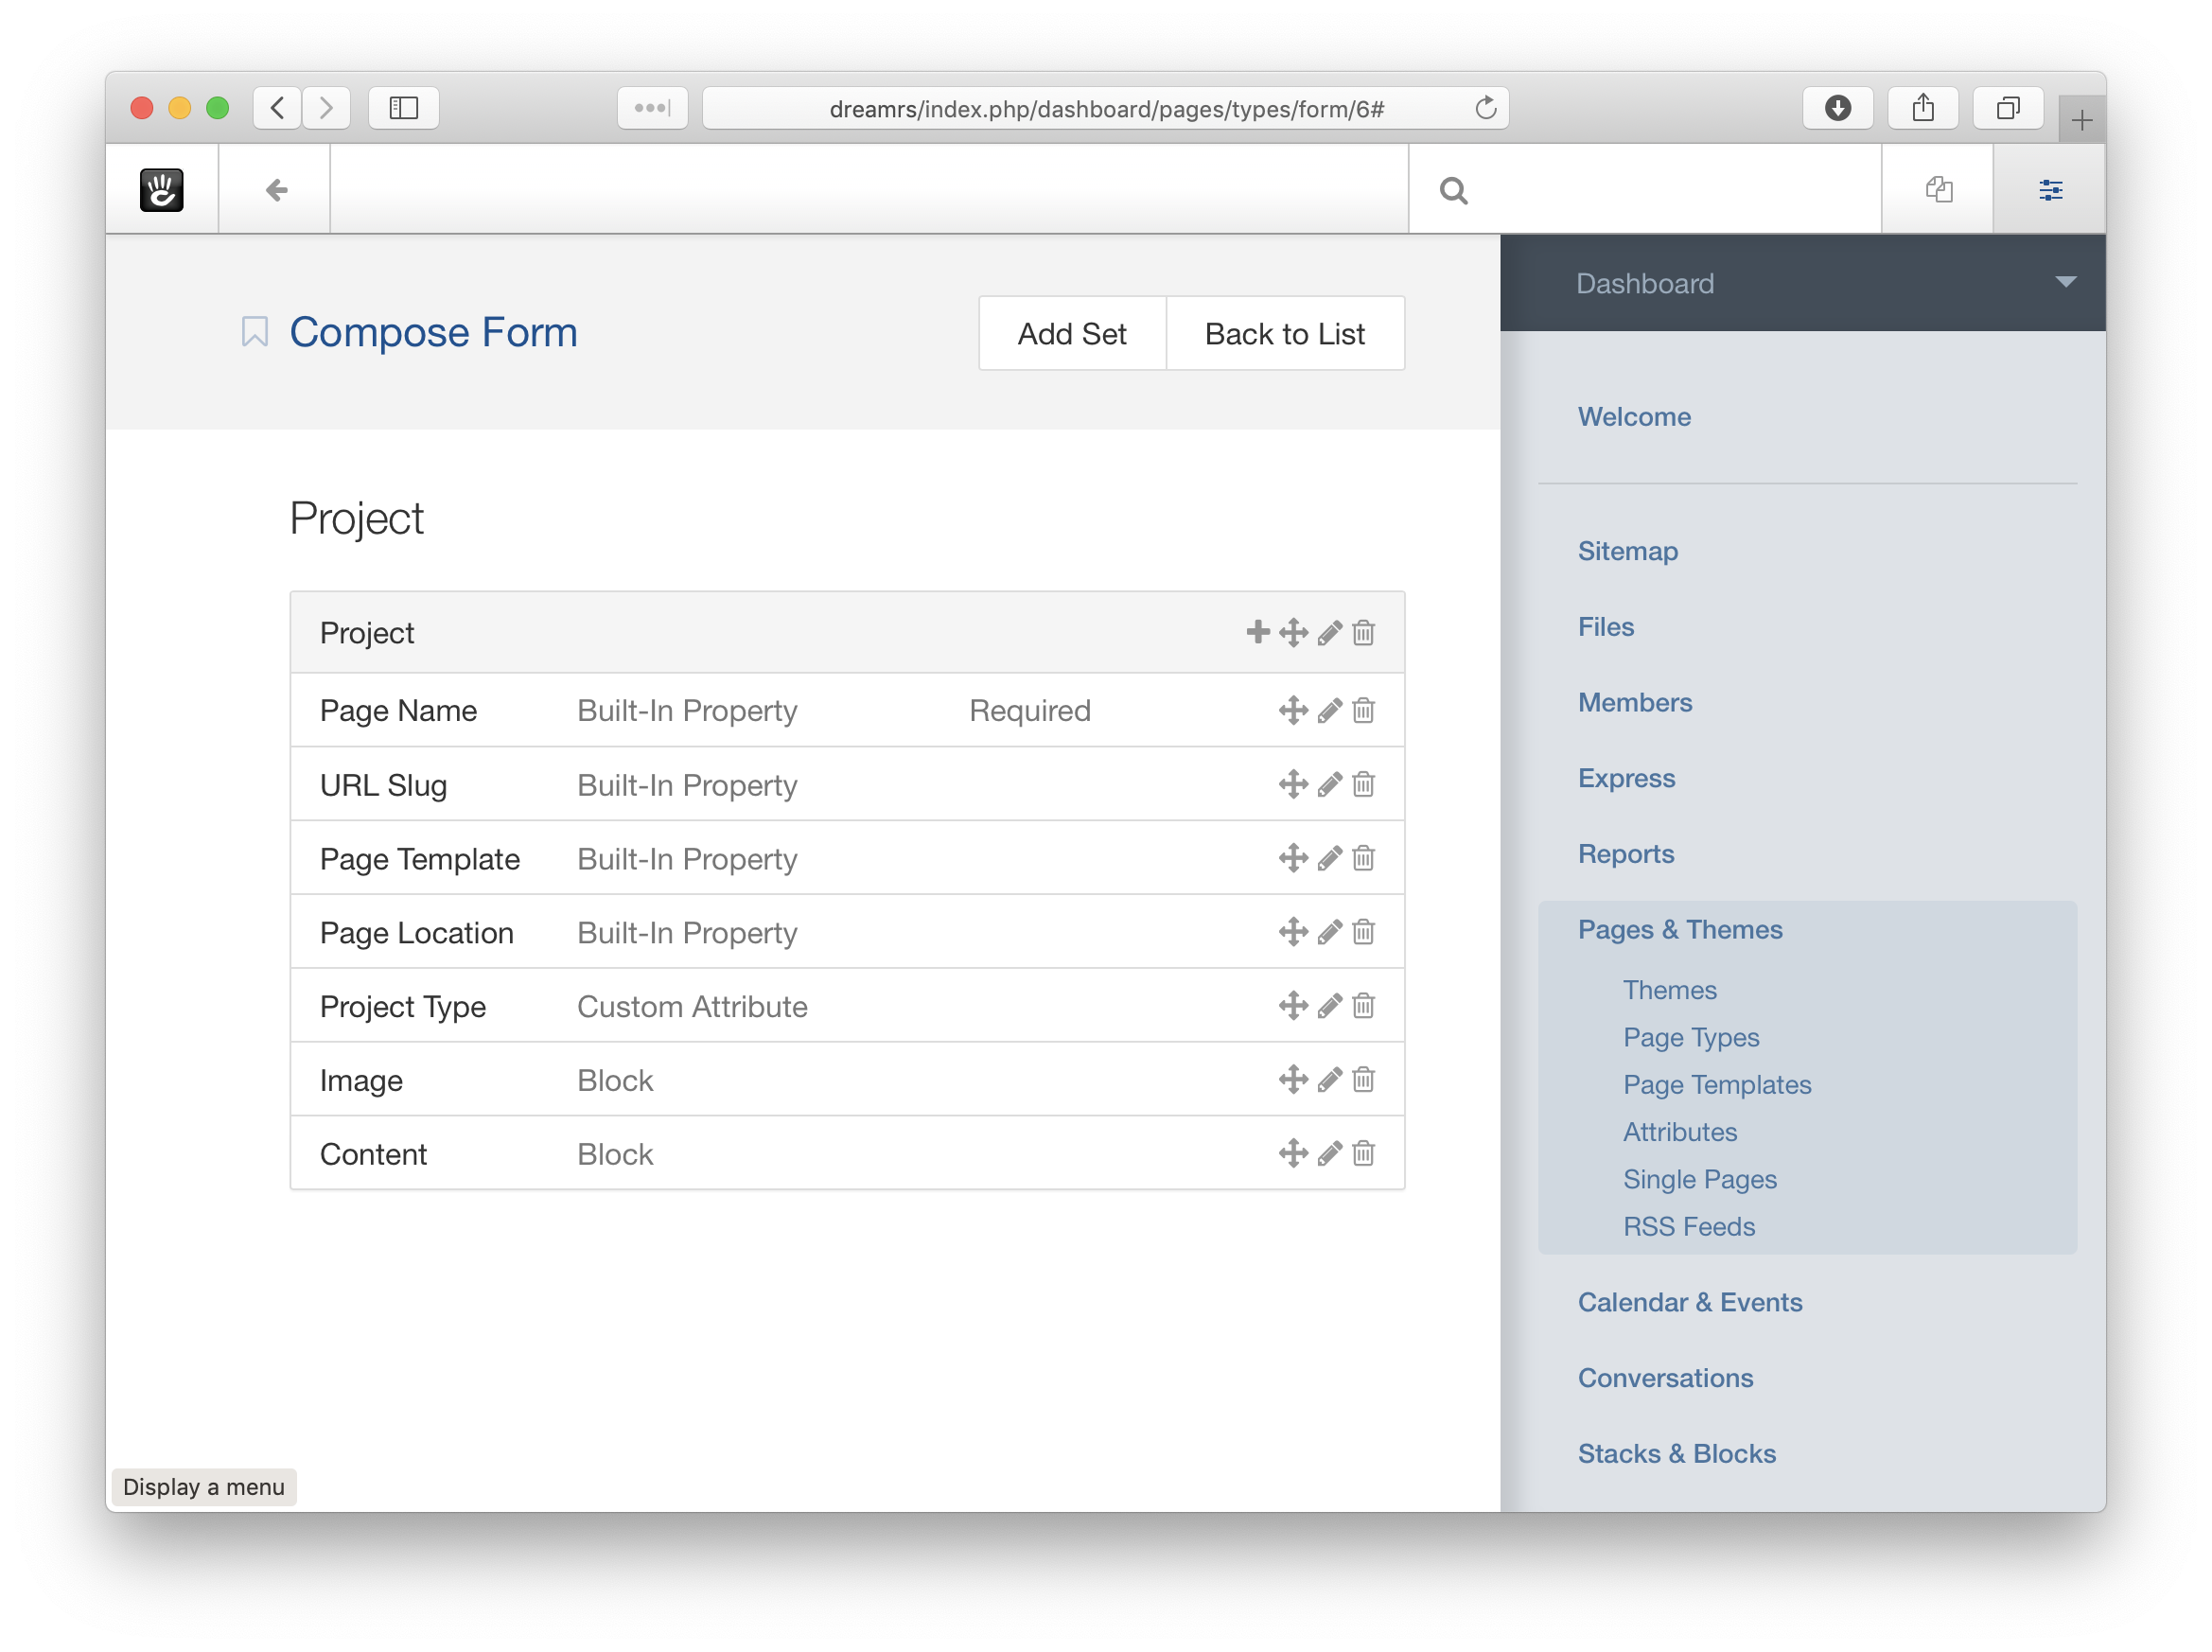
The result?
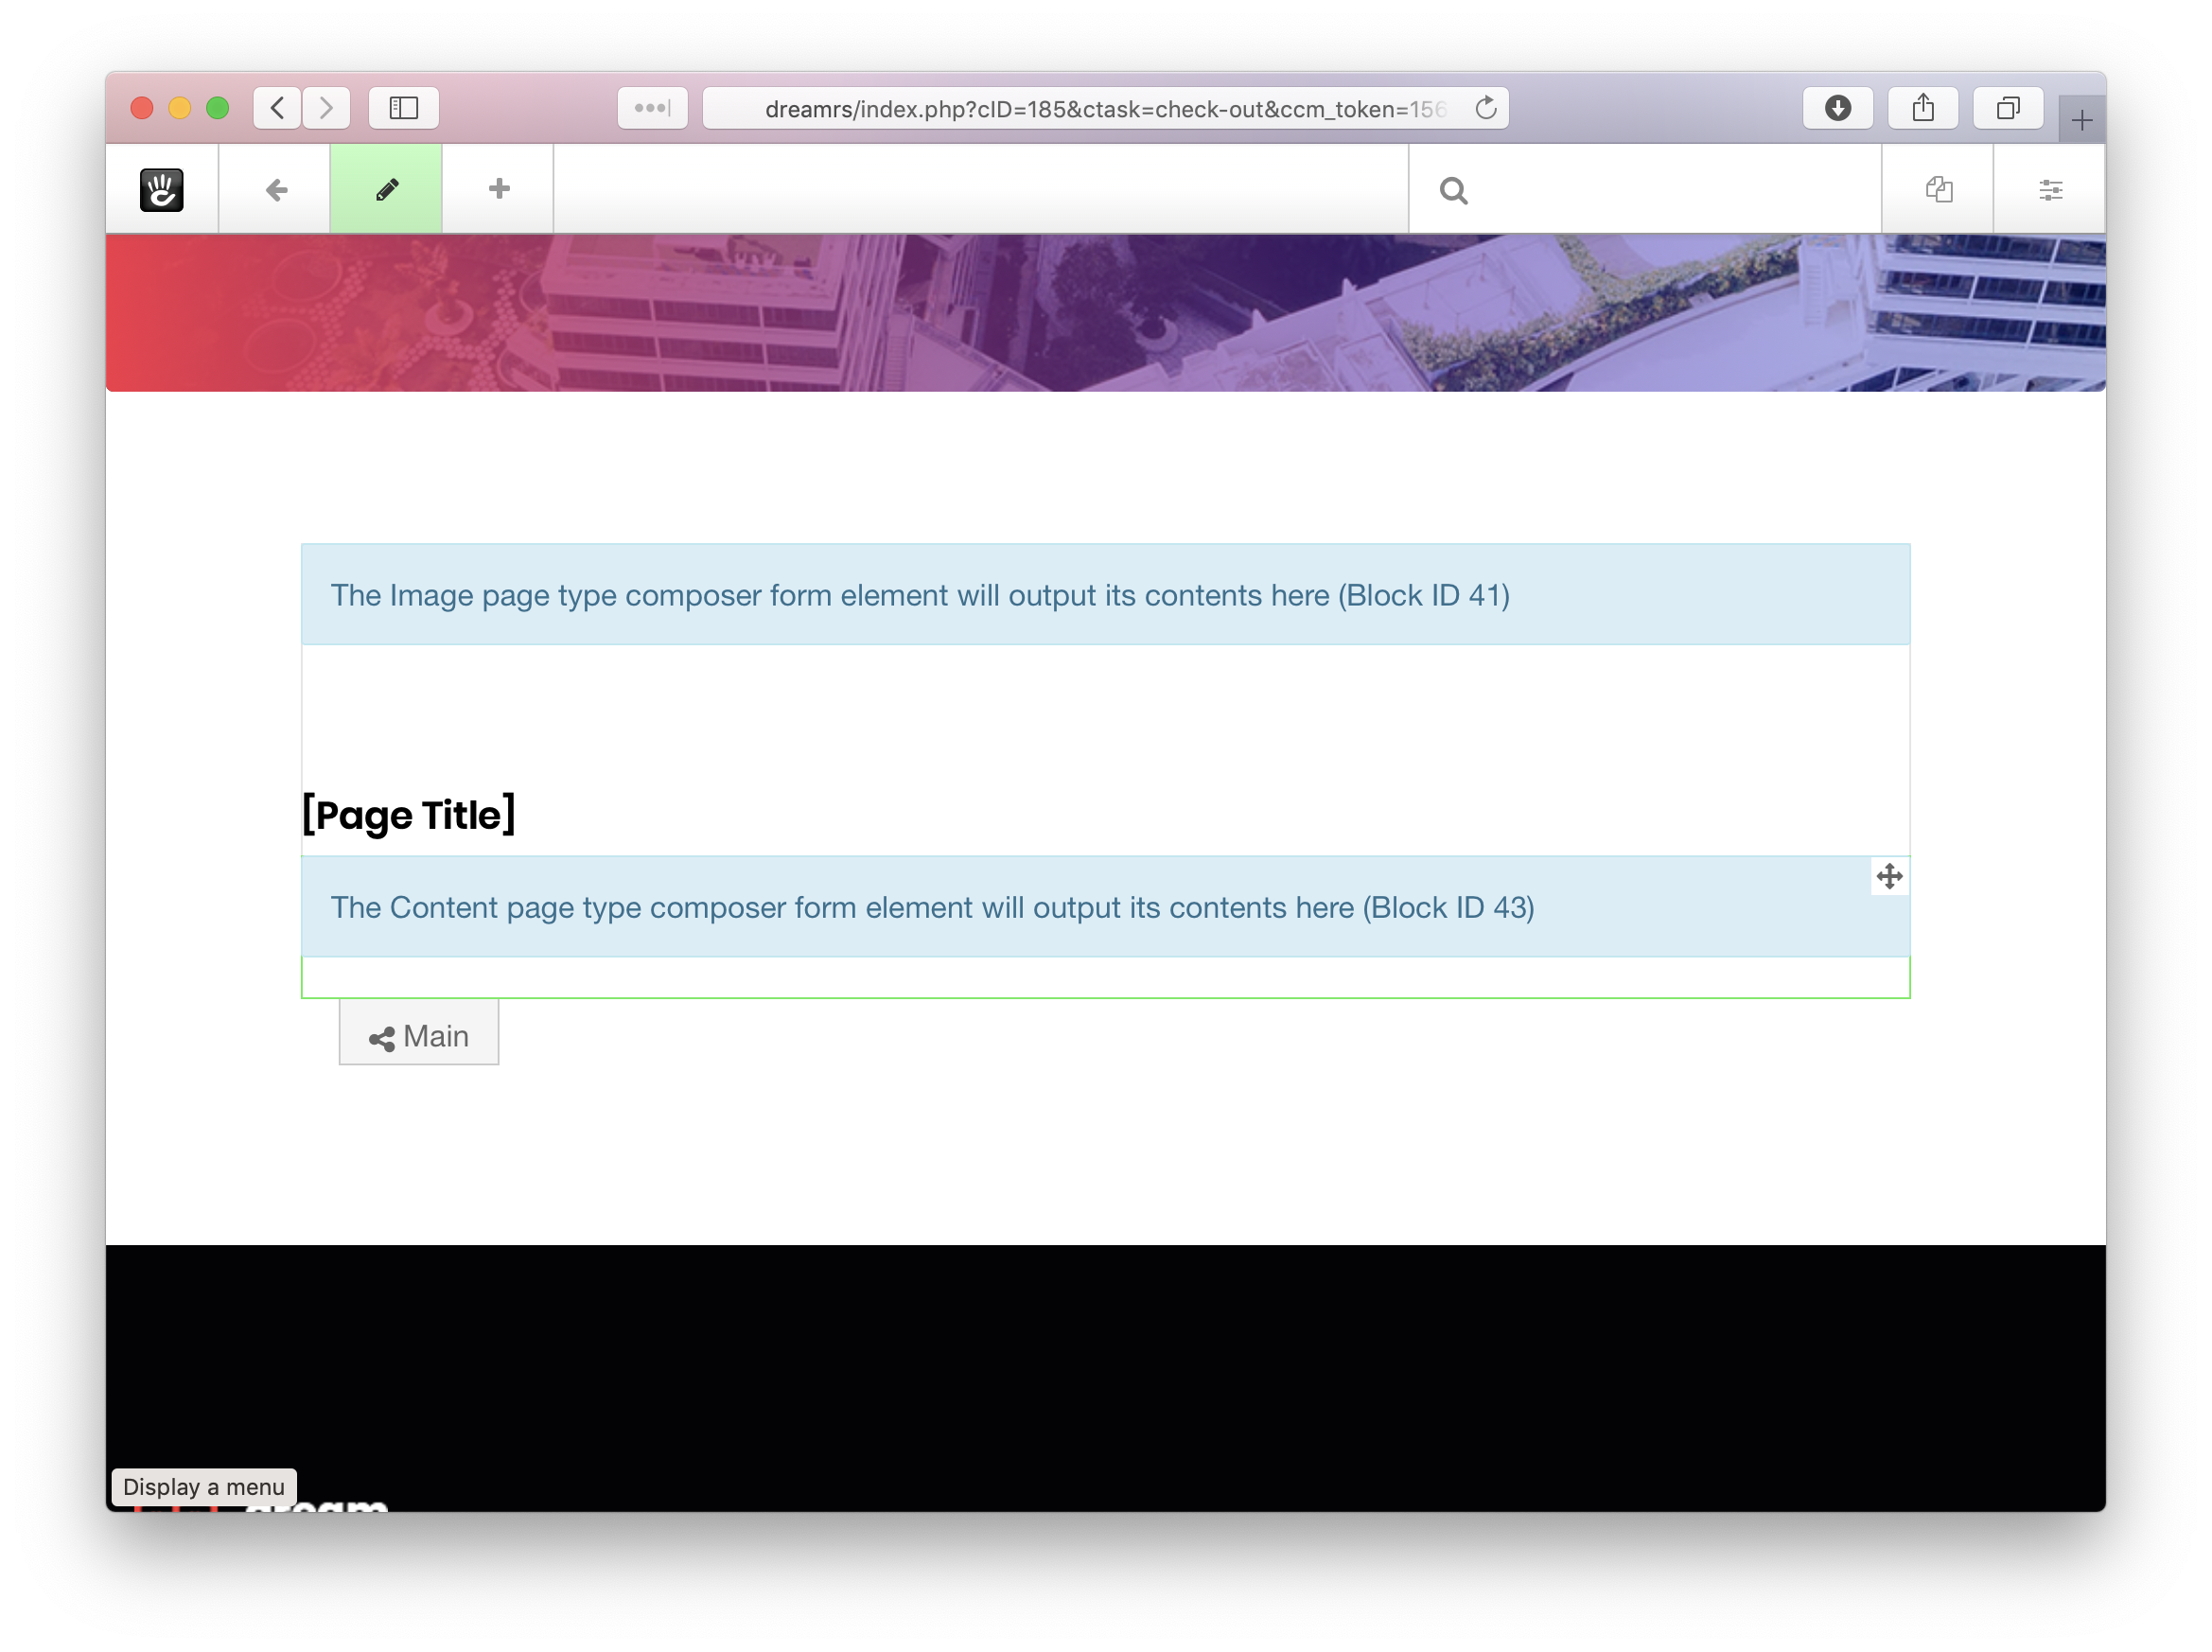
Now, let’s add our default blocks to the Outputs section.
The Page Type Output section allows you to configure the default blocks positioned on a page any time a page of its type is created. This includes blocks that are editable through composer, or those that should just appear on the page. We’re going to add the following block to our Project default output:
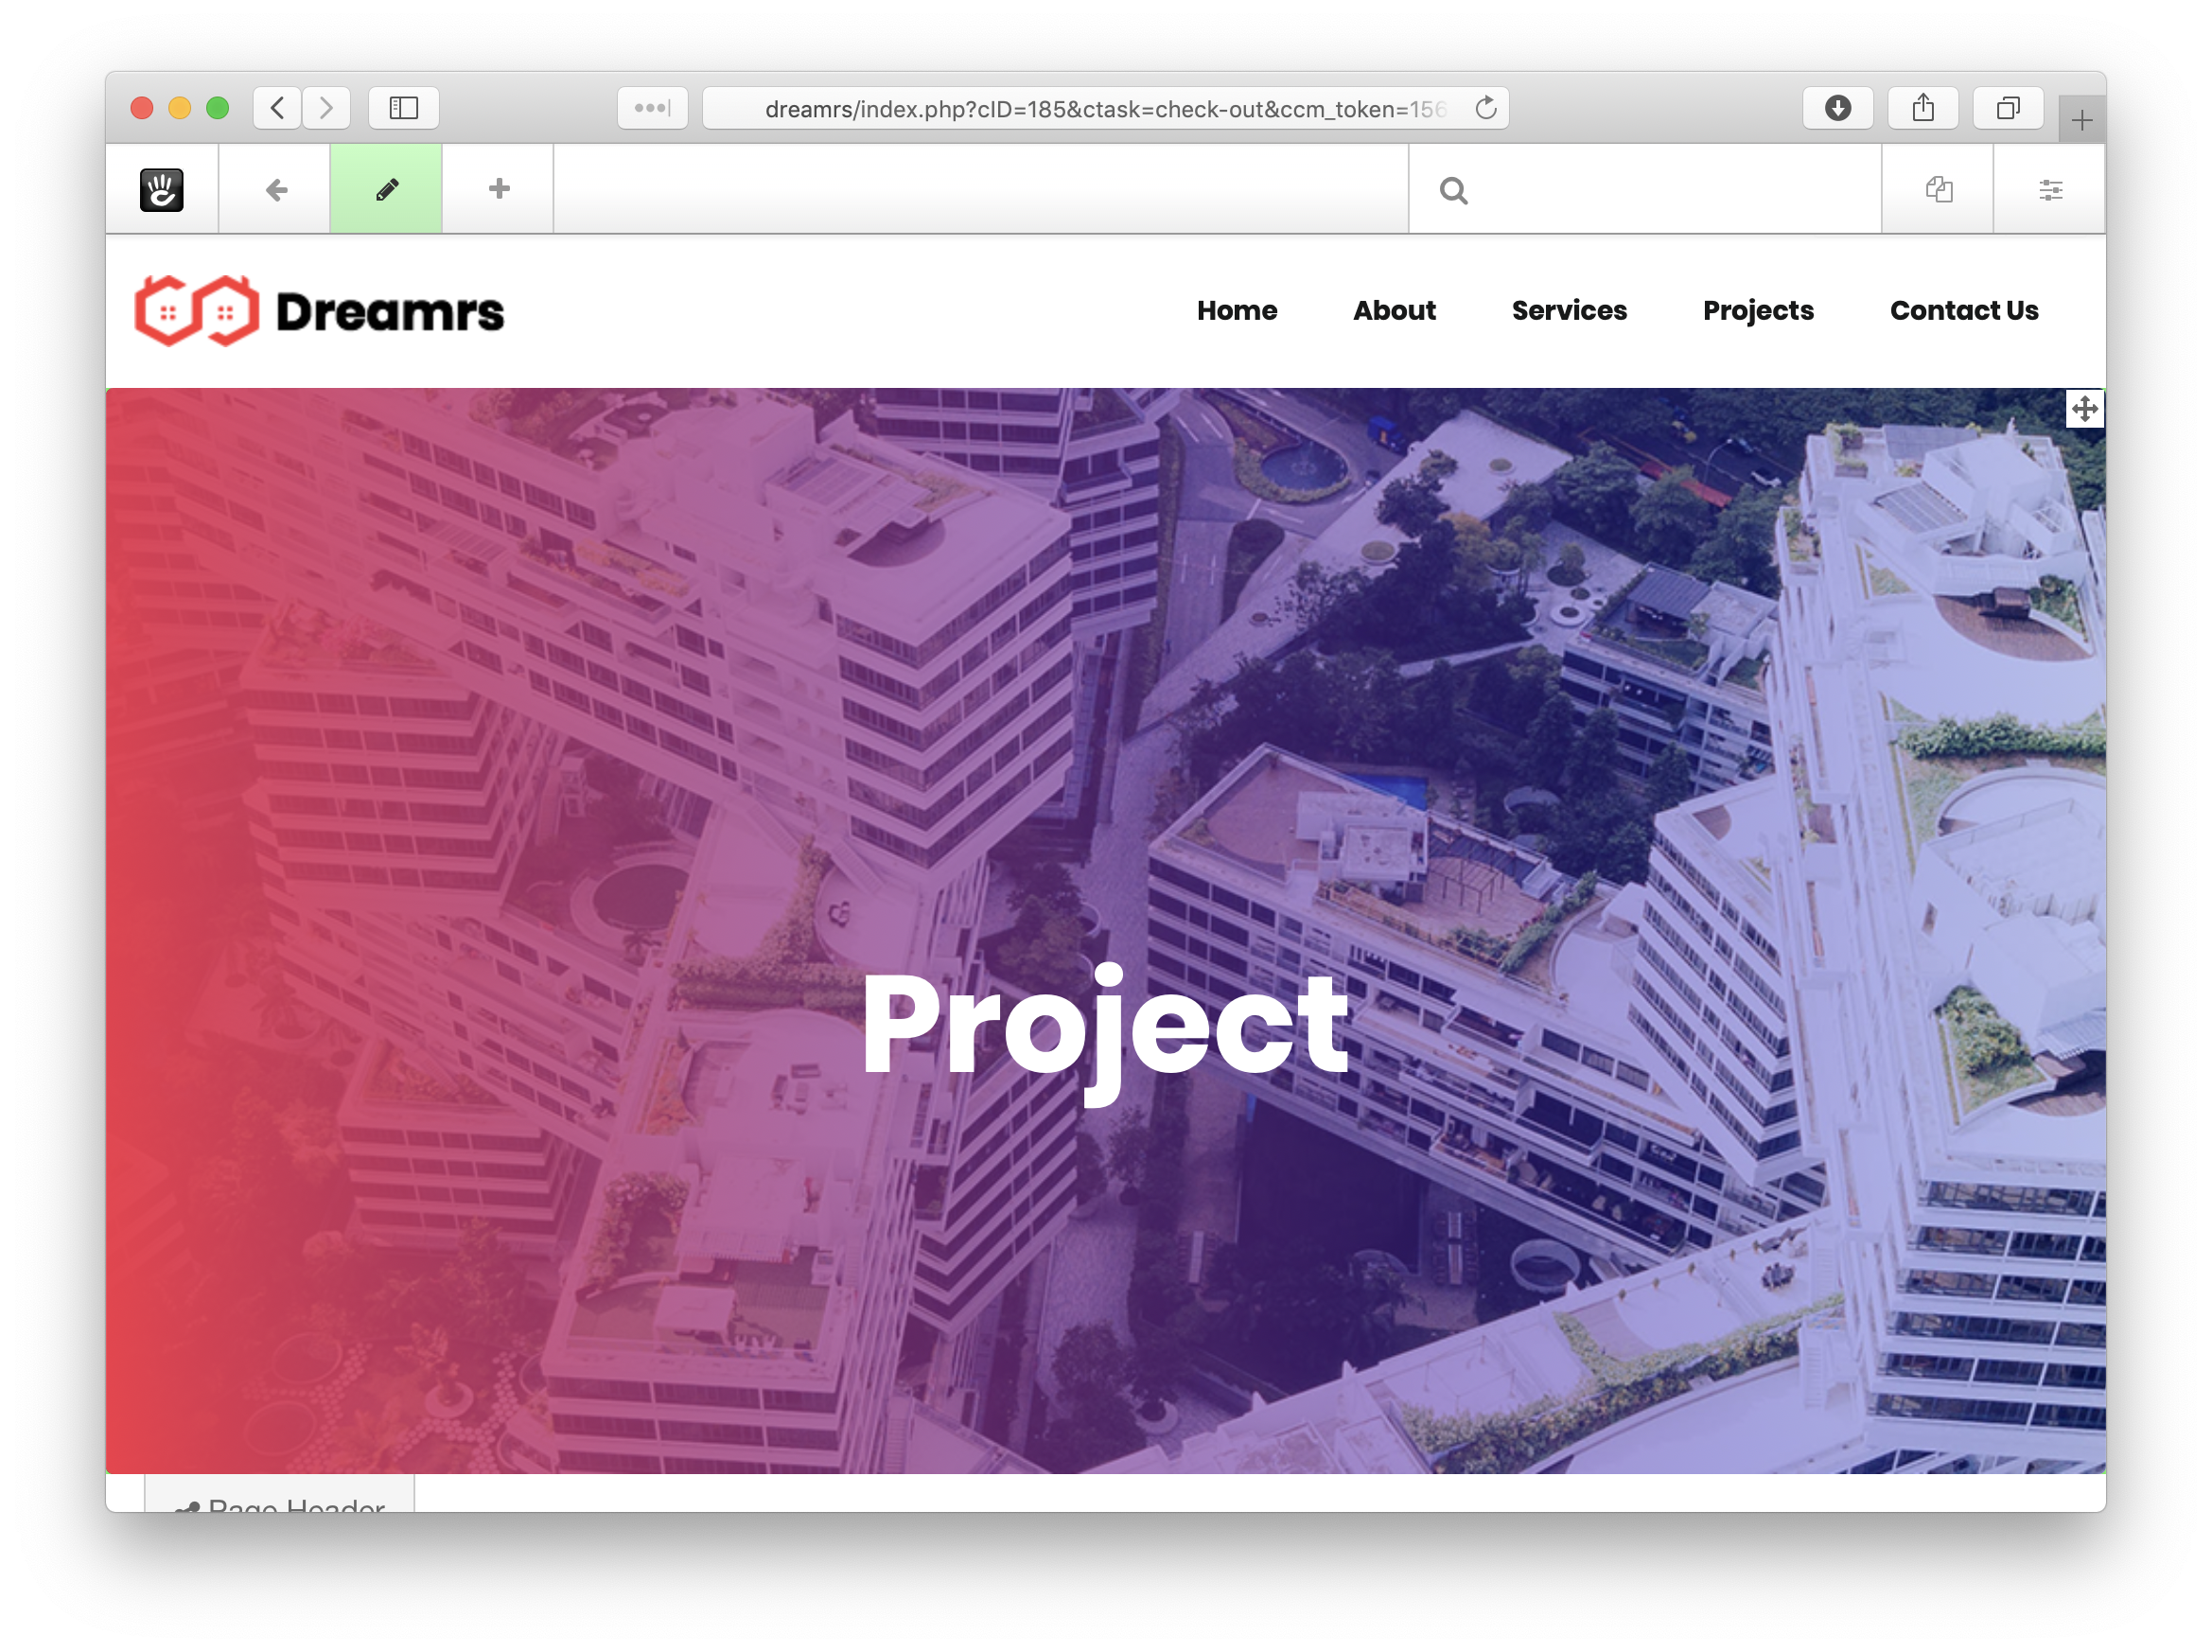
- Page Header (with the custom title “Project”)
- Composer Image Block
- Page Title Block with Project Custom Template
- Composer Content Block
The image and content blocks will be directly linked to the blocks we added in our Composer form; the Page Header and Page Title blocks will be regular defaults that will show up any time a page of the Project type is made.
The Content page template for our Project Page Type starts off as empty:
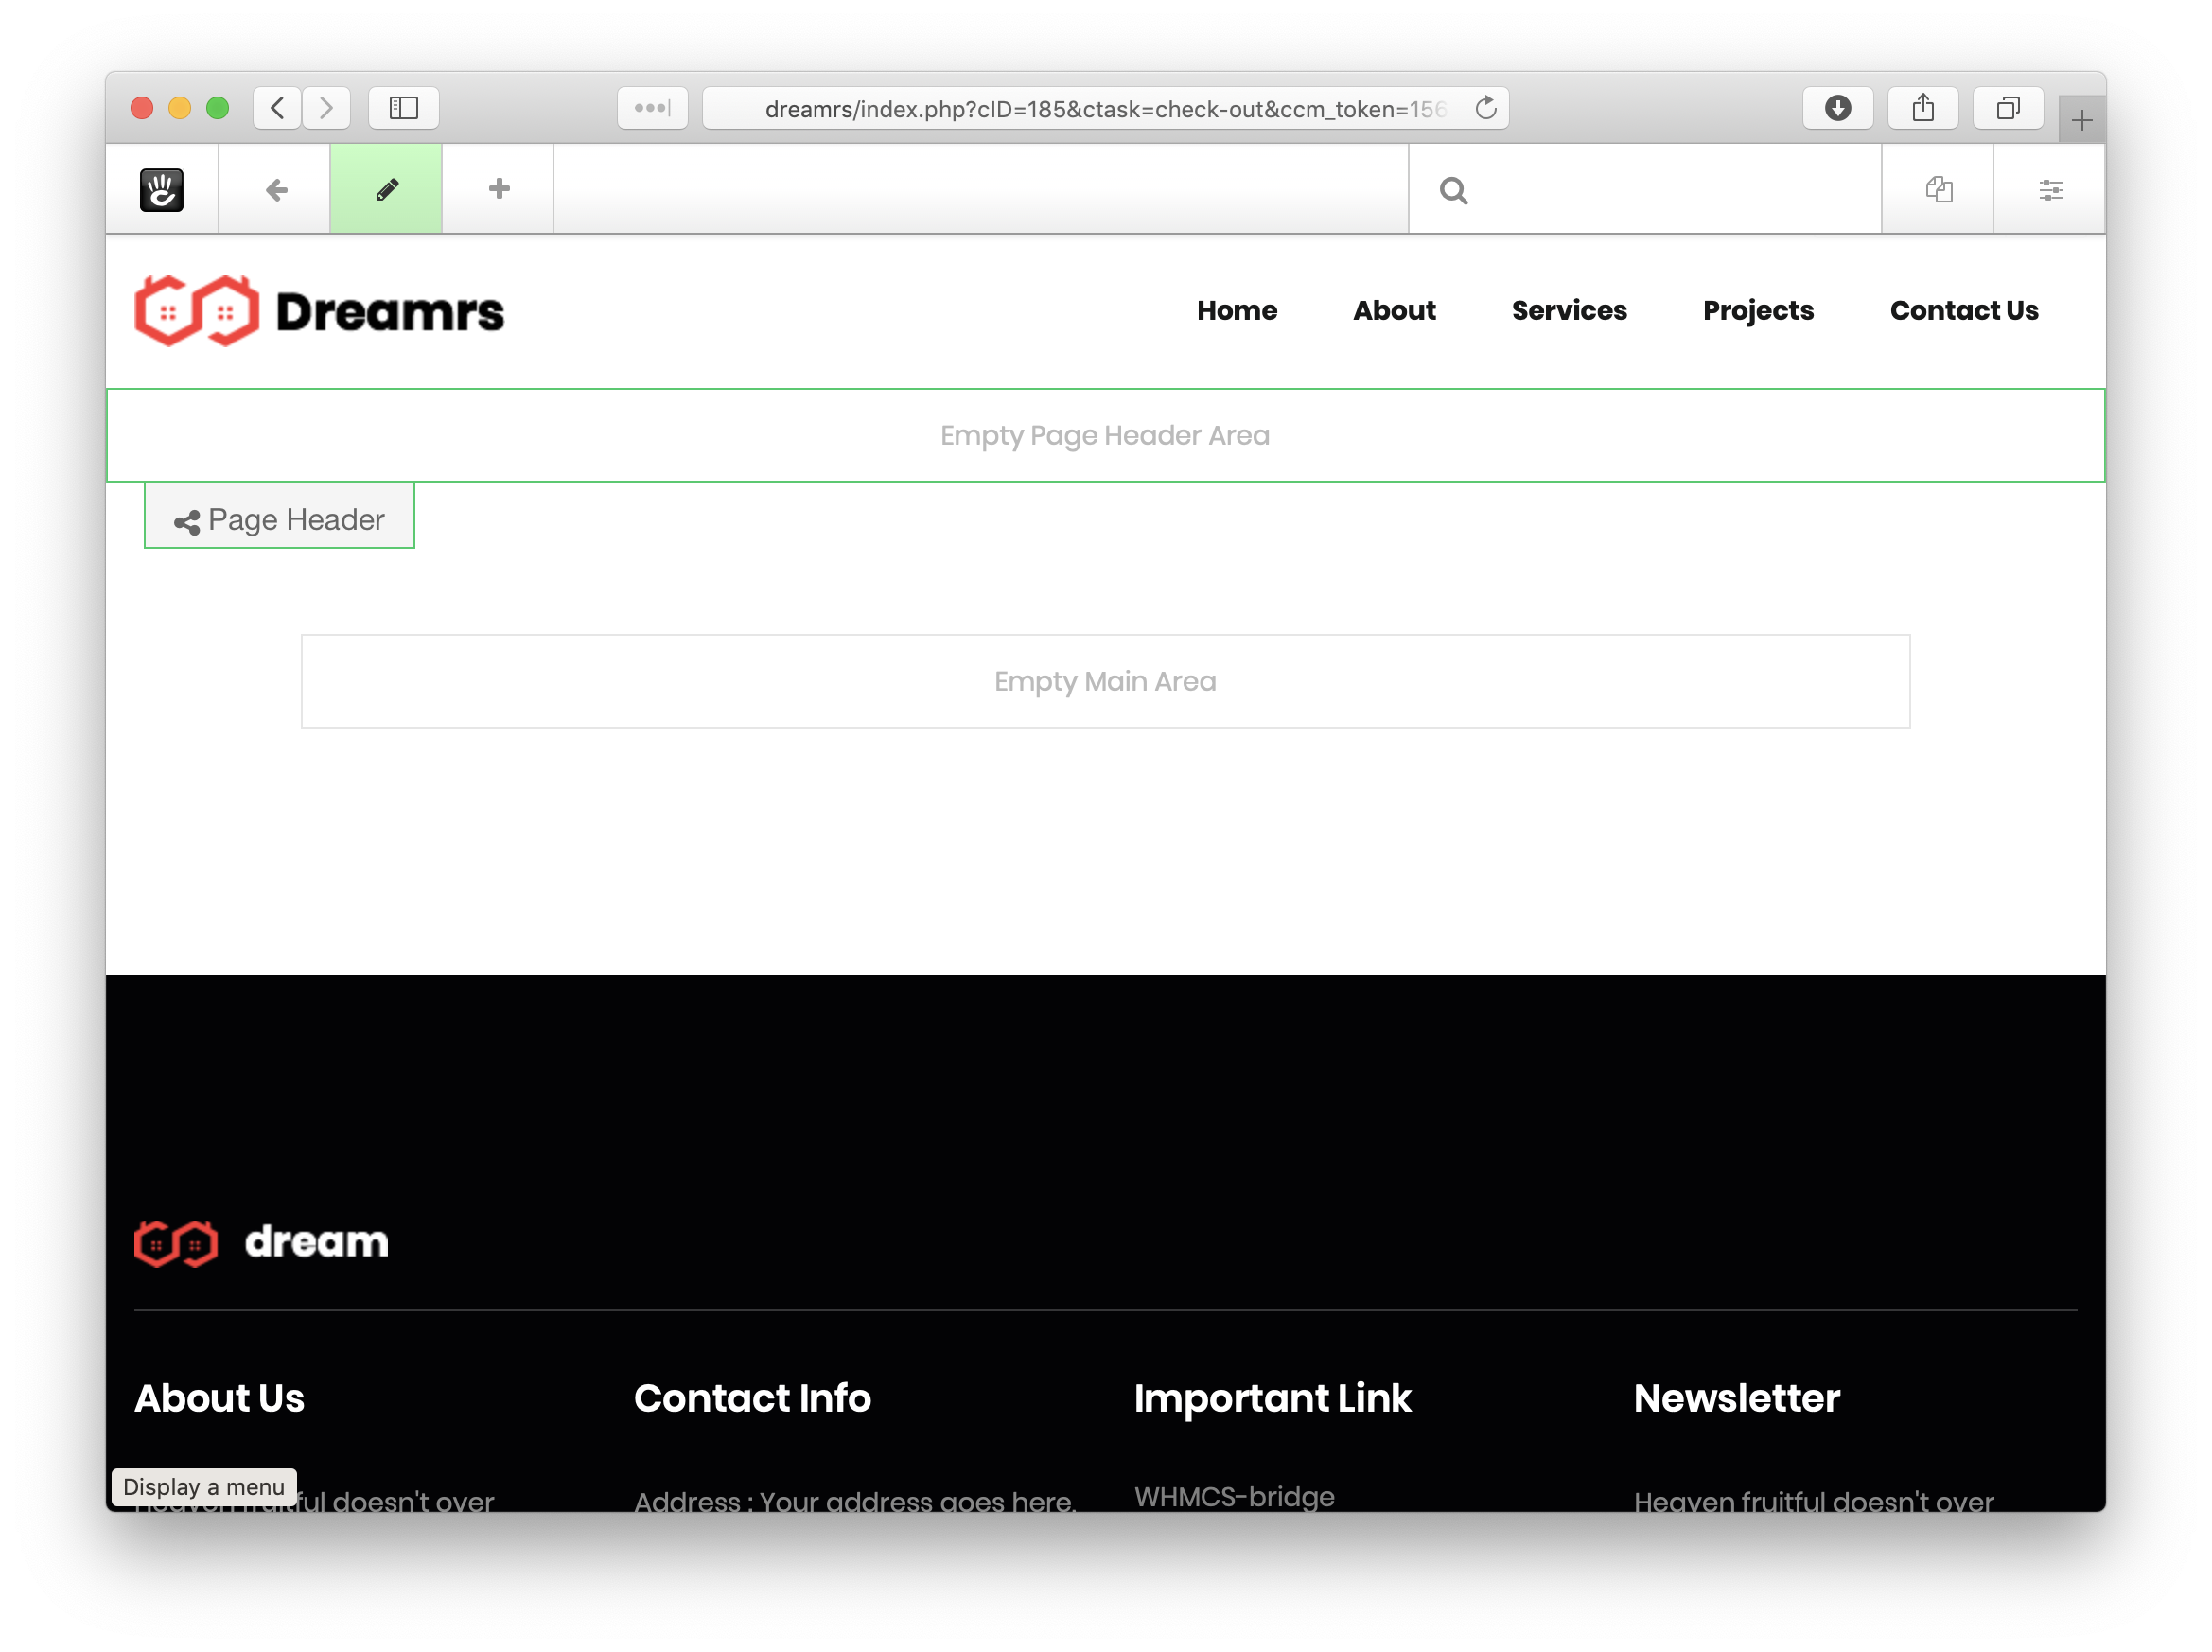
So let’s add the Page Header Block.
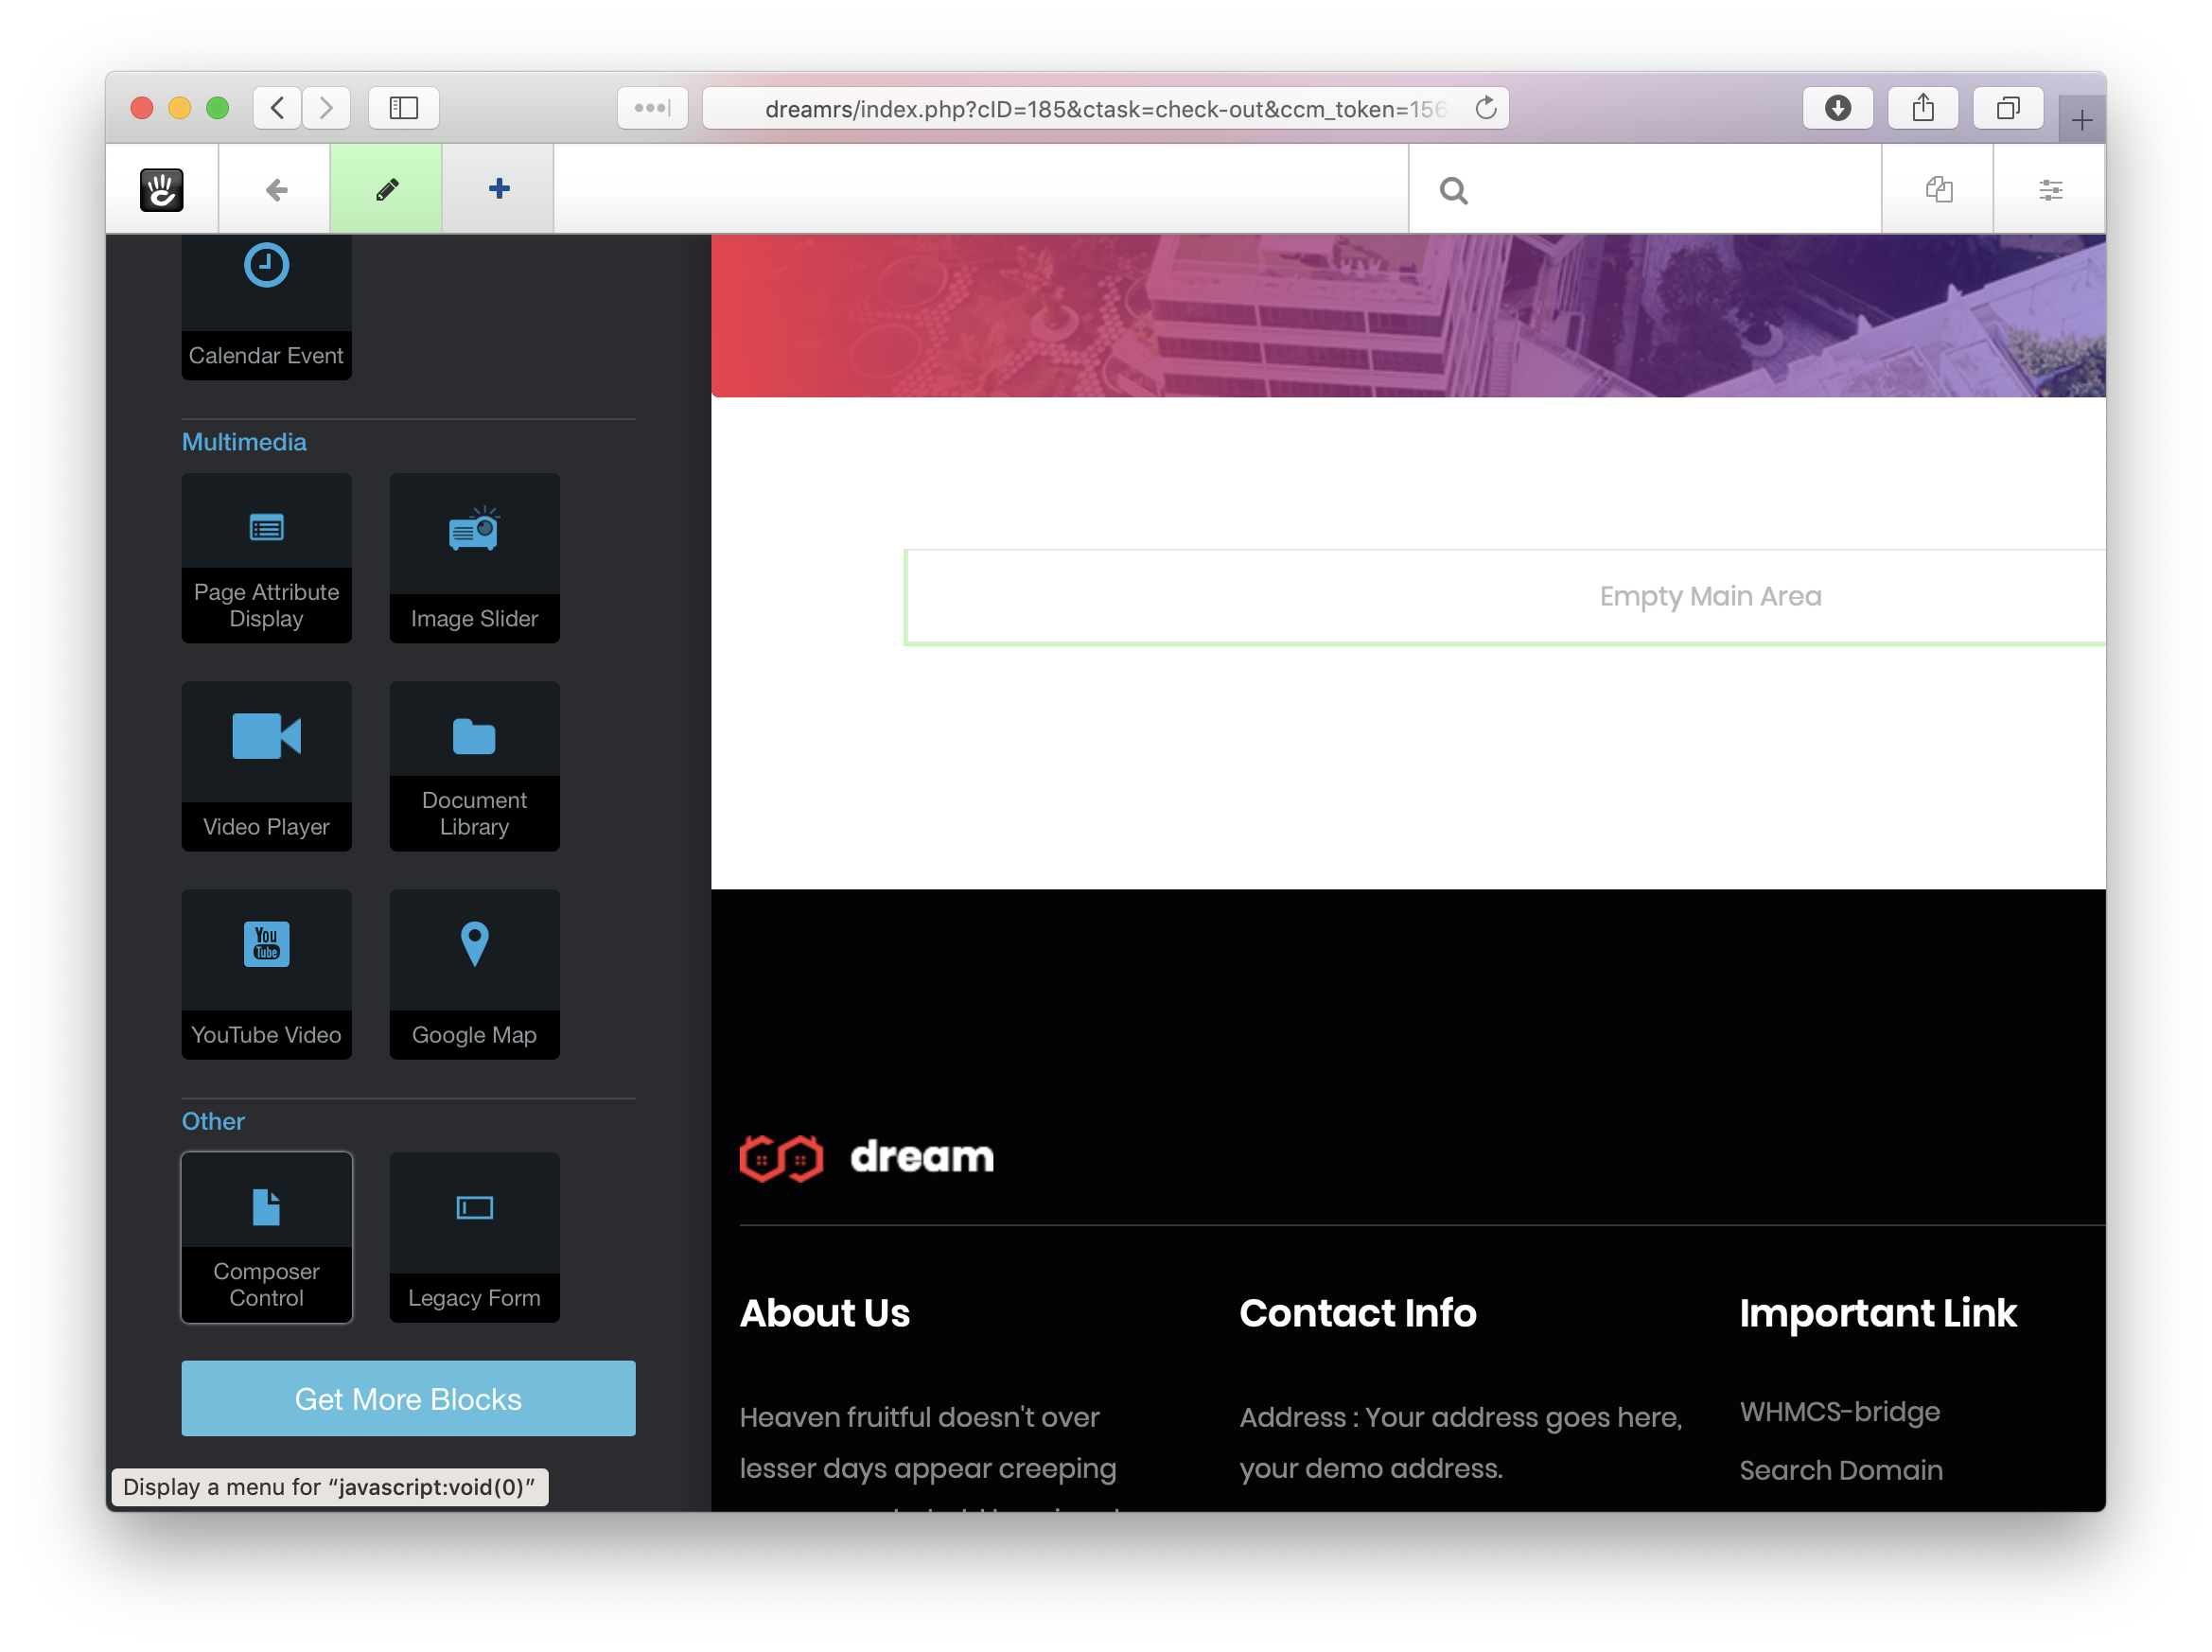
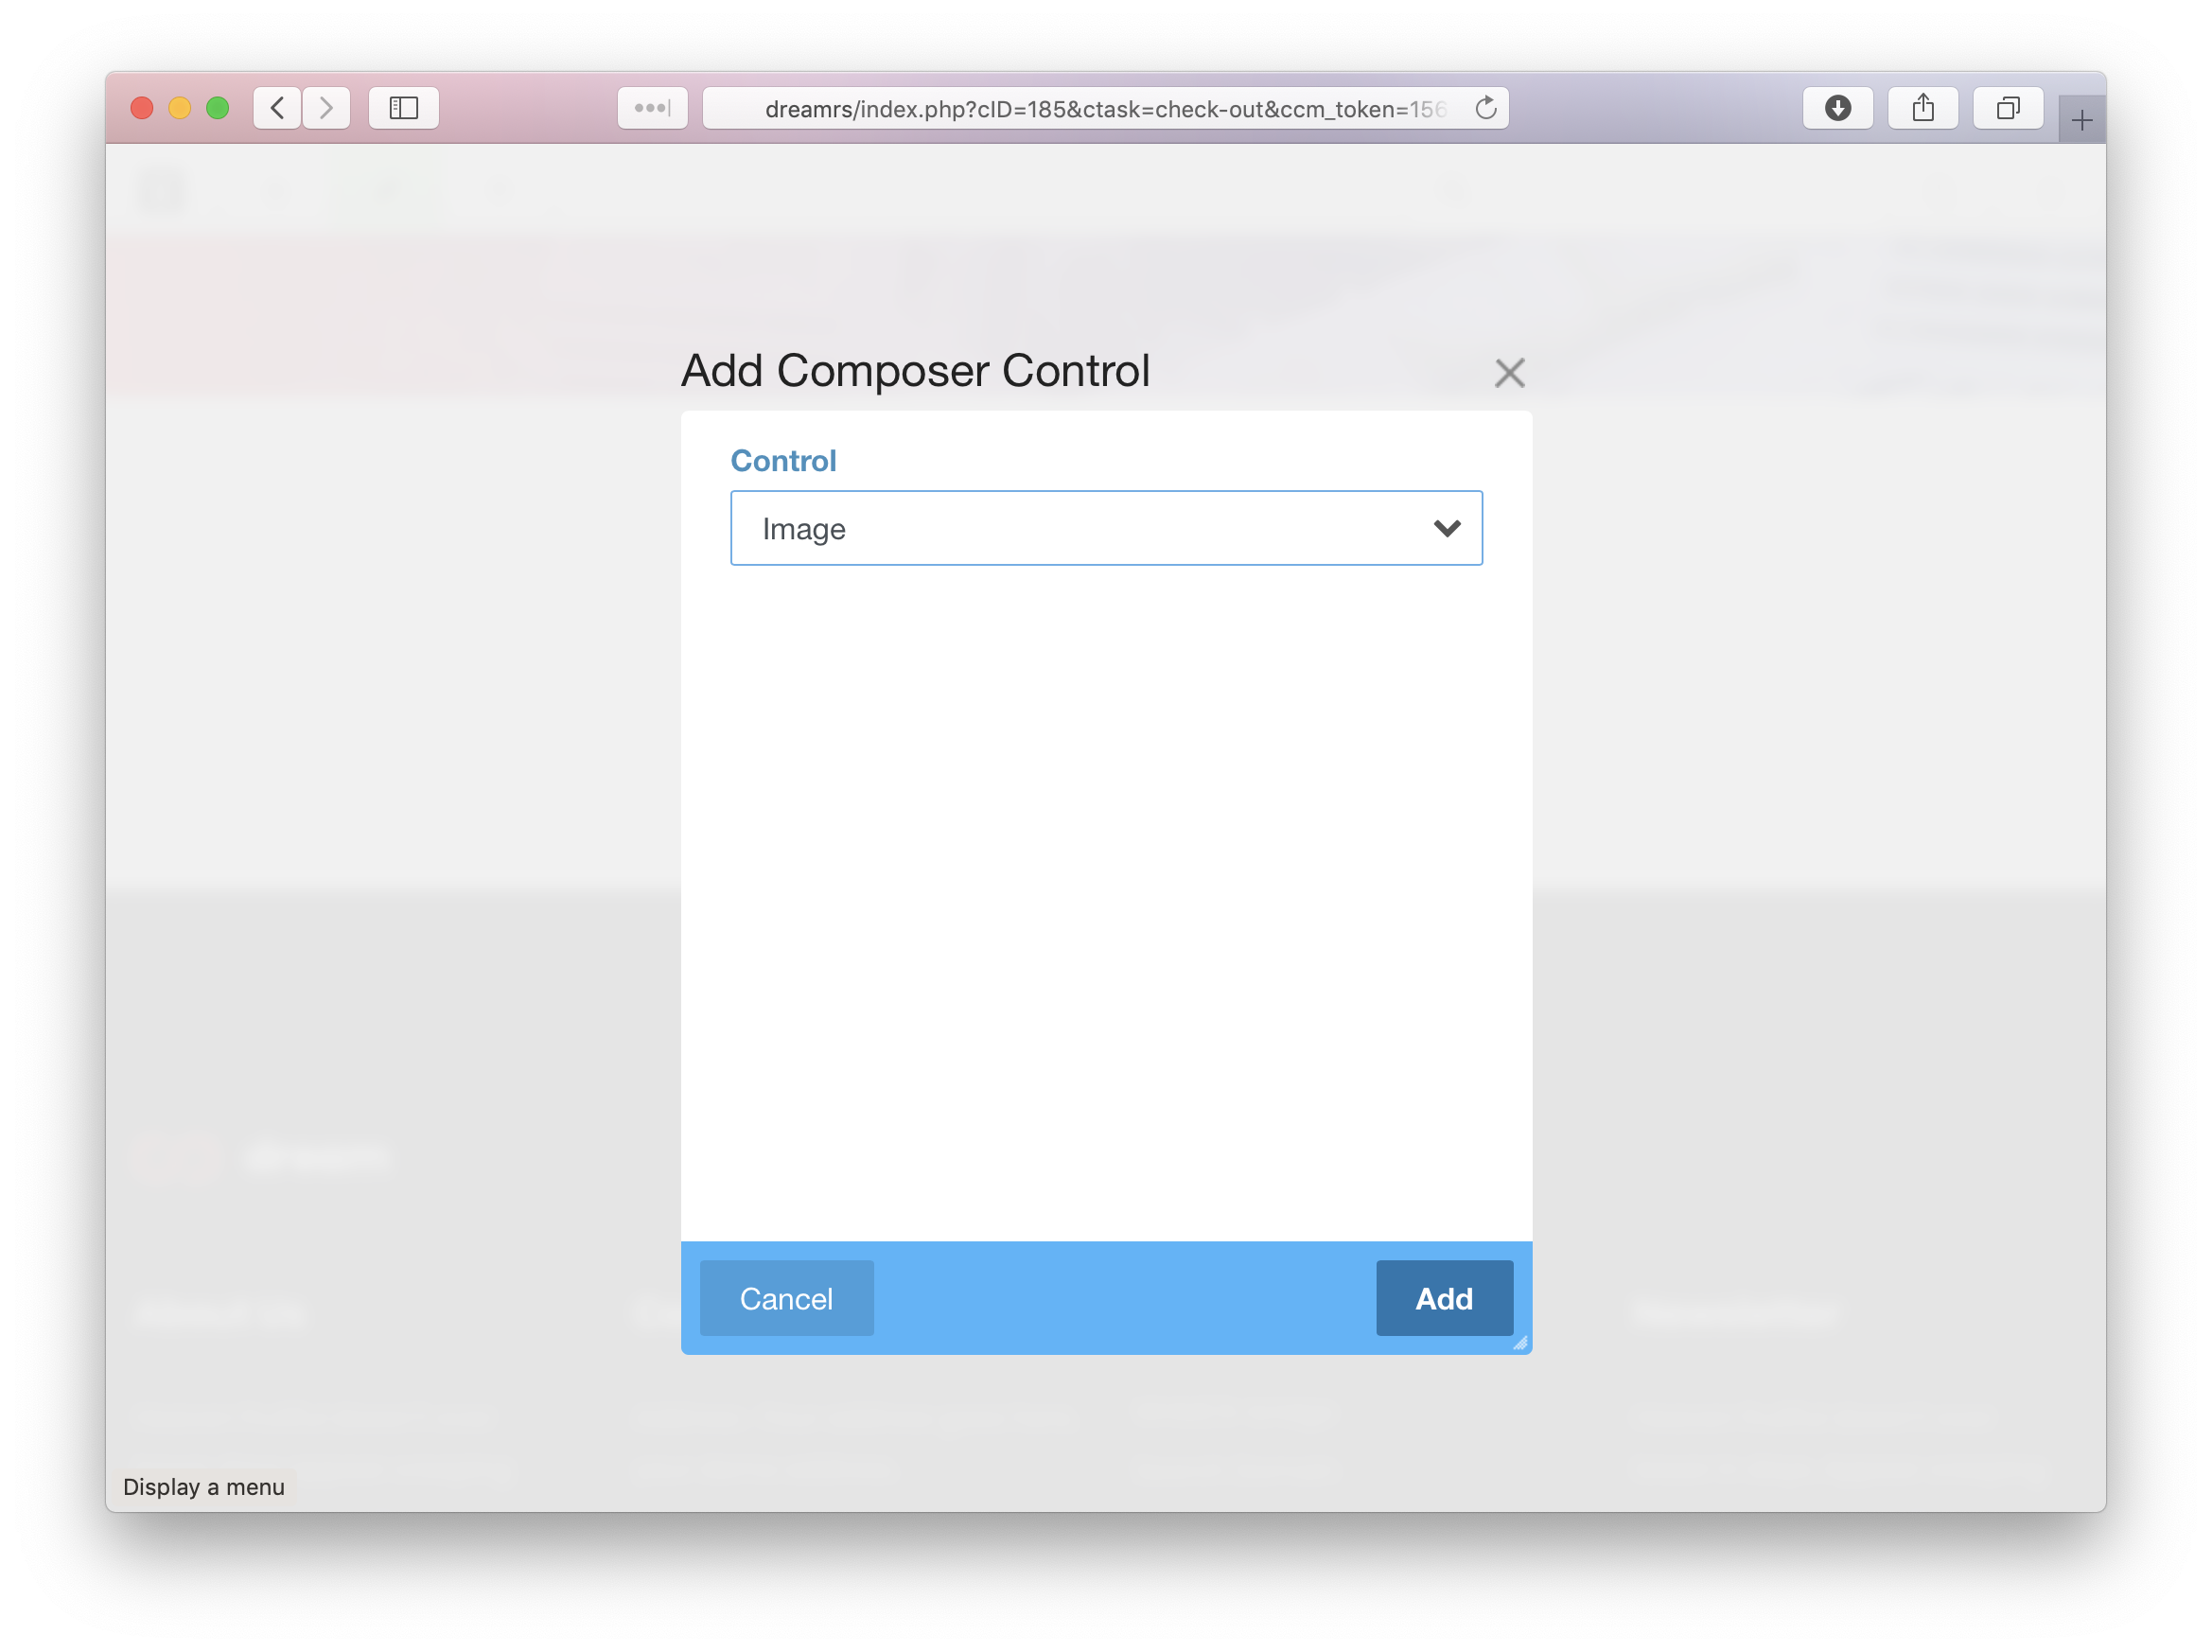
Then, within our Main area, let’s position our Image block. Instead of adding an Image block though, we’re going to add a Composer Output Control Block. This block let’s you join a composer form control block with its corresponding output. This let’s you control where the Image block that’s in your Composer form will output its block content.
Next, add your Page Title block, and choose the Project custom template. Finally, add the Composer Output Control block for the content block. Your page should look like this:
You’re done. You’ve added the relevant default blocks to the page, and added the composer output control blocks to make the composer controls for the block types work properly.
At this point, we could create a page of the Project Type, and it would use the the Project page template. But to truly configure our Project in the best, most useful way for editors, we should add our default blocks to the page, and also let Let’s add the Page Header block, configured to
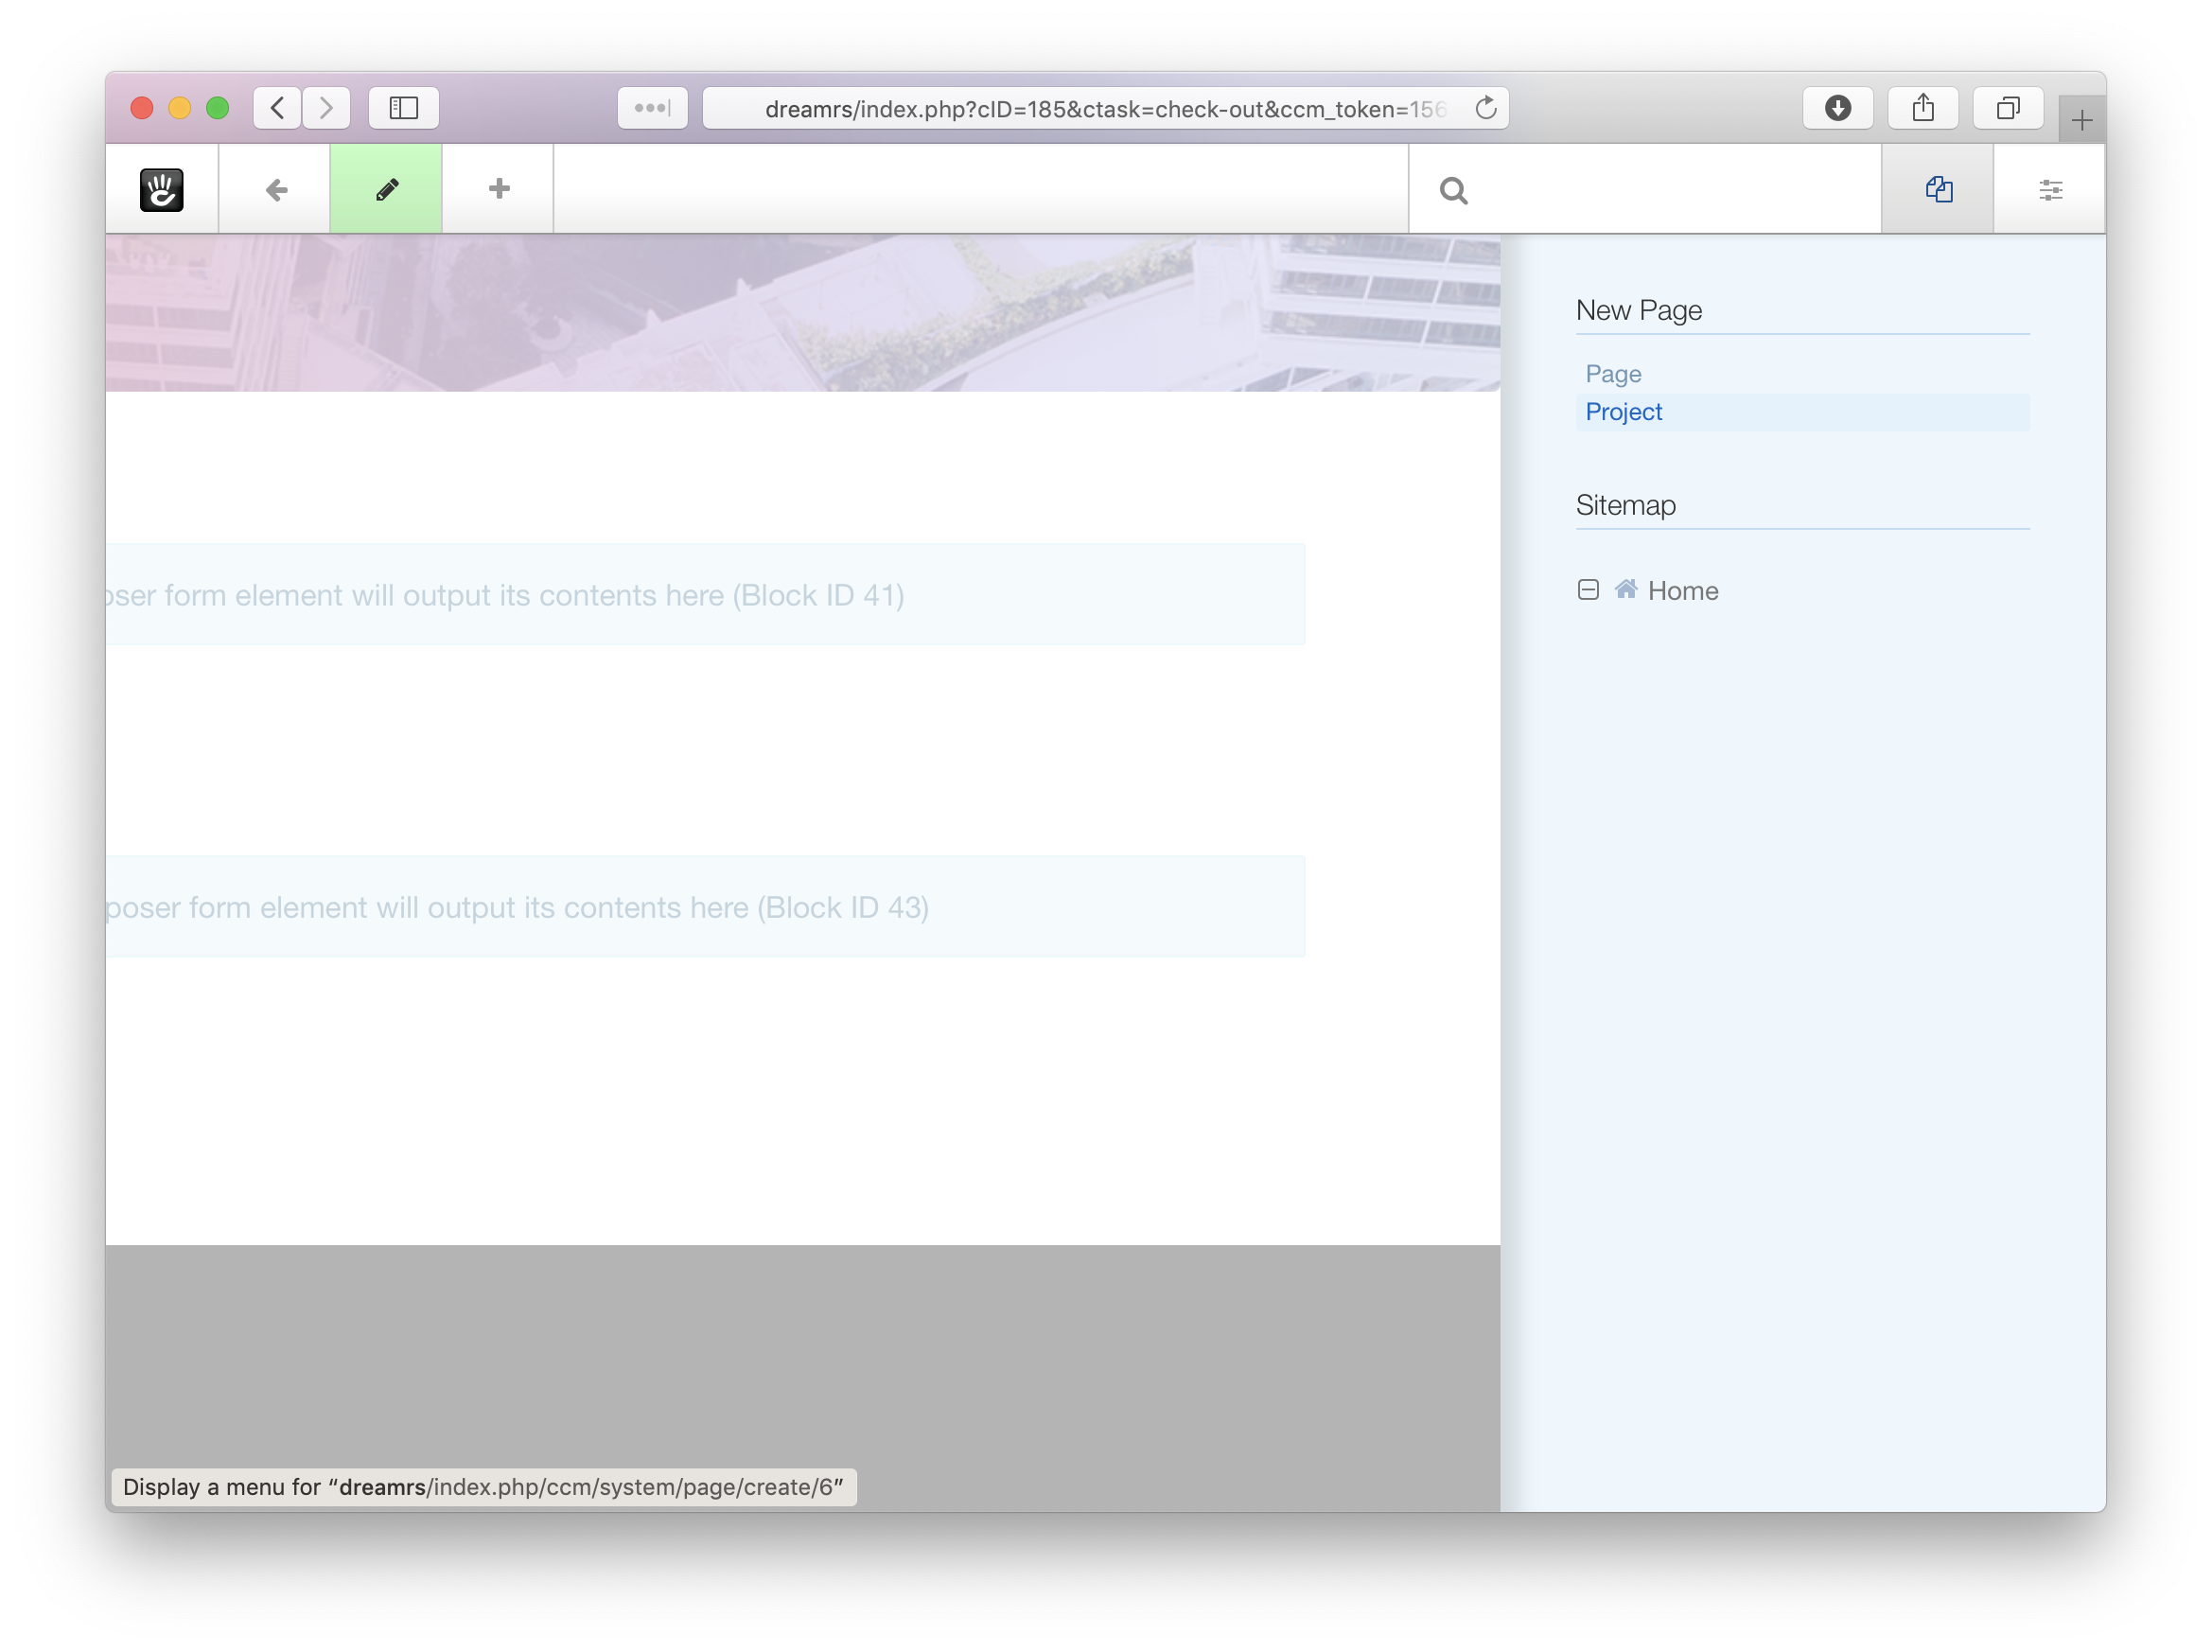
Test the Final Page Type
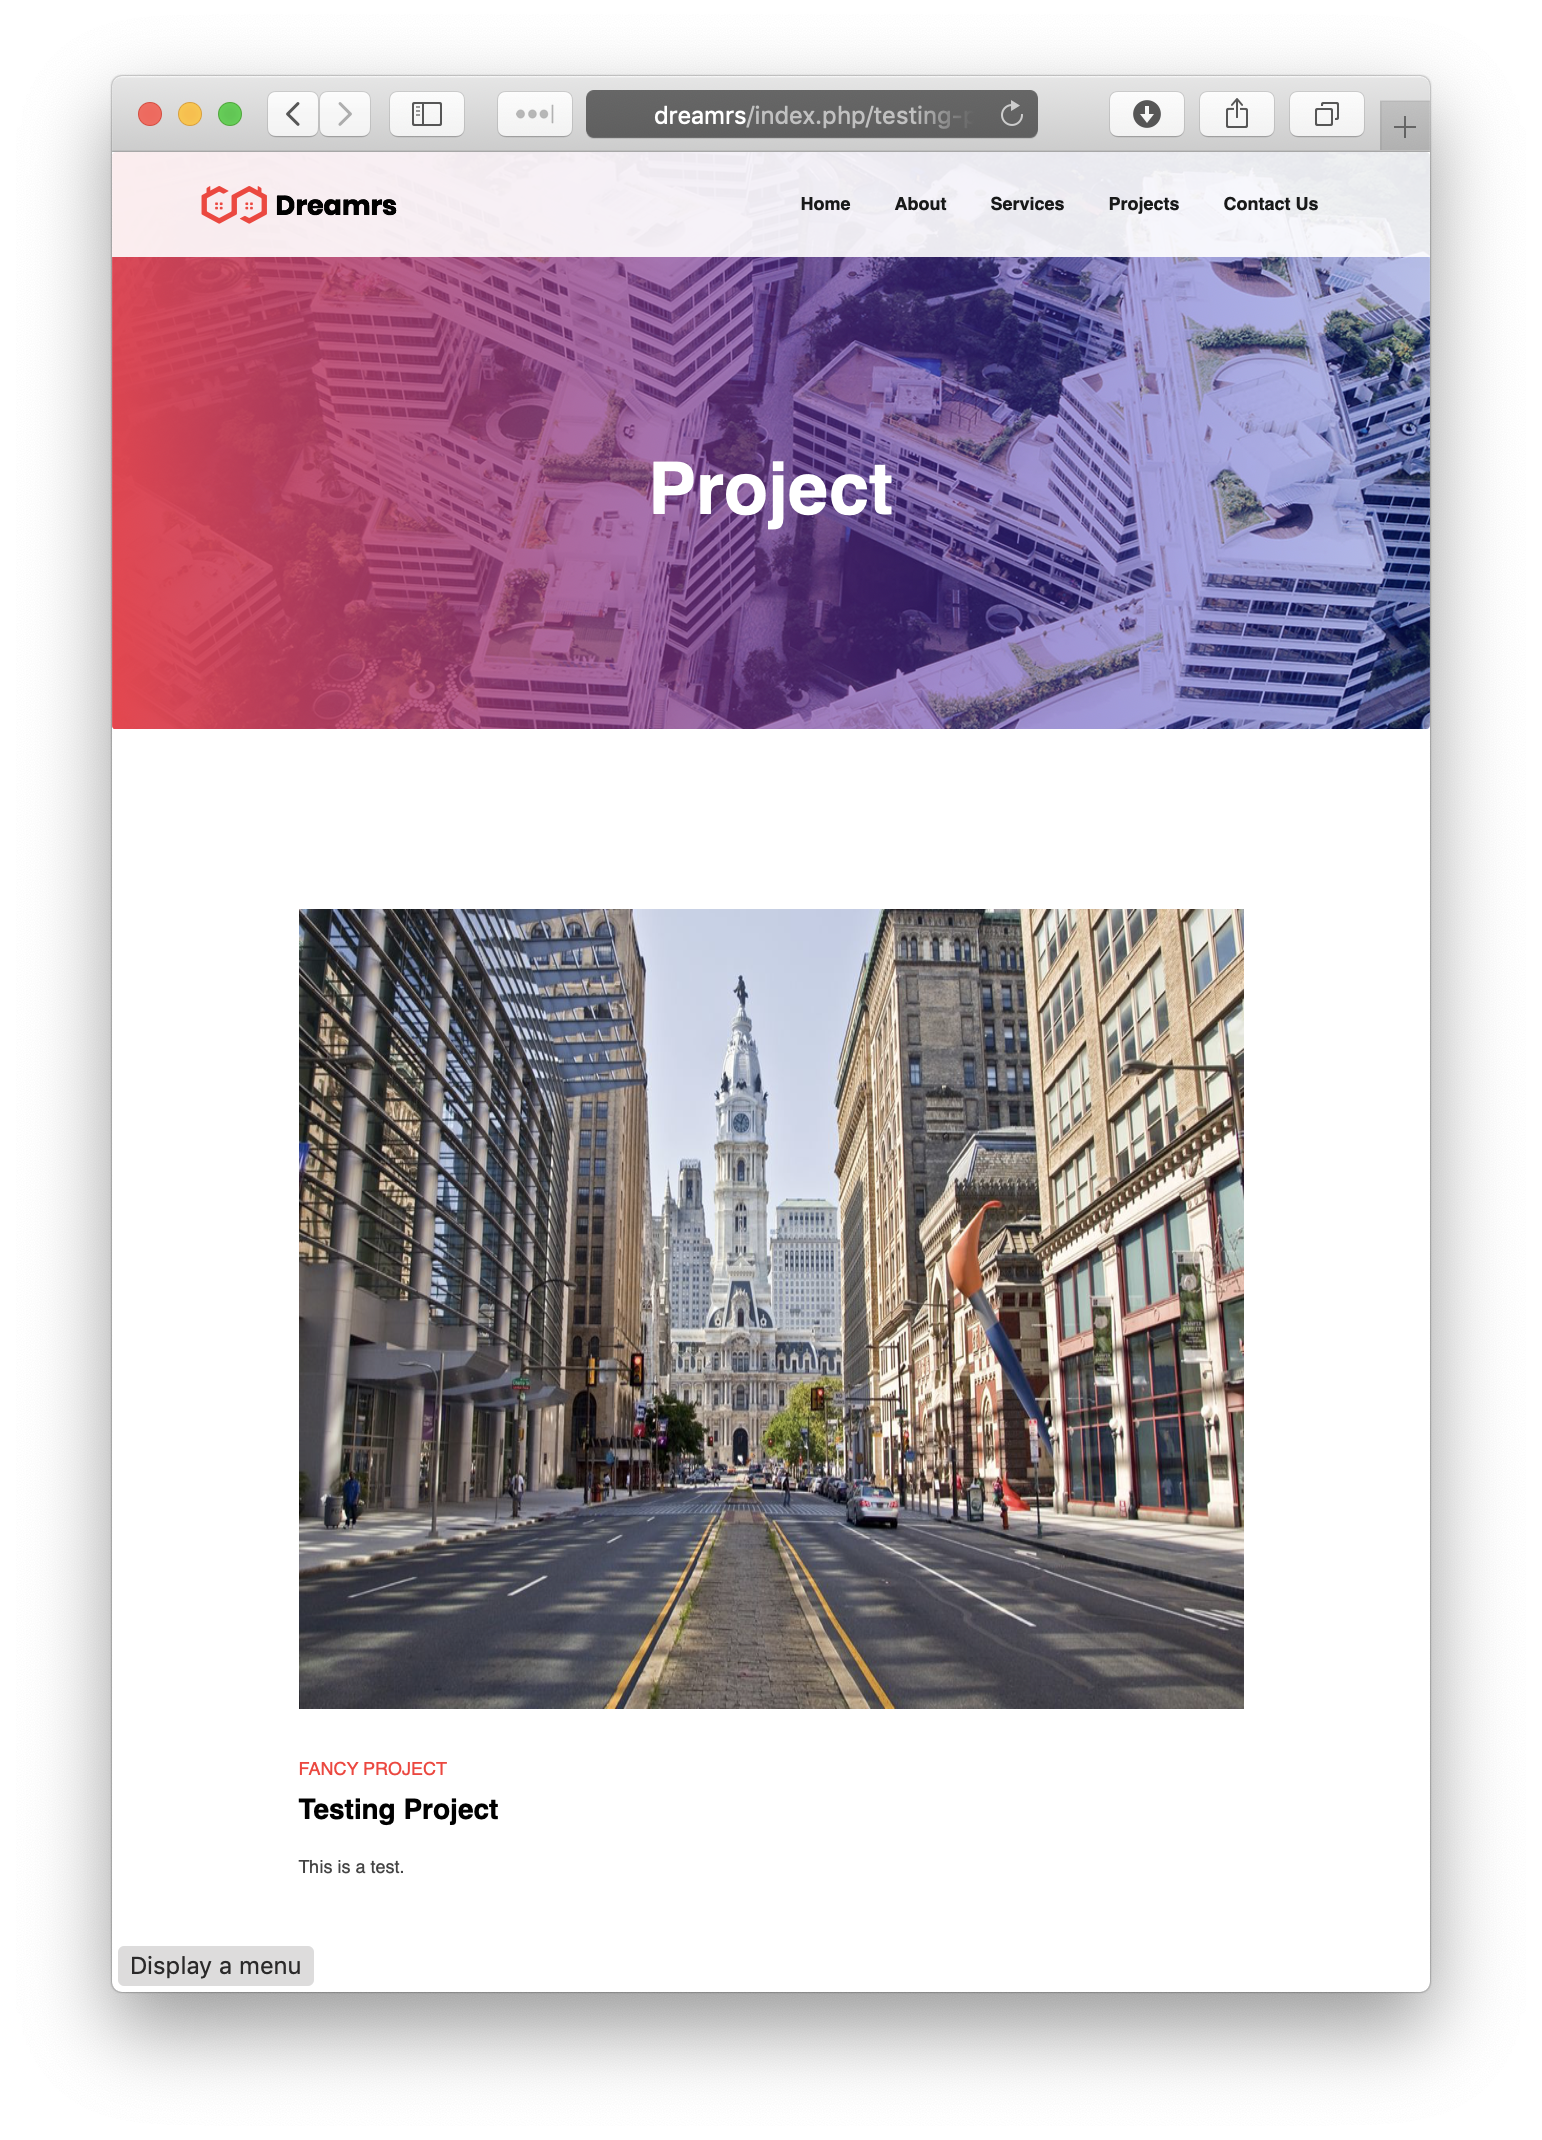
Let’s test our page type by adding a new project. Add a page of the type Project from the Sitemap panel:
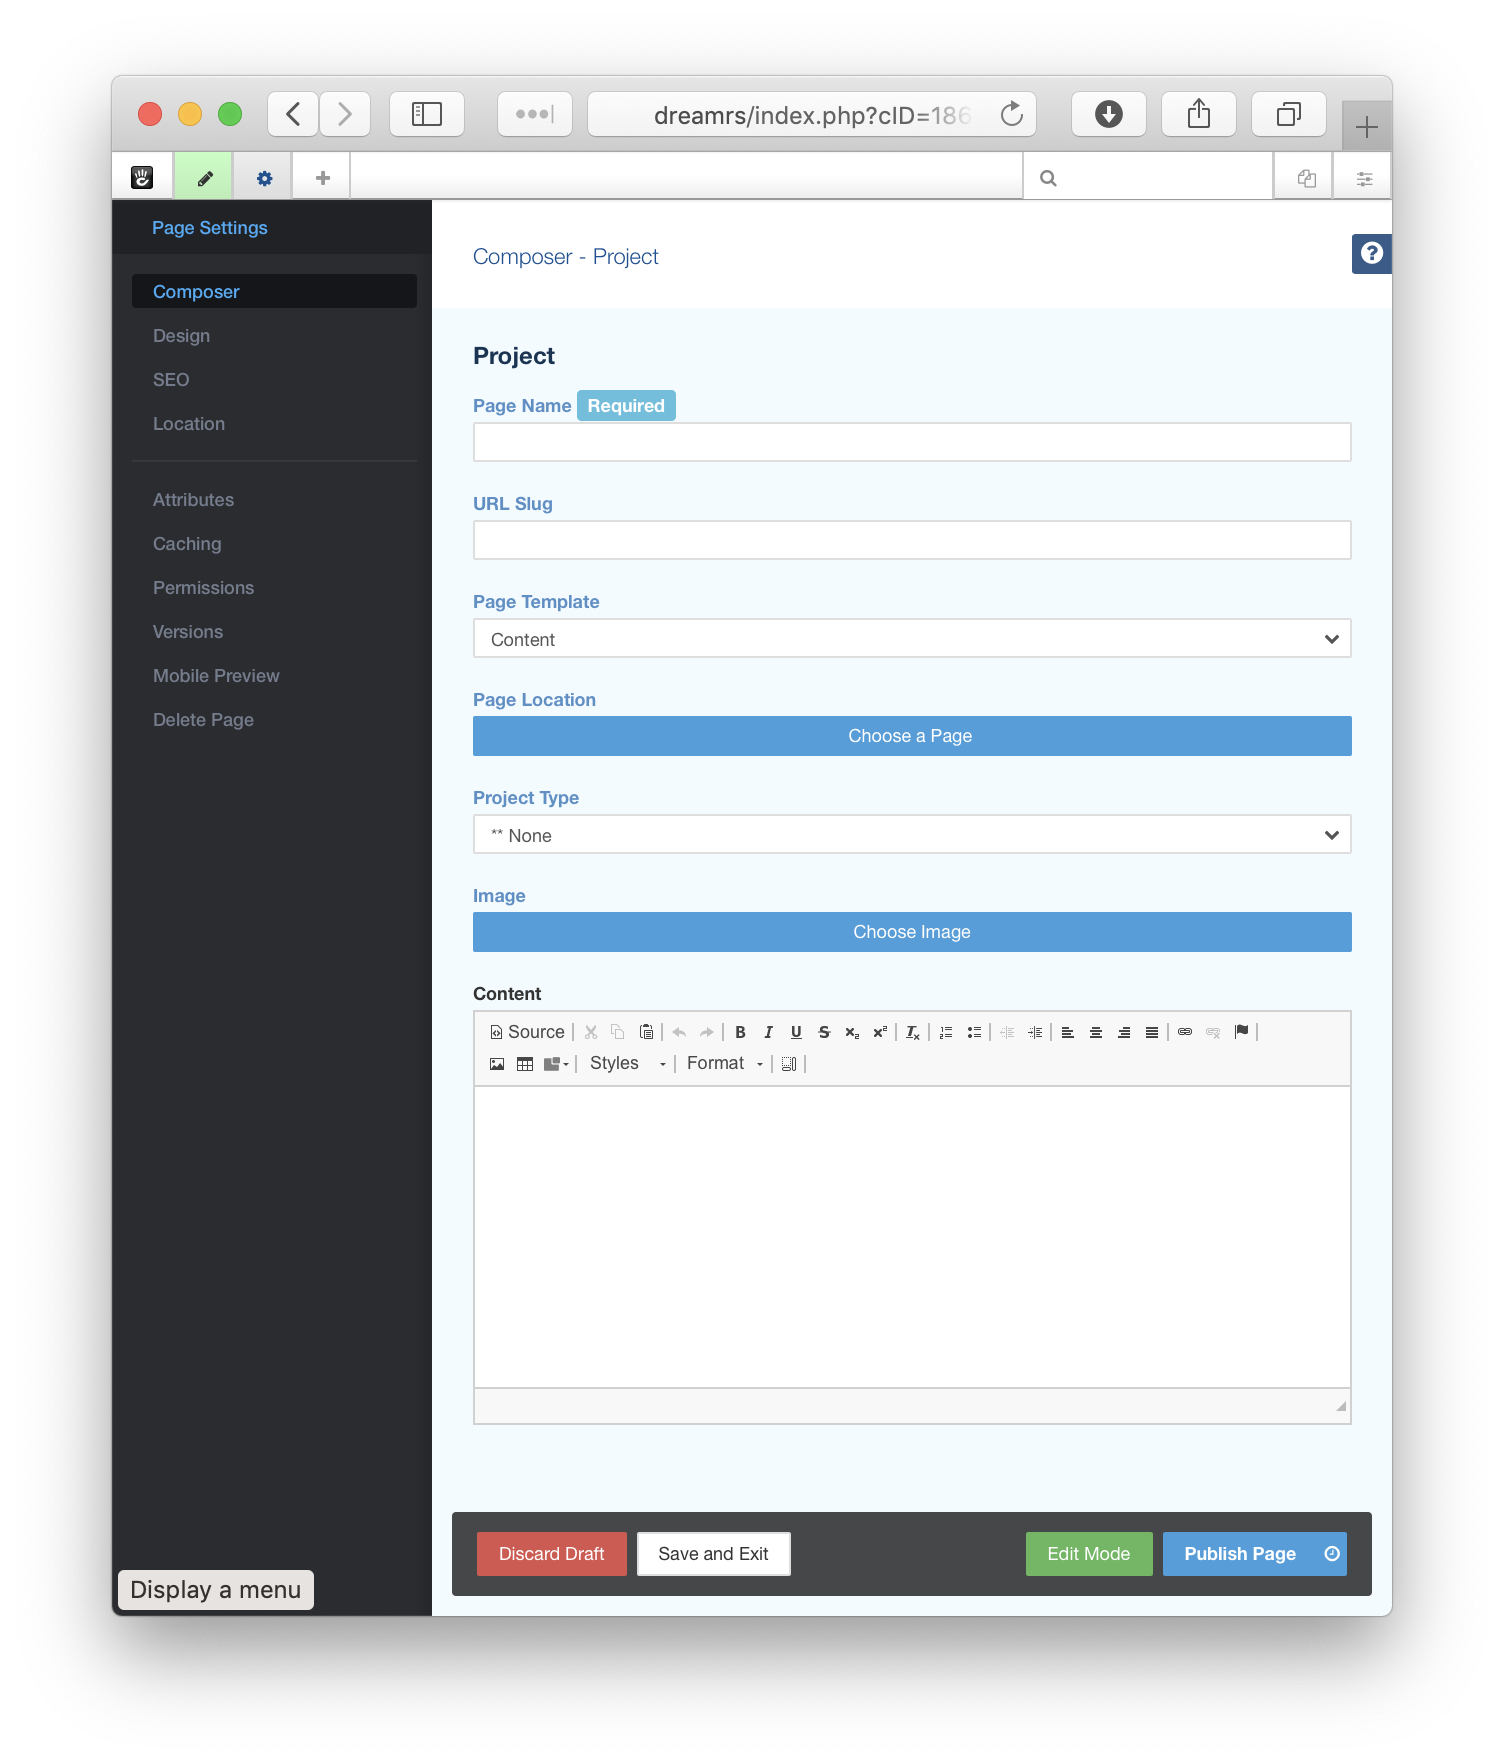
Let’s fill out our form with test data.
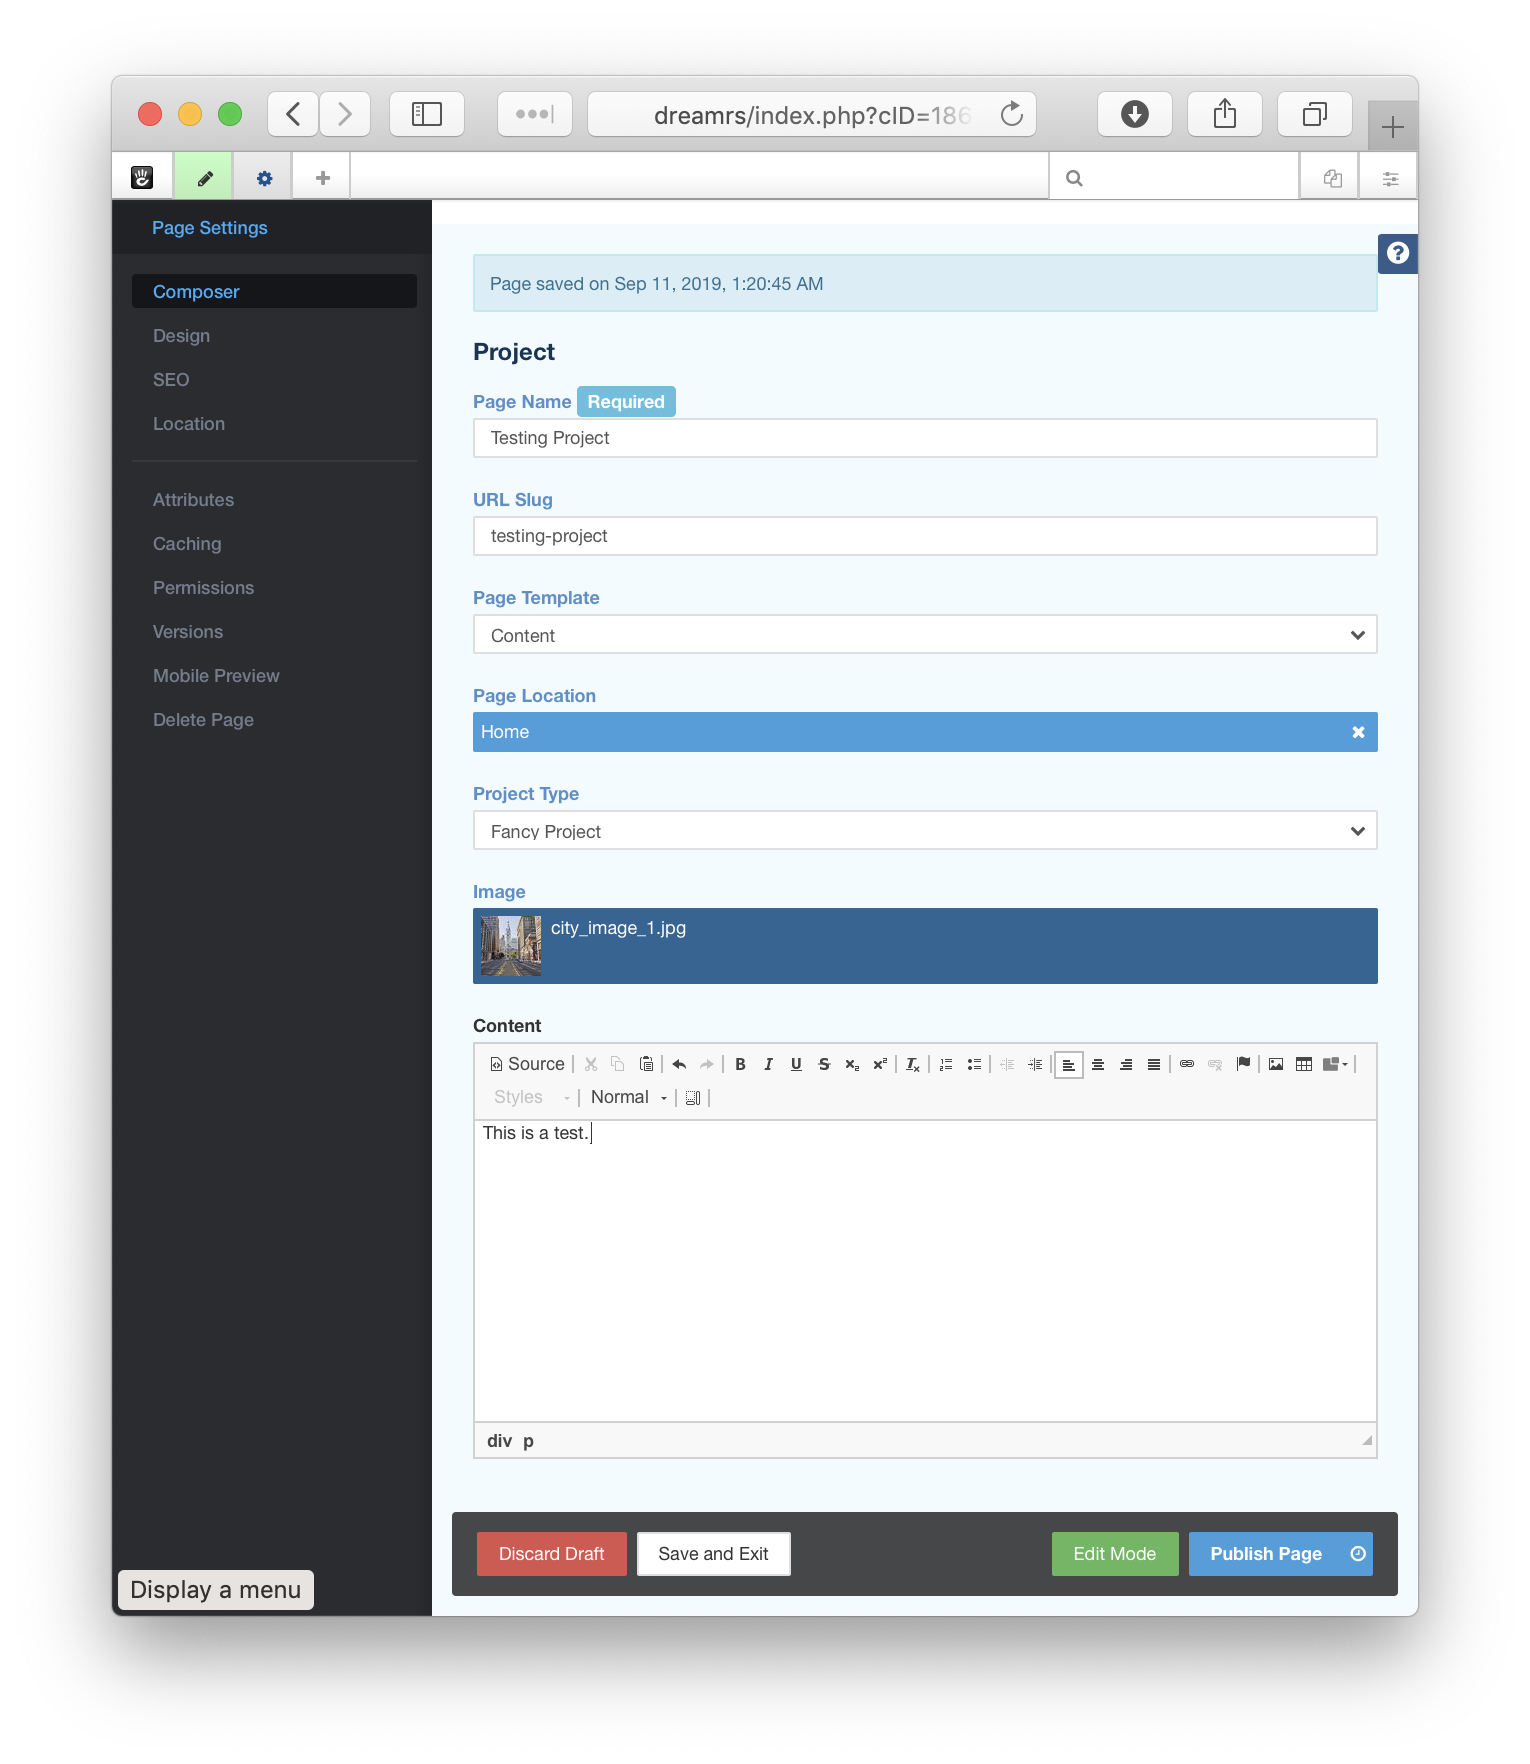
And check out our results!
Export the Page Type to CIF XML
We could certainly stop here. We’ve built our first page type, and it works well. It outputs data into the structured page, making it easy for editors to add content and use the CMS to manage it. Let’s create a page_types/project.xml in the install/ directory and add installContentFile(‘install/page_types/projects.xml’); to the install() method. Don’t forget to change the version number of the package to 0.6.4 (but don’t upgrade it yet).
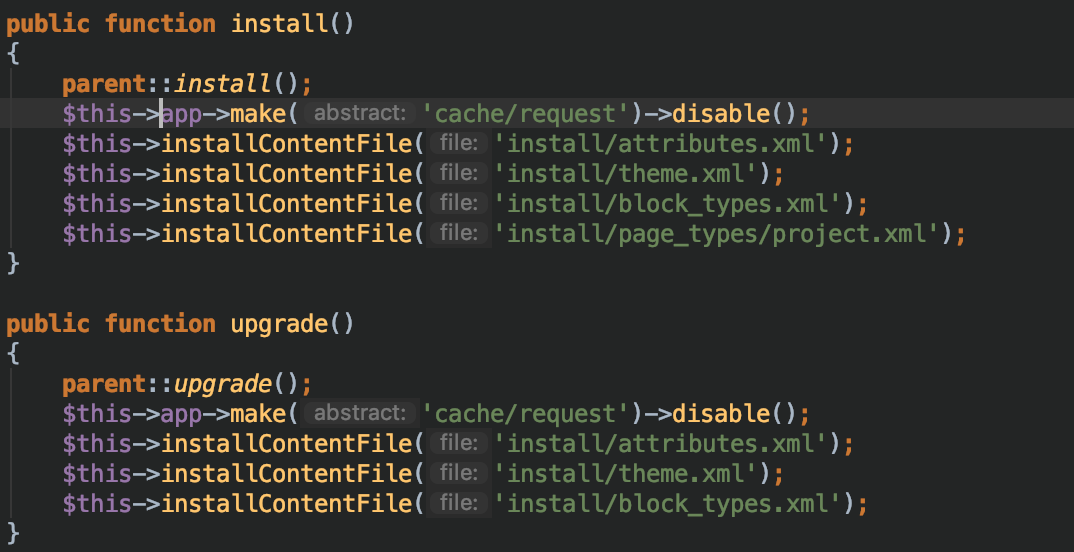
Why aren’t we adding this to the upgrade() method? In Concrete, since page types have a significant amount of content associated with them, they don’t import the same way as block types and attribute. Block types and attributes will skip importing if they already exist -- page types do not. If you add this page type to the upgrade method, any time you upgrade you’ll get some duplicated block type content on the page type, and duplicated controls in the forms. While this may be improved in the future, in the meantime it’s better to install the page type once -- and if we add new page types in the future, we’ll control their addition in the upgrade() method when that time comes.
Install the Migration Tool Add-On
Our page_types/project.xml file is empty; up to this point we’ve been crafting our CIF XML by copying it from the Elemental starting points. Our Project page type is too complex, however. Instead, let’s have our Project page type generated. We can do this by using the Migration Tool Add-On.
First, download the Migration Tool from the Migration Tool GitHub Repository.
Note - this version of Migration Tool is for Concrete Version 9.
For version 8 and 5.7+, use this repository.
For legacy 5.6 sites, use this repository and install it through the dashboard, not the command line.
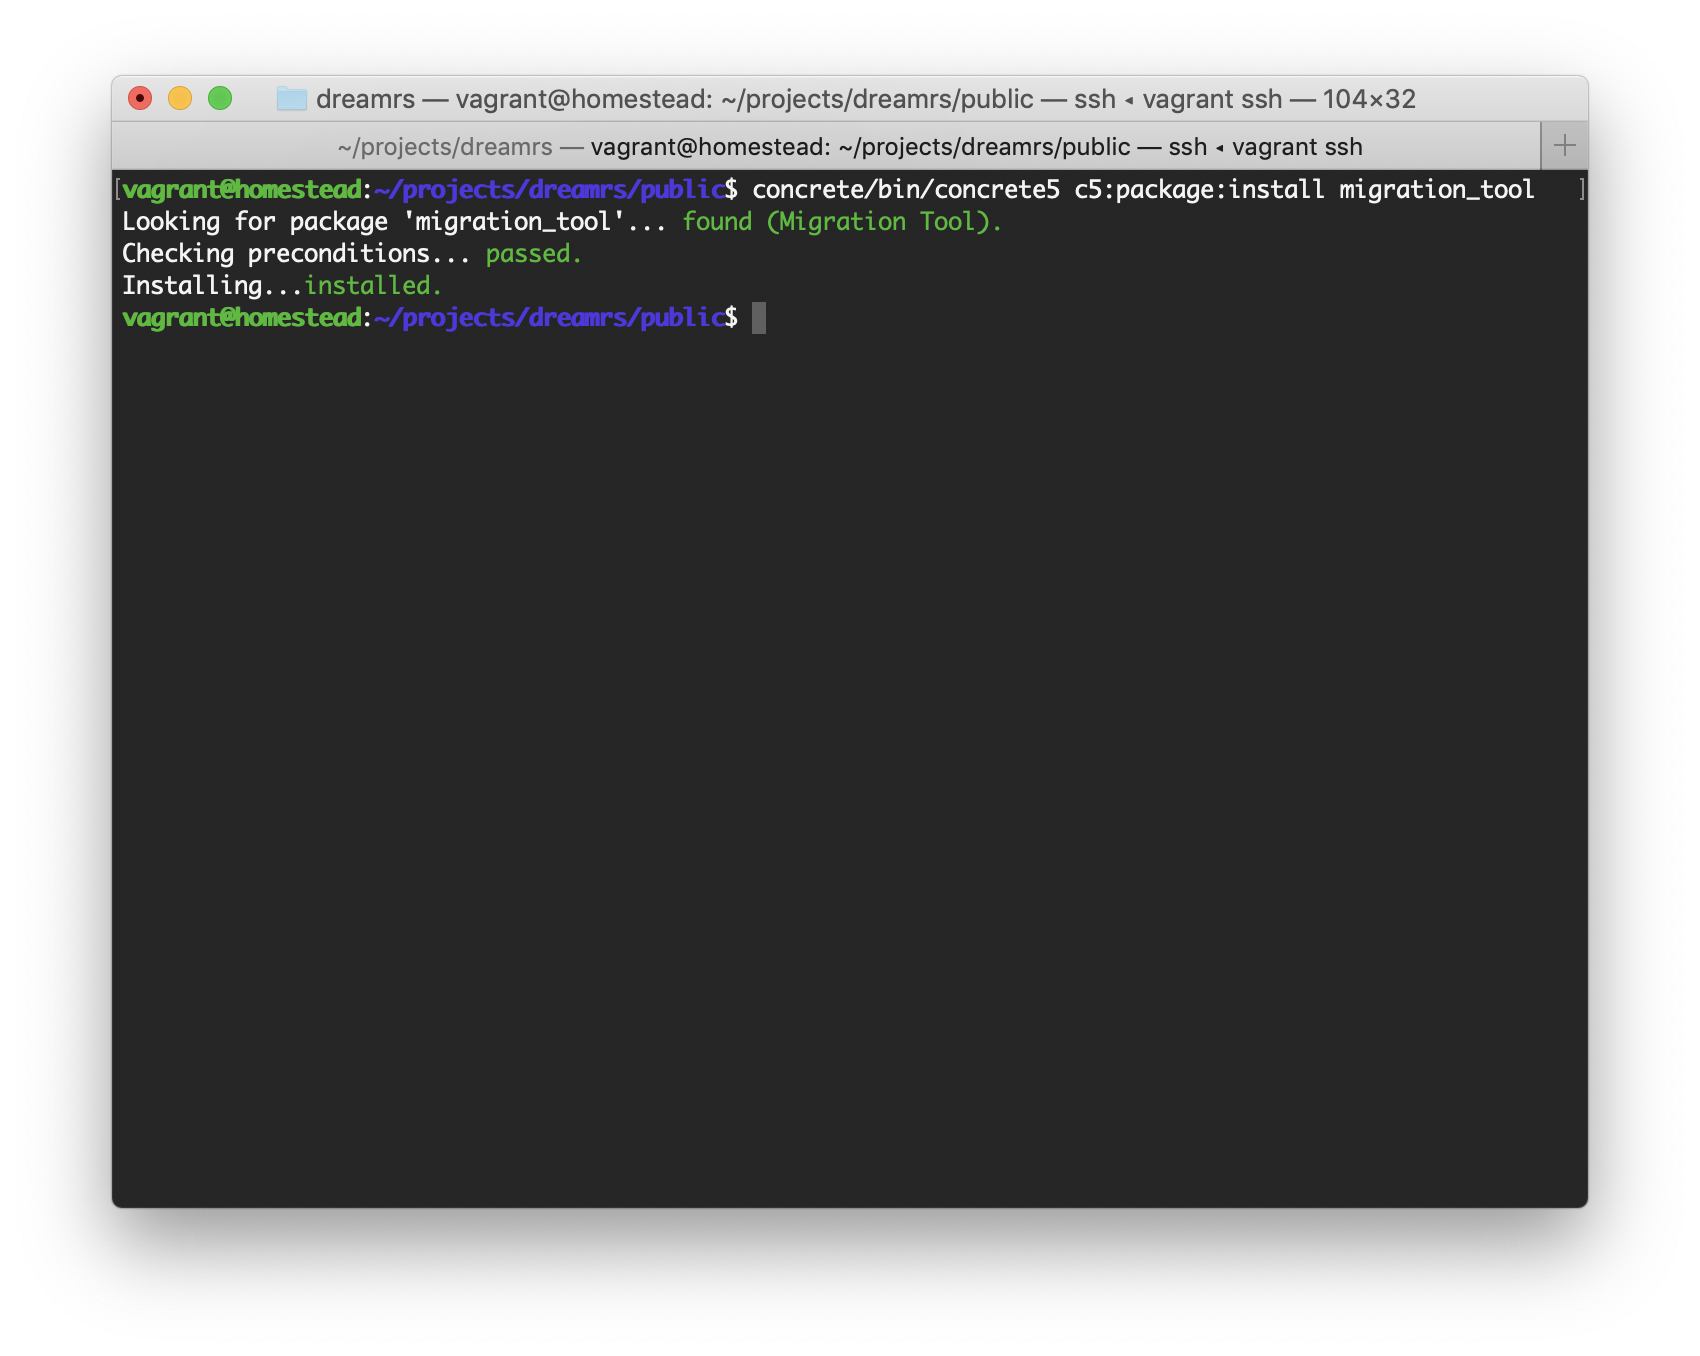
Take the migration_tool directory from the repo and place it in your packages/ directory. Then install it via the command line:
concrete/bin/concrete5 c5:package:install migration_tool
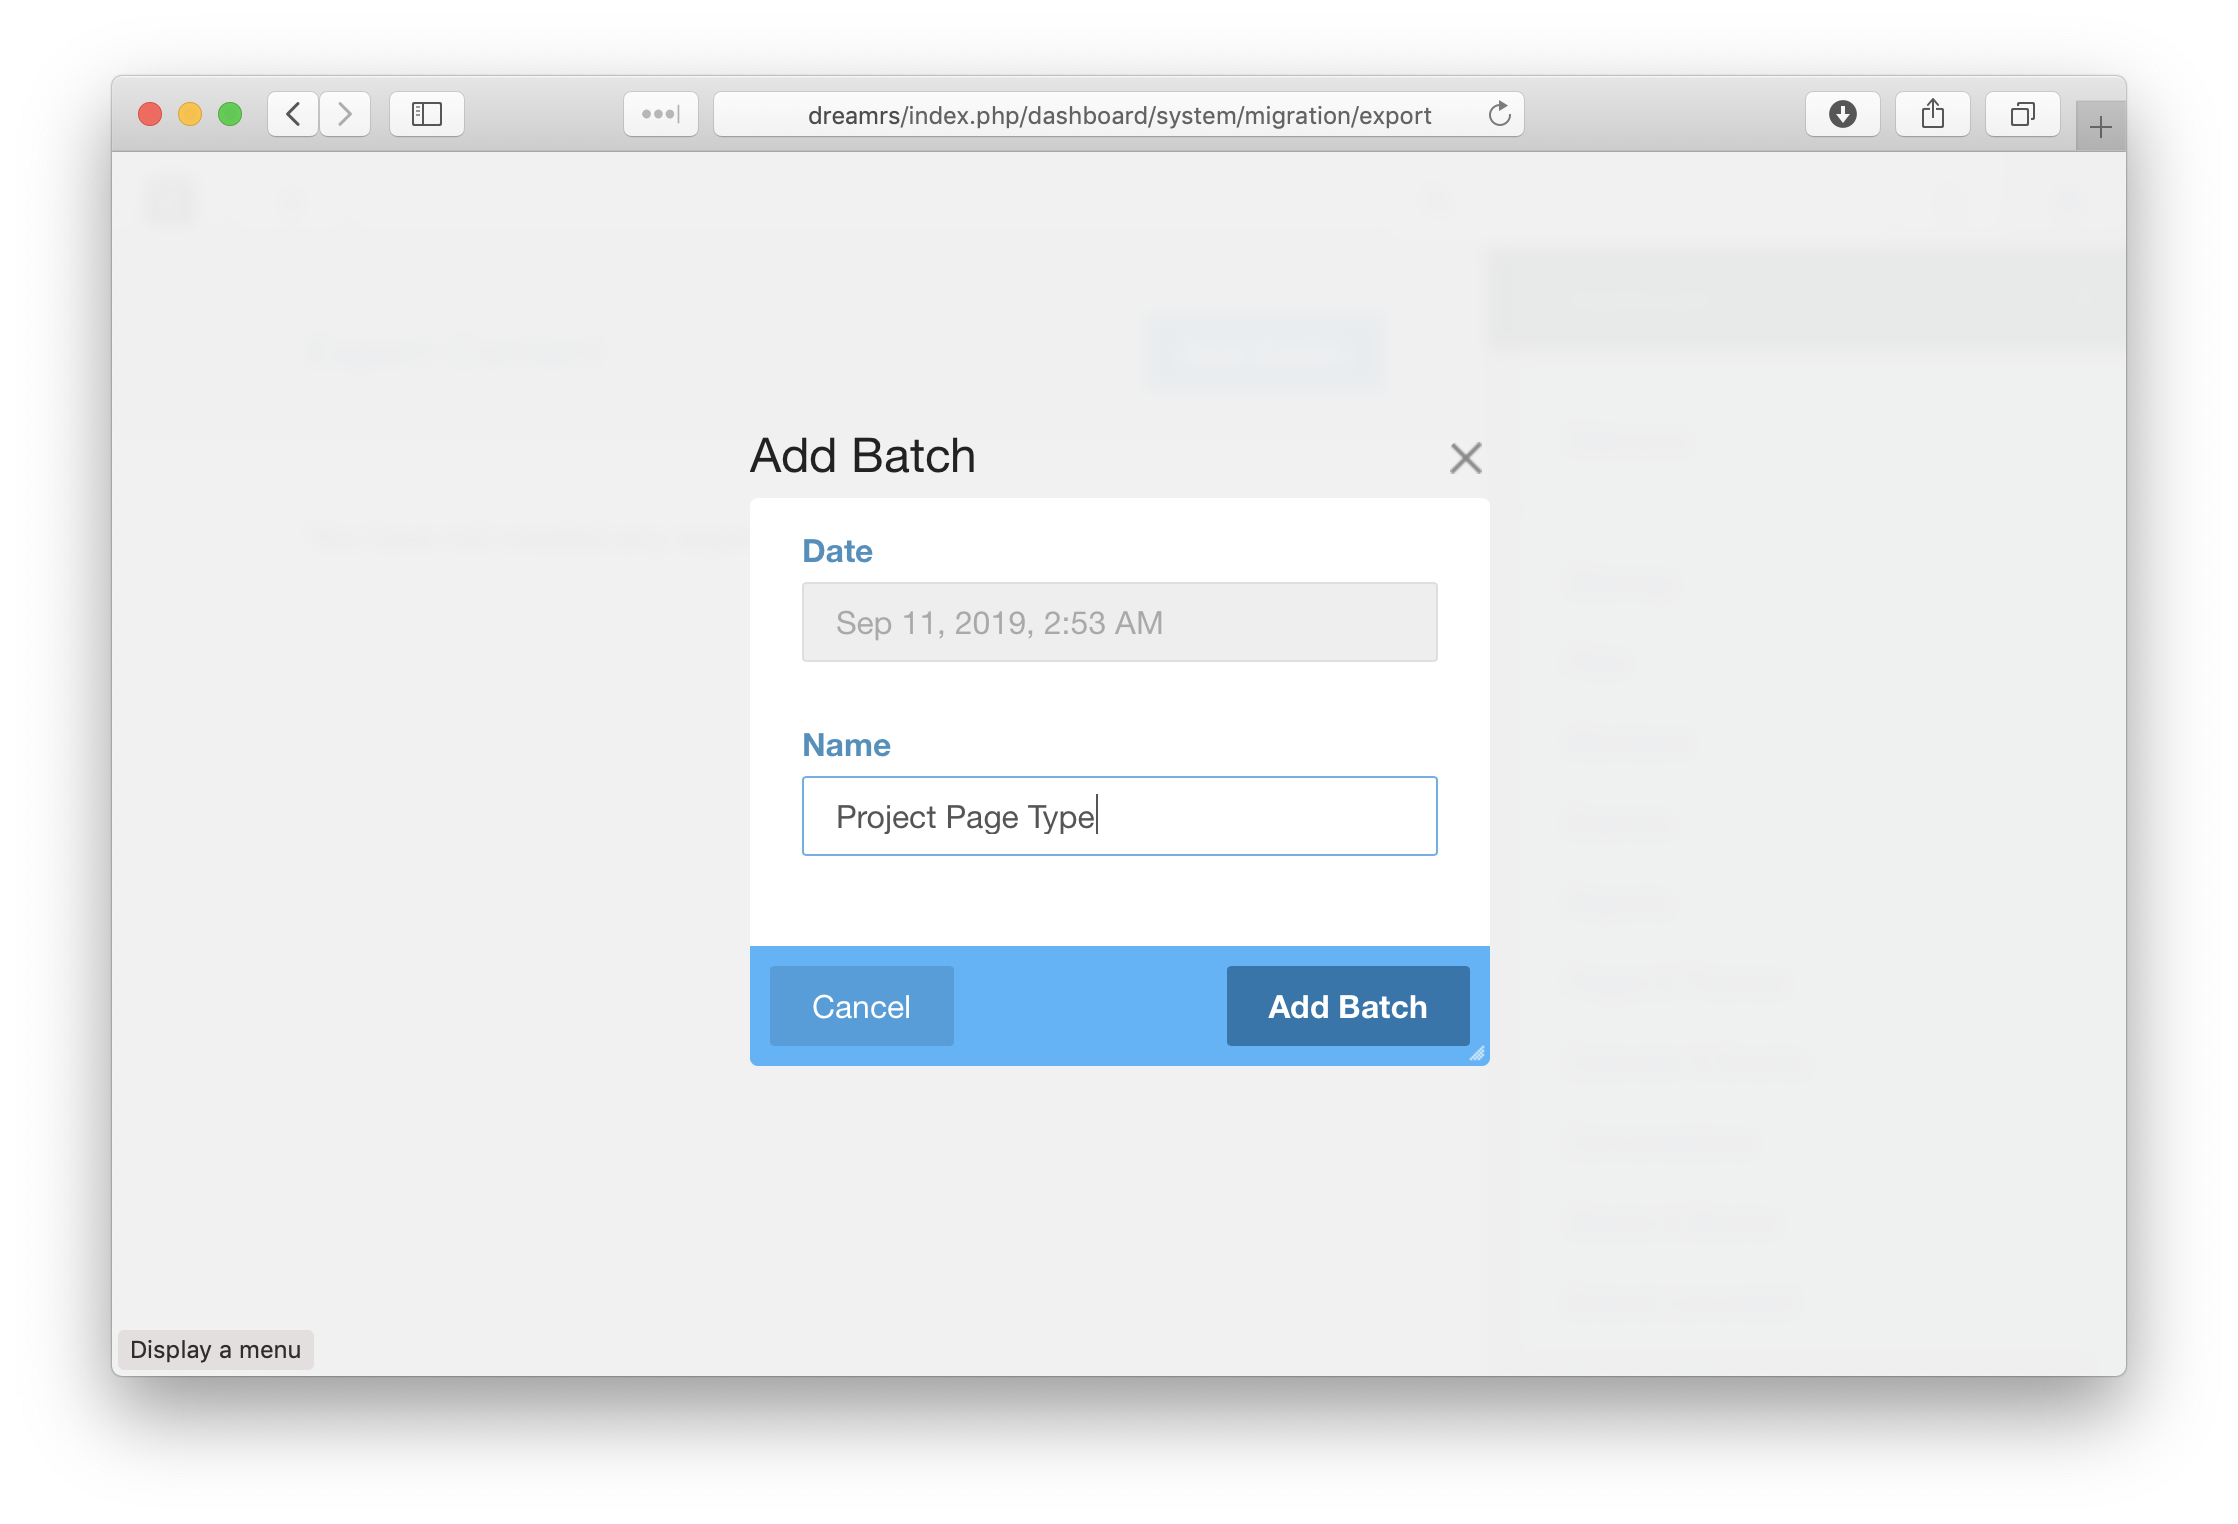
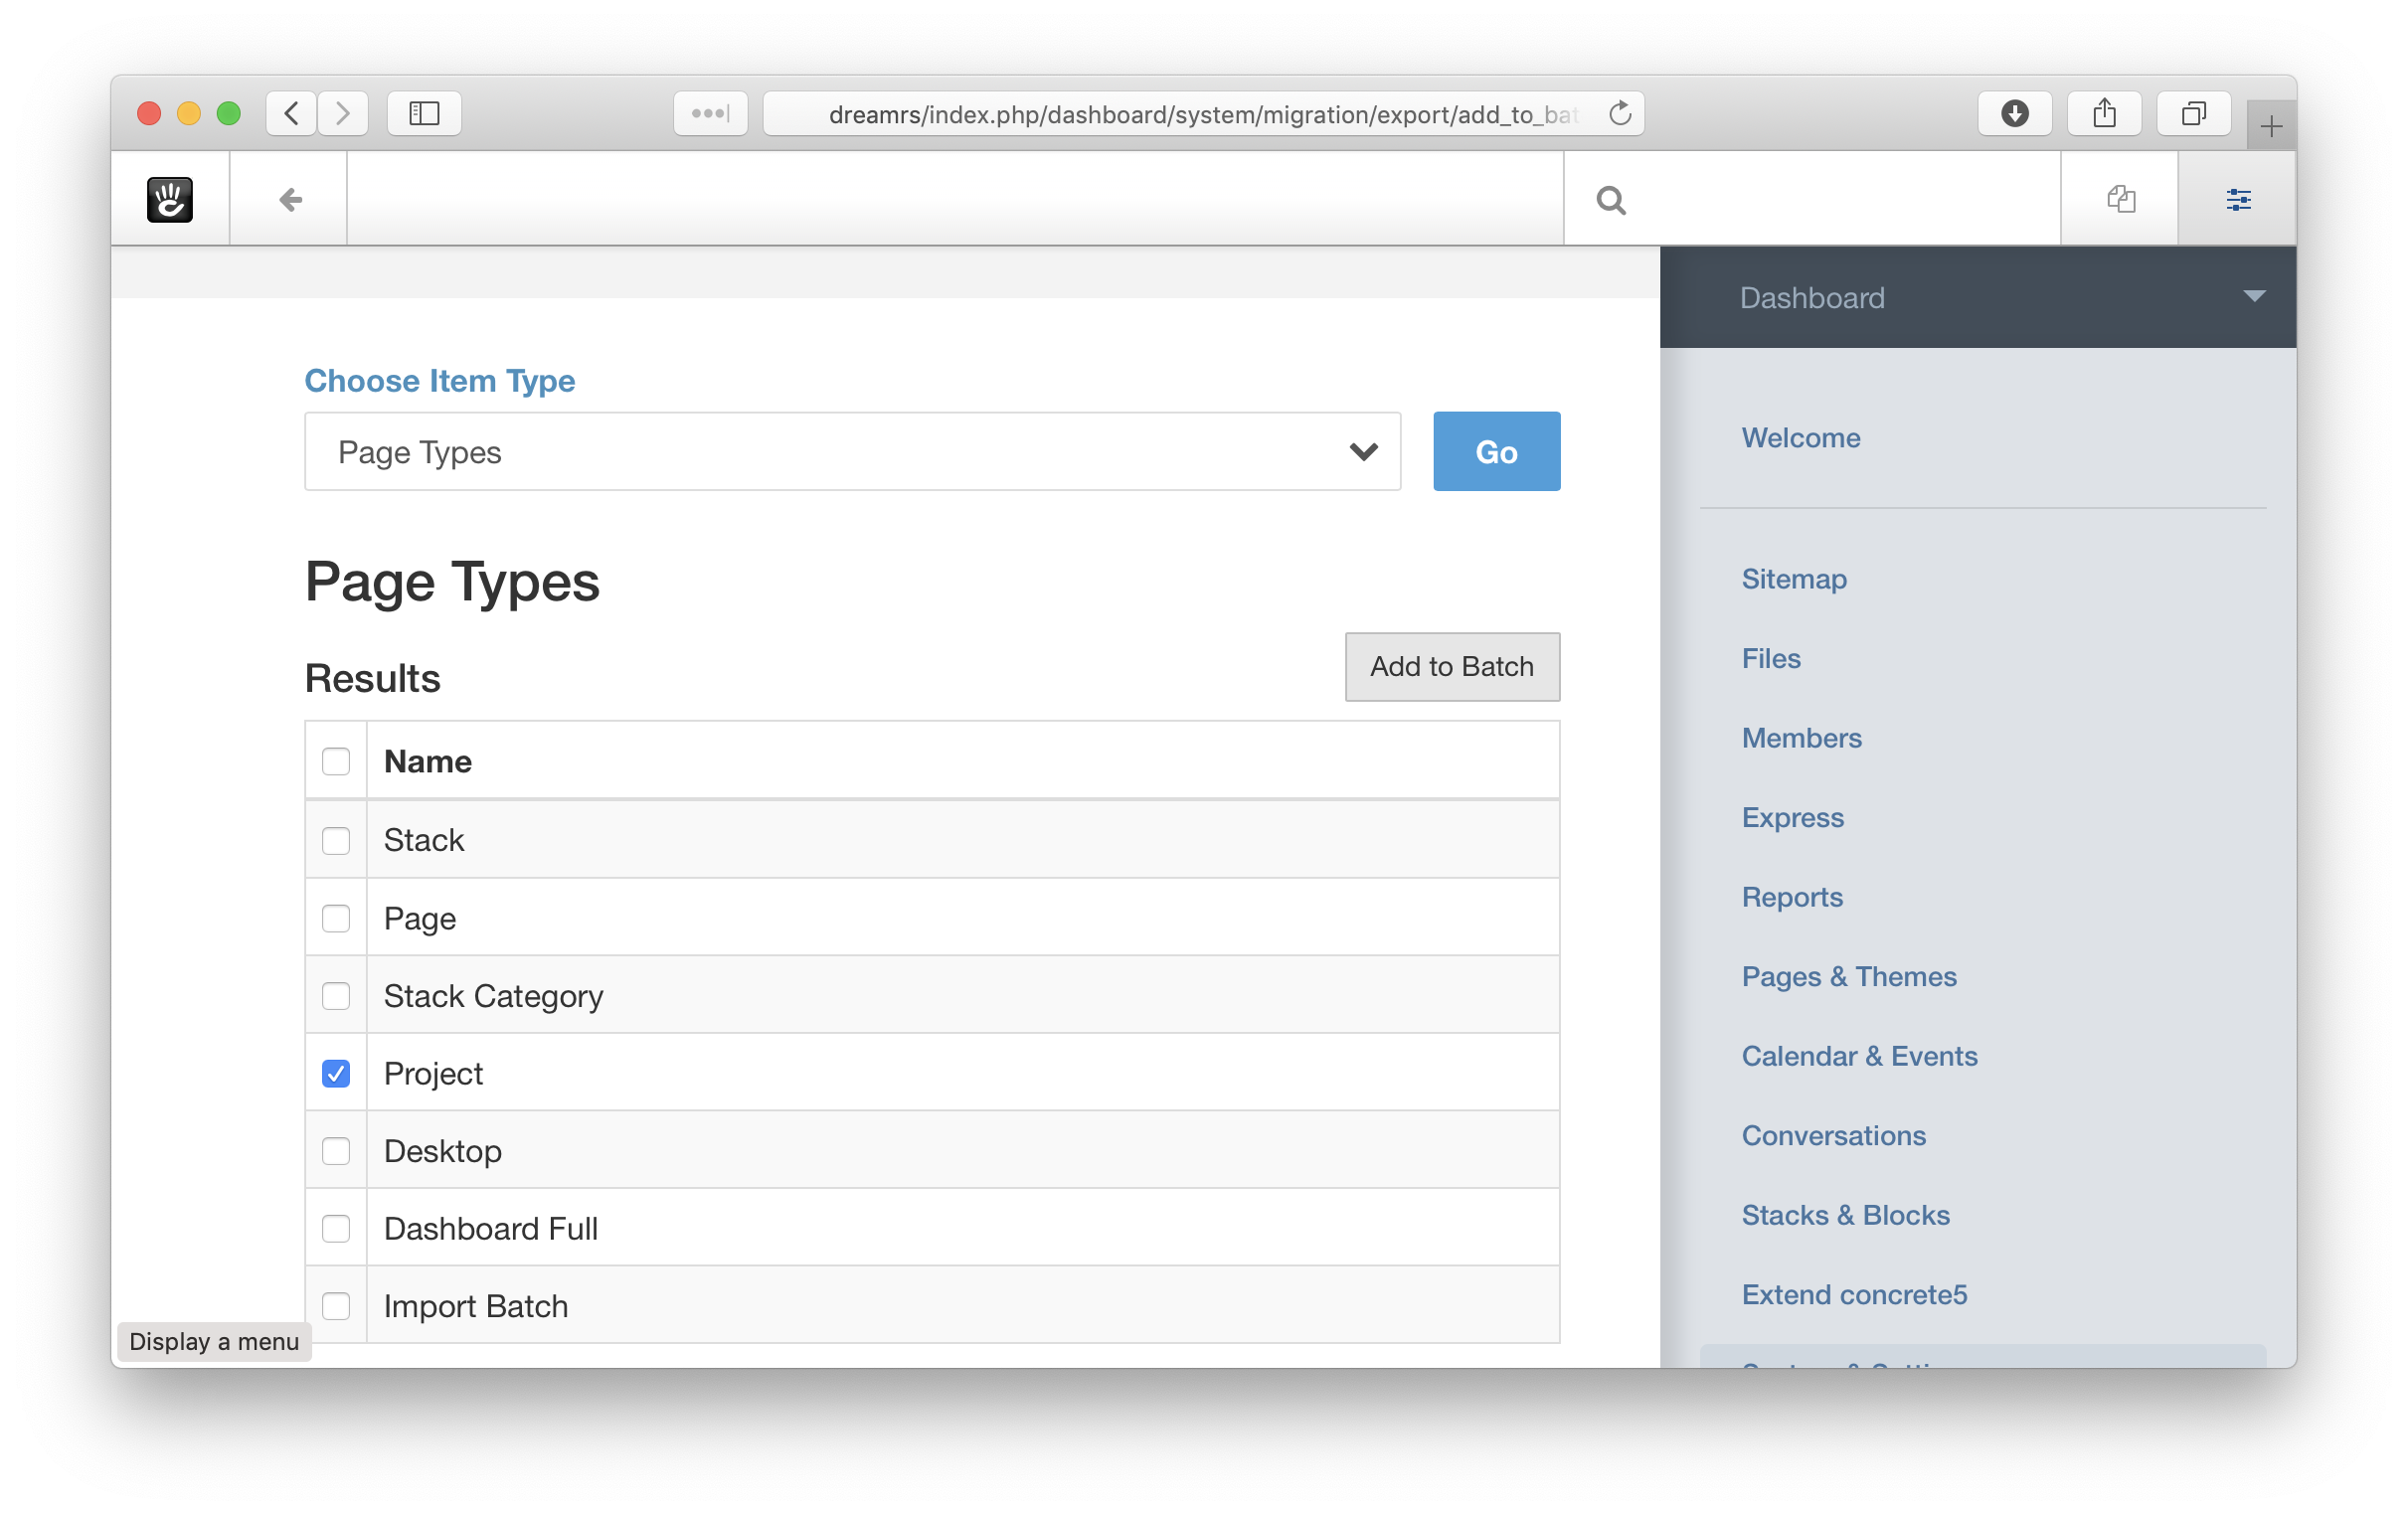
Create an Export Batch
Next, we’re going to create an export batch, with our Project page type in it. Head to Dashboards > System and Settings > Migration Tool > Export Content. Add a batch for the Project page type.
Next, click Add Content to Batch on the next page. Choose Page Type as the type of content to add, and select Project:
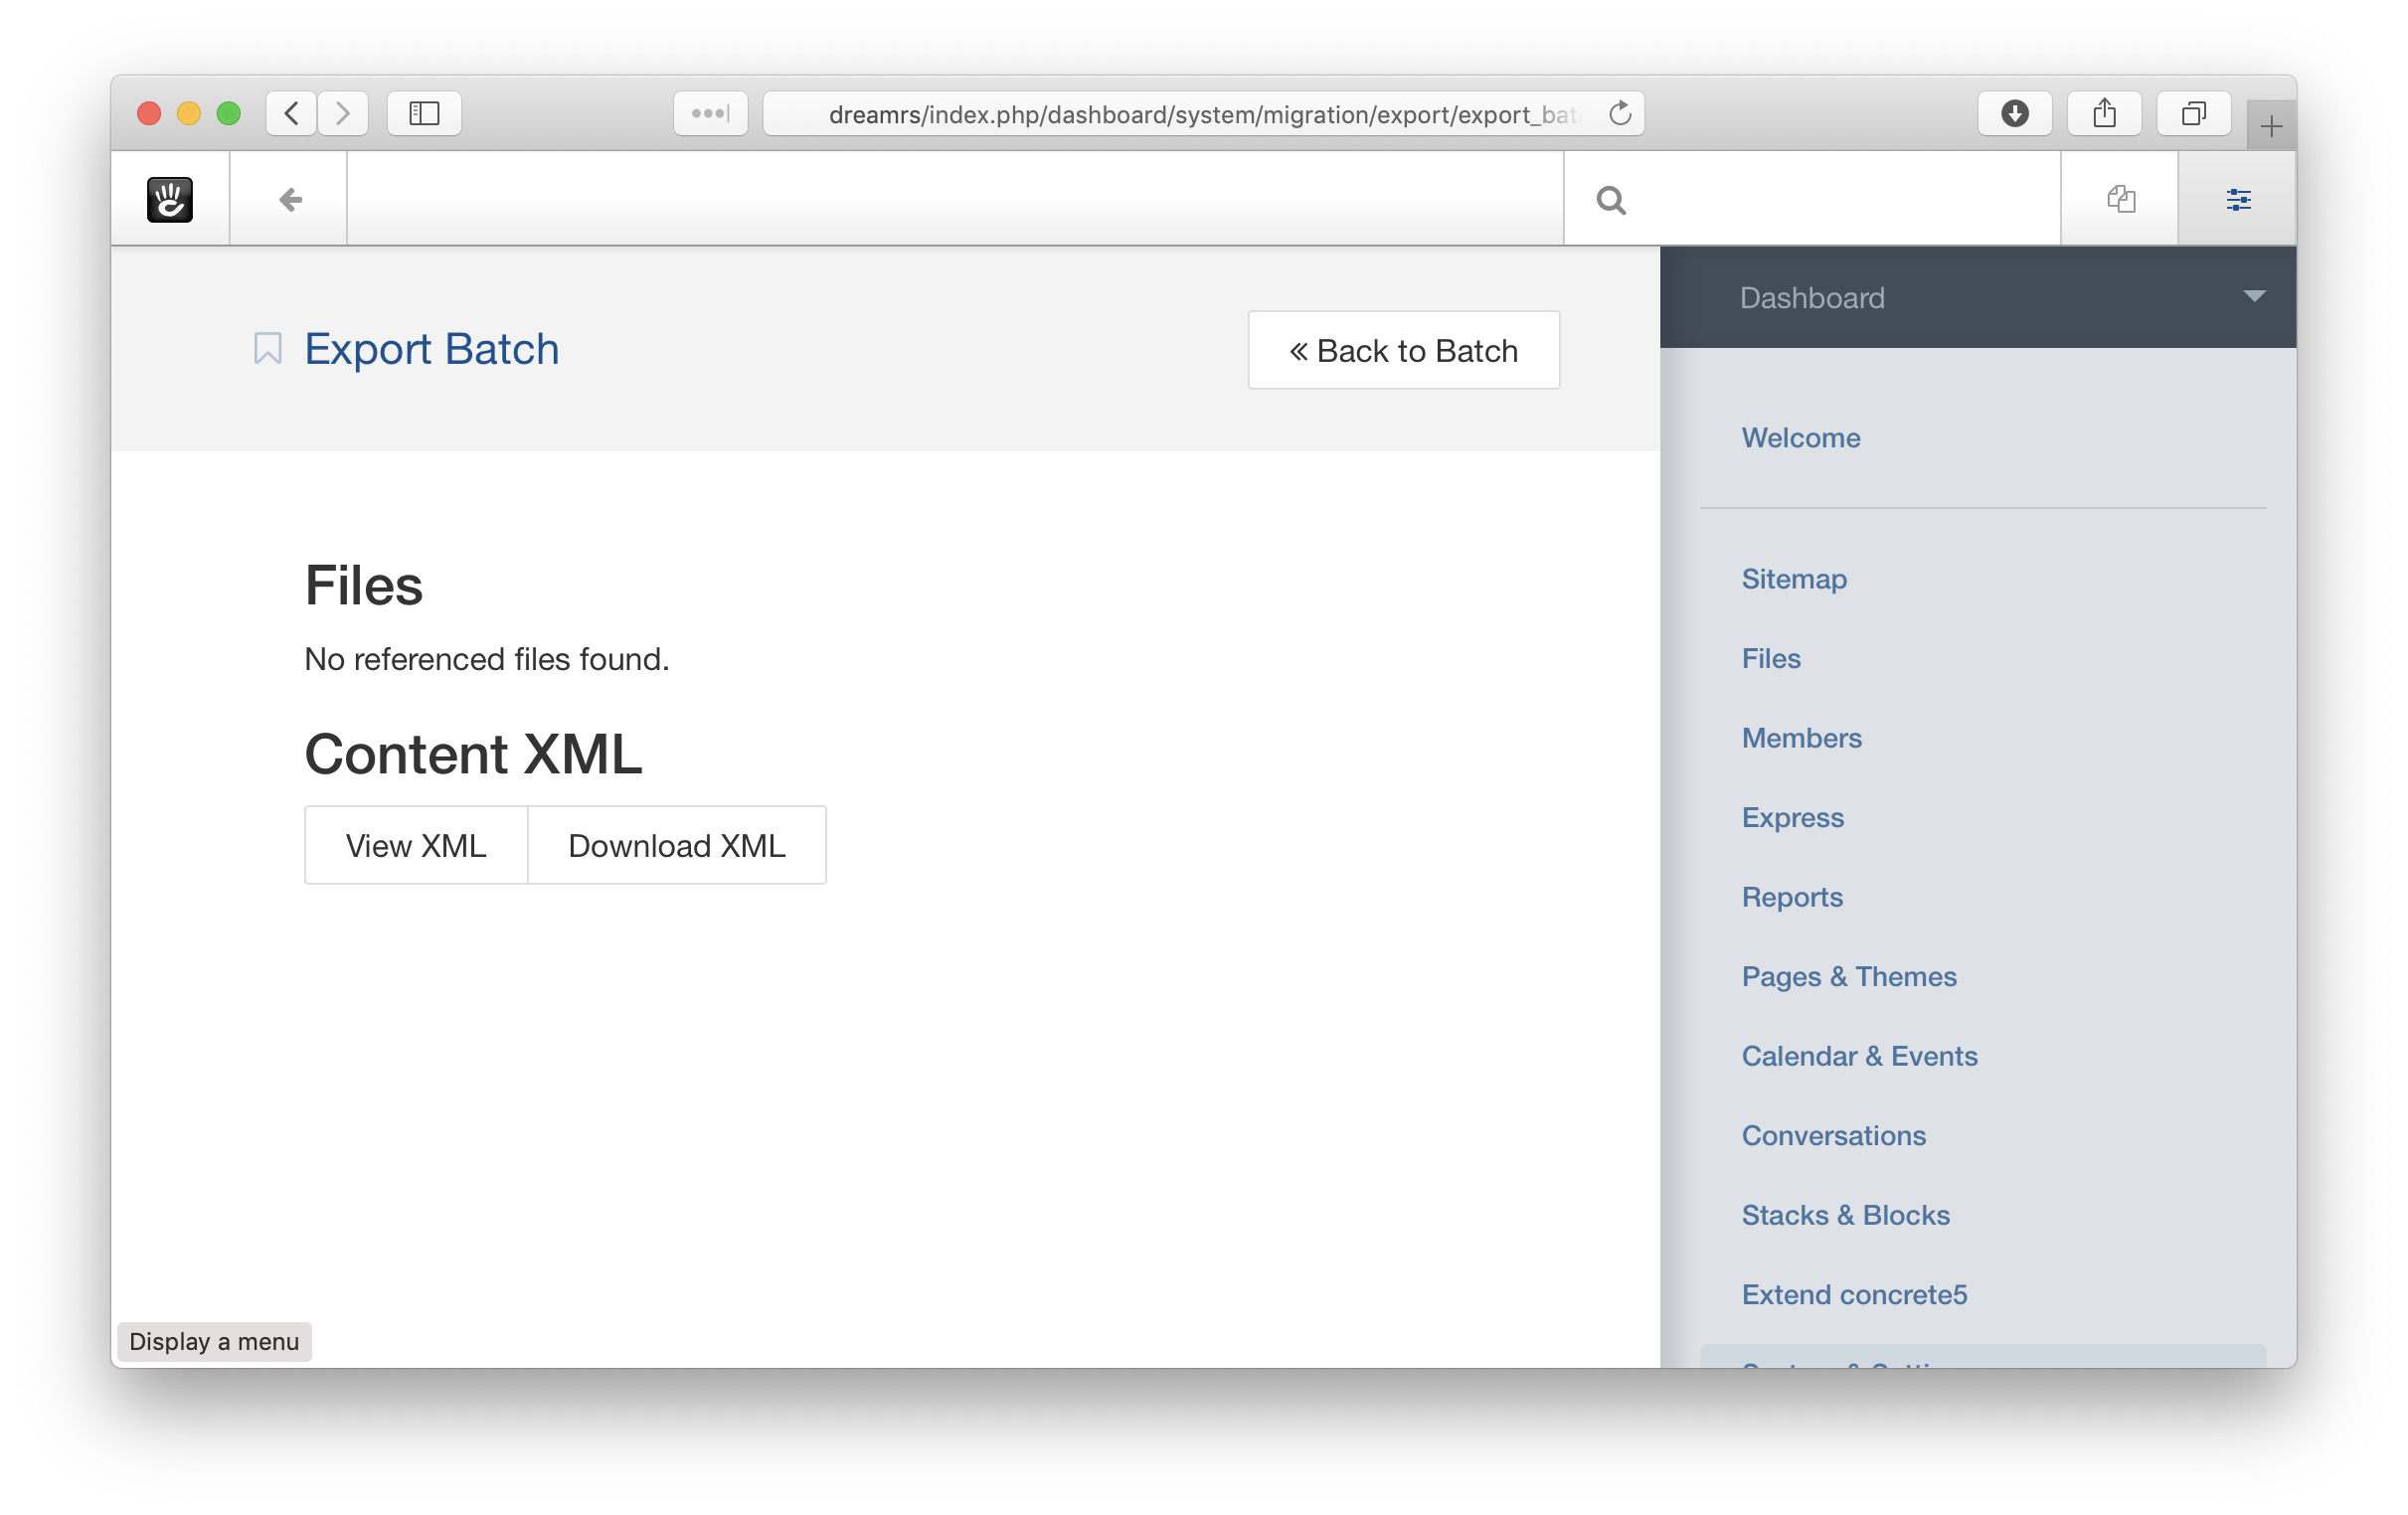
Go back to the batch details screen, and click Export Batch. On the Export screen, click Download XML.
Open the XML in your editor, and copy the Project page type node from your editor into the page_types/project.xml page:

When you copy this into page_types/project.xml, make sure you change the package=“” node to package=“dreamrs” in your <pagetype> node:

Test the XML
Unfortunately, since this page type is being installed through the XML but not added through an upgrade, you can’t really test it in the same way we’ve tested other content. Not to worry -- when we finish this project we will test a full clean reinstall of everything to ensure that our CIF XML is functioning properly.