Once you have a centralized help registry for your application, you can start to do some interesting things with it. Let's add a Launch Guide button to our acme_widgets Dashboard page. Change this:
$this->app['help/dashboard']->registerMessageString('/dashboard/acme\_widgets/add',
    t('Add a Widget.')
);
to this:
$this->app['help/dashboard']->registerMessageString('/dashboard/acme\_widgets/add',
    array(t('Add a Widget.'), 'add-widget')
);
This will keep the current text (since its the first parameter of the array), with the second parameter being the string identifier of a JavaScript Guide on the page. This will also enable the button in the Help overlay:

Clicking the button will result in a JavaScript error. That's because we haven't added any JavaScript to the page to handle our guide. We need to register our guide with the page, using the Concrete ConcreteHelpGuideManager JavaScript object. A guide is simply a list of steps (JavaScript objects in an array) registered with the Tourist.Tour class. Tourist is a JavaScript tour library built-in to Concrete and enabled in the Dashboard.
Here's an example of a simple tour for our 'add-widget' tour. This JavaScript can simply be added at the bottom of the Dashboard page's view template:
<script type="text/javascript">
    $(function () {
        var steps = [{
            content: '<p><span class="h5"><?=t('Widget Name')?></span><br/><?=t('The name of the widget.')?></p>',
            highlightTarget: false,
            nextButton: true,
            target: $('input[name=widgetName]'),
            my: 'top center',
            at: 'bottom center'
        }];

        var tour = new Tourist.Tour({
            steps: steps,
            tipClass: 'Bootstrap',
            tipOptions:{
                showEffect: 'slidein'
            }
        });
        tour.on('start', function() {
            ConcreteHelpLauncher.close();
        });
        ConcreteHelpGuideManager.register('add-widget', tour);
    });
</script>
This should be pretty self-explanatory. First, we set up the steps array. The options available in this array are all documented in the Tourist documentation. Next, we create a new tour object. Since we want the help launcher to close the moment we start the tour, we bind the ConcreteHelpLauncher.close() method to the start event of our tour (note: this is optional). Finally, we register this tour object to "add-widget" – which is the name of the guide as referenced in registerMessageString above.
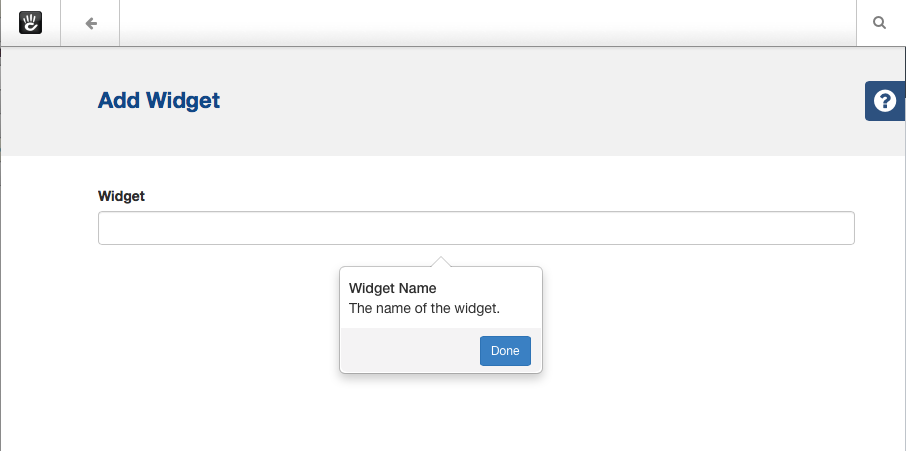
And that's it! Clicking the button launches our guide:

The Tourist documentation goes into great detail on how to customize these guide steps. We chose Tourist because it was both attractive and flexible: if you're comfortable with JavaScript you have a lot of control over how these tours work and interact with the page.