AWS EC2 micro instance for Concrete CMS
AWS EC2 instance for Concrete CMS
The following procedures help you set up everything you need to run Concrete on AWS. It will explain step by step how to install the Apache web server with PHP and MySQL support on your Amazon Linux instance. You can use this server to host a most cms’s or deploy a dynamic PHP application that reads and writes information to a database.
Sign into AWS
Sign into you aws account at aws.amazon.com.
You can use the same account you do for shopping on amazon. If you don't have an account you can create your aws account here.
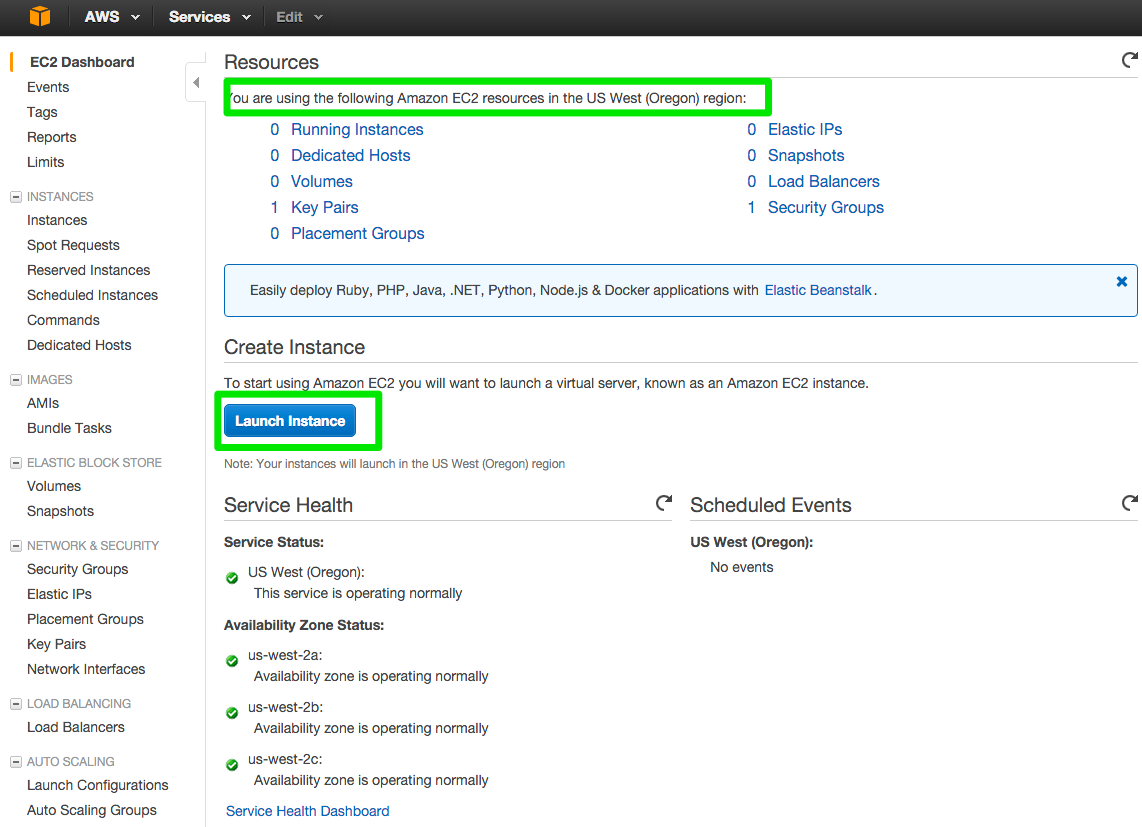
To create a new instance, access the AWS Management Console and click EC2:

Create Instance
To start using Amazon EC2 you will want to launch a virtual server, known as an Amazon EC2 instance. Click the blue button that says launch instance. Make note of what region you set this up in.
Amazon for free
The AWS Free Tier includes services with a free tier available for 12 months following your AWS sign-up date, as well as additional service offers that do not automatically expire at the end of your 12 month AWS Free Tier term.
Choose an Amazon Machine Image (AMI)
An AMI is a template that contains the software configuration (operating system, application server, and applications) required to launch your instance.
Click the blue select button and choose amazon64-bit Amazon Linux AMI

What type of EC2 instance should you use?
I started my experiments with a t2.micro instance because its free. Once your site goes live or your load starts increasing, you can upgrade to support more bandwidth. Typically a Concrete site that has a couple of thousand visitors will stay within the limitations. You can also check out this article by the engineers at Amazon for more info on limits.
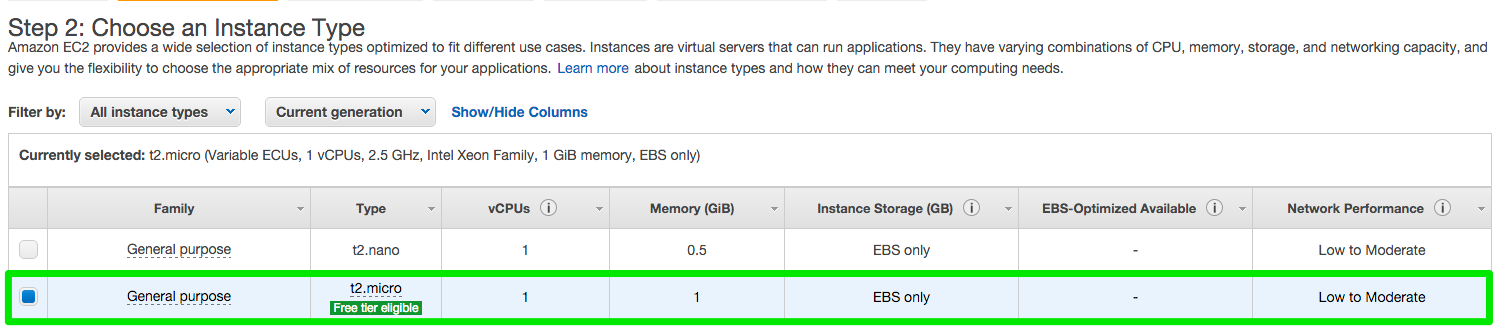
Choose an Instance Type
Amazon EC2 provides a wide selection of instance types optimized to fit different use cases. Instances are virtual servers that can run applications. They have varying combinations of CPU, memory, storage, and networking capacity, and give you the flexibility to choose the appropriate mix of resources for your applications.
**Select t2.micro and click Next Configure Instance Details **
Configure Instance Details
Configure the instance to suit your requirements. You can launch multiple instances from the same AMI, assign an access management role to the instance, and more. For this tutorial we’ll leave the defaults.
Click Next Add Storage

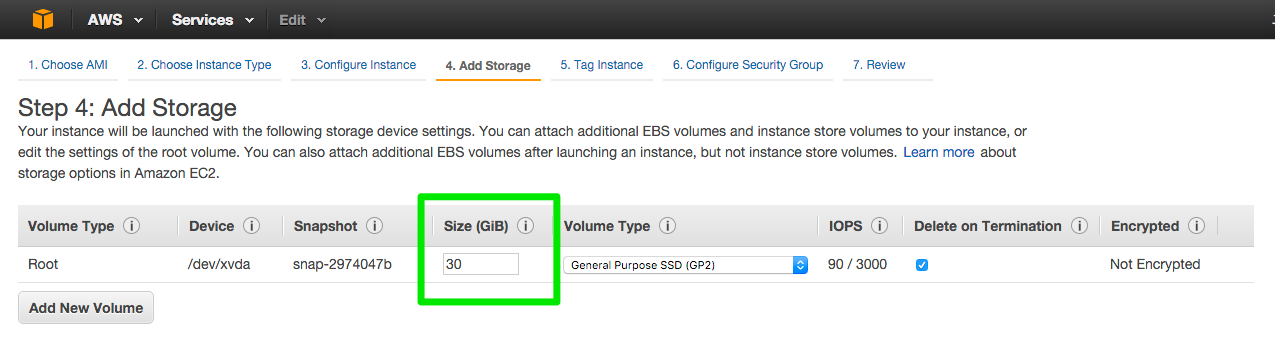
Add Storage
Your instance will be launched with the following storage device settings. You can attach additional EBS volumes and instance store volumes to your instance, or edit the settings of the root volume. You can also attach additional EBS volumes after launching an instance, but not instance store volumes.
Free tier eligible customers can get up to 30 GB of EBS General Purpose (SSD) or Magnetic storage
Change the size to 30gb and click Next: Tag Instance
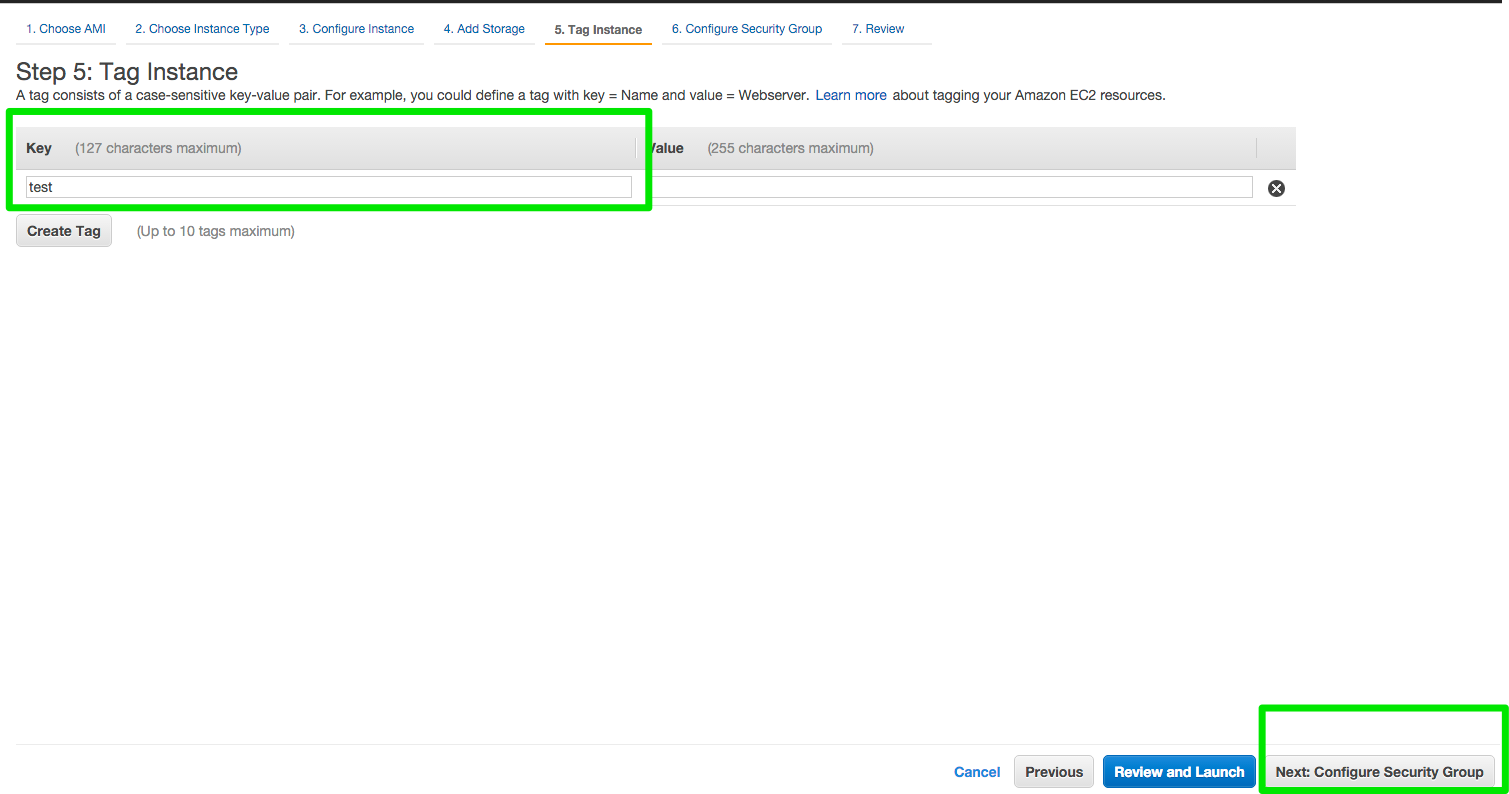
Tag your instance
To help you manage many instances, images, and other Amazon thing you can assign your own metadata to each resource in the form of tags. Tags enable you to categorize your AWS resources in different ways, for example, by purpose, owner, or environment.
create a test tag or if you have a naming convention use that.
Click Next Configure Security Group
Configure Security Group
unch A security group is a set of firewall rules that control the traffic for your instance. On this page, you can add rules to allow specific traffic to reach your instance. For example, if you want to set up a web server and allow Internet traffic to reach your instance, add rules that allow unrestricted access to the HTTP and HTTPS ports. You can create a new security group or select from an existing.
A default security group is named default, and it has an ID assigned by AWS. The following are the initial settings for each default security group:
Allow inbound traffic only from other instances associated with the default security group Allow all outbound traffic from the instance
For this tutorial we will use an existing security group
Click Select an existing security group Choose Defult
Click review and Launch

Review Instance Launch
Please review your instance launch details. You can go back to edit changes for each section. Click Launch to assign a key pair to your instance and complete the launch process.

Select an existing keypair or Create a new keypair
A key pair consists of a public key that AWS stores, and a private key file that you store. Together, they allow you to connect to your instance securely. For Linux AMIs, the private key file allows you to securely SSH into your instance.
For this tutorial we will Create a new key pair.
Choose Create a new key pair
Change the key pair name
Download your Key Pair (save to your .ssh if you are on mac)
Click Launch Instances

Your instances are now launching
If all goes well your instances will be launching and you will see
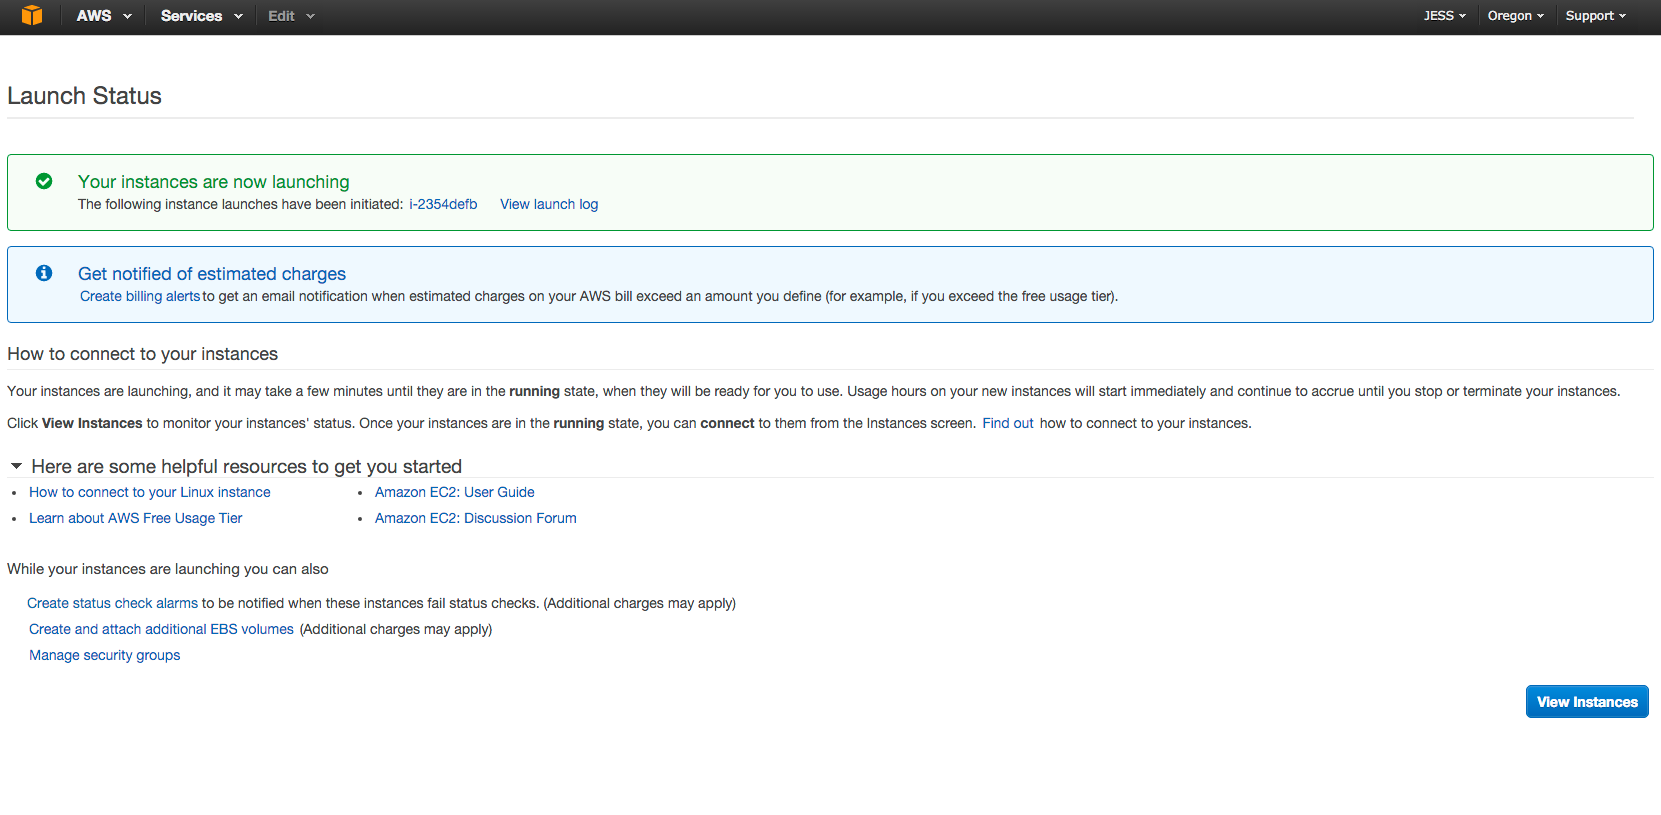
After a few minutes if you check back into your EC2 page you should see a new server in place. The server should have an IP address. Amazon by default has started to provide the IP to the server unlike before where only a DNS was provided.
SSH into your Instance
Once your instance is running, you can ssh into it. First, you need to identify the address of your instance:
Select the instance in the AWS Management Console, and look for the Public IP in the instance description:
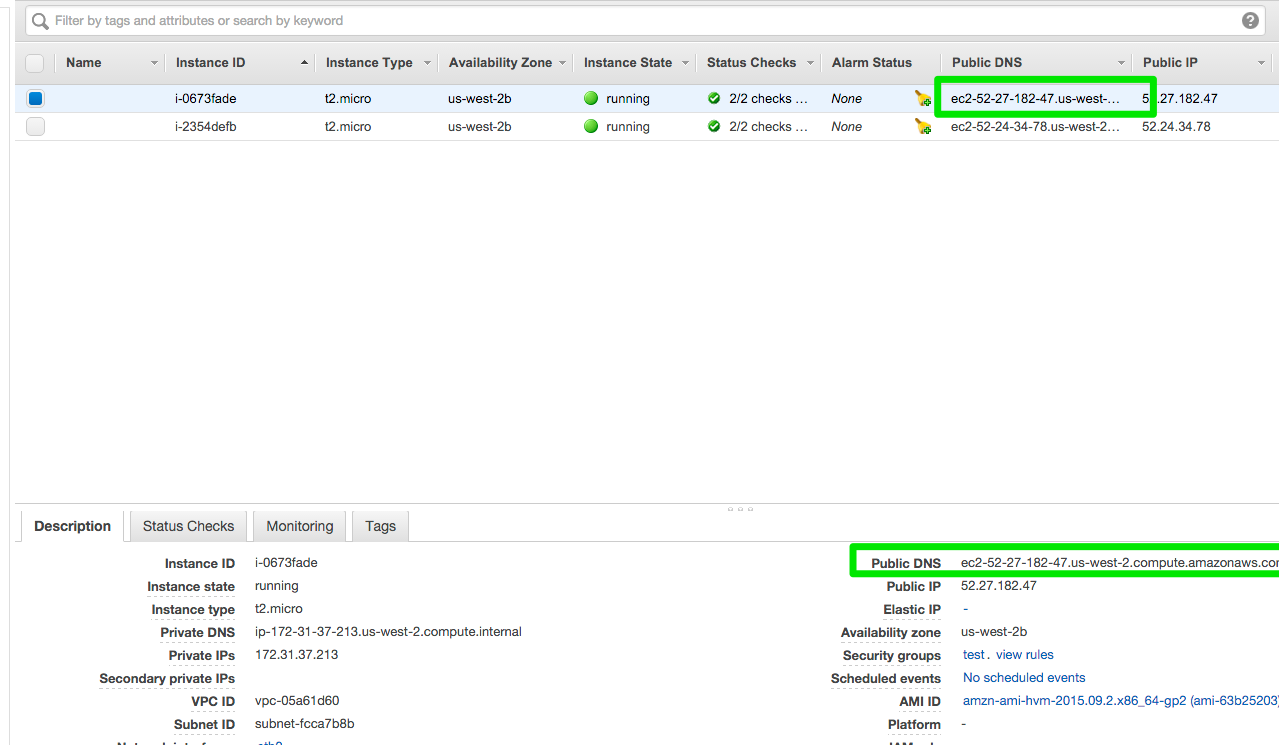
Use that address (and a path to your .pem file) to ssh into your instance:
Example:
ssh -i "test/.ssh/test.pem" ec2-user@ec2-52-27-182-47.us-west-2.compute.amazonaws.com
To access your instance:
- Open an SSH client.
- Locate your private key file (test.pem).
The wizard automatically detects the key you used to launch the instance. Your key must not be publicly viewable for SSH to work. Use this command to change permissions if needed:
chmod 400 test.pem
Connect to your instance using its Public DNS: ec2-52-27-182-47.us-west-2.compute.amazonaws.com
ssh -i "test/.ssh/test.pem" ec2-user@ec2-52-27-182-47.us-west-2.compute.amazonaws.com
One amazing tip that saves a lot of time is a drag and drop file into the terminal. This way you will not need to type the full file path.
If you need any assistance connecting to your instance, please see the AWS connection documentation.
If you receive an error while attempting to connect to your instance, see Troubleshooting Connecting to Your Instance.
Many of the shell commands below require root access. To avoid having to prefix these commands with sudo, let’s just switch user once and for all
A lot of these commands require root access. Lets change the user to sudo, to save on typing characters
sudo su
Install the Apache Web Server, PHP, MySQL To install the Apache Web Server, type:
yum install httpd
To install PHP, type:
yum install php php-mysql
To install MySQL, type
yum install mysql-server
Install mcrypt
yum install php-mcrypt
To in stall image processing and gd
yum install php-gd
Once everything is install go ahead an make sure everything is up to date type:
yum update
Start Up Services
service httpd start
service mysqld start
To test your Web Server, open a browser and access your web site using the public IP. You should see the Amazon Linux AMI Test page. If you see this page then everything is setup correctly thus far.
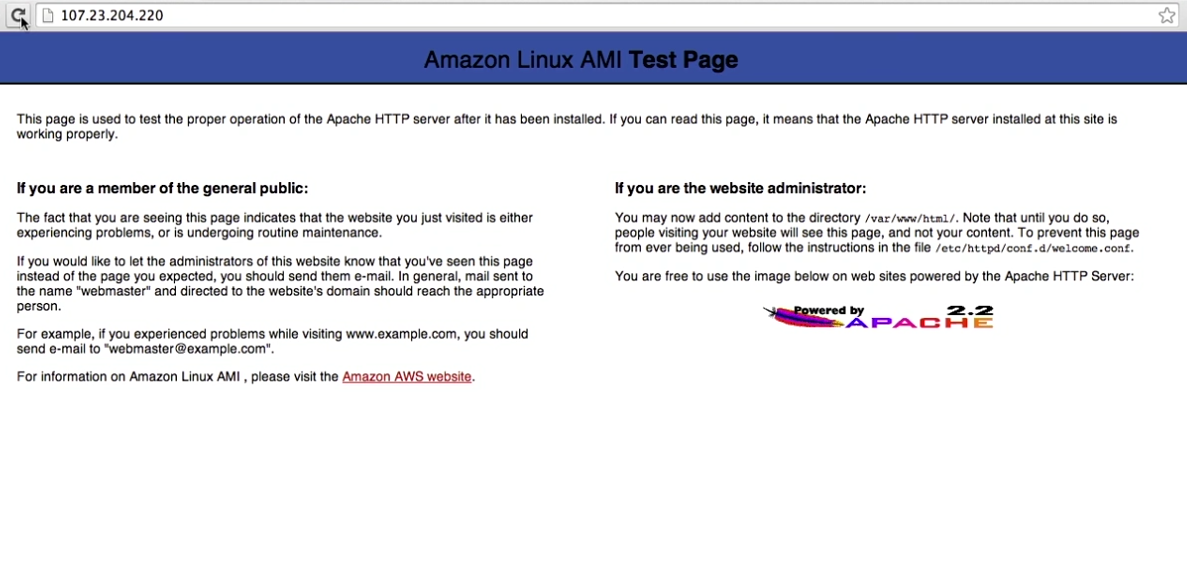 If you are unable to see this page. Check your security group. This is where most of the errors happen. You need to allow incoming traffic in your security group.
Set The Folder Permissions Go to this directory and set the permissions for the following users. Type:
cd /var/www/html
chown -R ec2-user:ec2-user /var/www/html
This is absolutely crucial as this is what allows Concrete to upload media and do an install
Enable .htaccess overrides
edit the configuration to allow the .htaccess file to override standard website configs. This allows you to use mod_rewrite and make pretty urls Type and edit the config
cd /etc/httpd/conf/
nano httpd.conf
http://docs.aws.amazon.com/AWSEC2/latest/UserGuide/install-LAMP.html
#
# AllowOverride controls what directives may be placed in .htaccess files.
# It can be "All", "None", or any combination of the keywords:
# Options FileInfo AuthConfig Limit
#
AllowOverride None
Change it to then
#
# AllowOverride controls what directives may be placed in .htaccess files.
# It can be "All", "None", or any combination of the keywords:
# Options FileInfo AuthConfig Limit
#
AllowOverride All
save (conctrol x enter) To check the syntax of your Apache configuration files without needing to restart the server and test, you can issue the following command on Debian and Ubuntu systems:
httpd -t
If Syntax OK type:
service httpd restart
Create and Secure MySQL Database
First we’ll login to the MySQL server from the command line with the following command:
mysql -u root -p
There is no password on the default install of mysql, press return at the password prompt
lets secure
The mysql_secure_installation command walks you through the process of setting a root password and removing the insecure features from your installation. Start the MySQL server
sudo service mysqld start
Run mysql_secure_installation. type:
sudo mysql_secure_installation
- Press enter when asked for the root account password
- Type Y to set a password, and ever a secure password twice.
- Type Y to remove the anonymous user accounts.
- Type Y to disable remote root login.
- Type Y to remove the test database.
- Type Y to reload the privilege tables and save your changes. If you want the MySQL server to start at every boot, enter the following command.
sudo chkconfig mysqld on
You should now have a fully functional LAMP web server. If you add Concrete files to the document root at /var/www/html, you should be able to view that content at the public DNS address or public IP for your instance.
If you want to install phpmyadmin you can follow these instructions: http://docs.aws.amazon.com/AWSEC2/latest/UserGuide/install-LAMP.html#SecuringMySQLProcedure ownload the latest c5 installation package with the wget command.
wget http://www.concretecms.org/download_file/-/view/85780/ -O c5.zip
Unzip the installation package. The installation folder is unzipped to your html folder type
unzip c5.zip
Log in to the MySQL server
mysql -u root -p
Create a user and password for your MySQL database. Your Concrete installation uses these values to communicate with your MySQL database. Enter the following command, substituting a unique user name and password.
CREATE USER 'test-user'@'localhost' IDENTIFIED BY 'your_strong_password';
Create your database. Give your database a descriptive, meaningful name. Type
CREATE DATABASE `concrete5-db`;
Grant full privileges for your database to the Concrete user that you created earlier.
GRANT ALL PRIVILEGES ON `concrete5-db`.* TO "test-user"@"localhost";
Flush the MySQL privileges to pick up all of your changes.
FLUSH PRIVILEGES;
Exit the mysql client.
exit
You can follow the rest of the Concrete installation directions here