Loading Configuration Based On Host and Environment
By default, concrete5 has a single database.php configuration file. This works well when you have a single machine or you can ensure that all the databases used in production and development share the same credentials. But what if they don't? What if you as a developer don't want to check your database credentials into your version control system?
The environment detection setup is for you. It's easy to use a custom database configuration file on your local setup, separately from the one used by the production server. Let's assume that production uses the regular database.php. It looks like this:
<?php
return array(
    'default-connection' => 'concrete',
    'connections' => array(
        'concrete' => array(
            'driver' => 'c5_pdo_mysql',
            'server' => 'db-server.wherever.com',
            'database' => 'mydatabase',
            'username' => 'username',
            'password' => 'password',
            'charset' => 'utf8'
        )
    )
);
First, copy this file, and add an identifier to the beginning of it. My name is Andrew, so I'm going to copy it and name it "andrew.database.php". Then I'm going to change my copied version to use my local database credentials
<?php
return array(
    'default-connection' => 'concrete',
    'connections' => array(
        'concrete' => array(
            'driver' => 'c5_pdo_mysql',
            'server' => 'localhost',
            'database' => 'awesome',
            'username' => 'andrew',
            'password' => 'superelite',
            'charset' => 'utf8'
        )
    )
);
Now, I simply have to tell concrete5 that, on my local machine, we need to use "andrew" configuration files, instead of the default ones. There are two ways to do this:
- Through the machine's hostname detection
- Through an environment variable
Using the machine's hostname for the environment detection
Let's get my hostname. The easiest way to do this in OS X is to use the terminal.
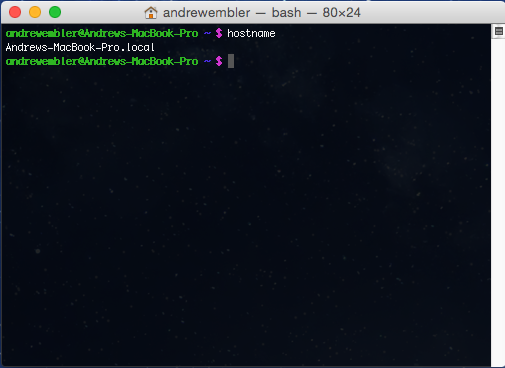
My host name is "Andrews-MacBook-Pro.local". So original.
Now, let's open up "application/bootstrap/start.php" in the application directory, and look down at the environment detection section. Normally it looks like this:
/**
 * ----------------------------------------------------------------------------
 * Detect the environment based on the hostname of the server
 * ----------------------------------------------------------------------------
 */
$app->detectEnvironment(
    array(
        'local' => array(
            'hostname'
        ),
        'production' => array(
            'live.site'
        )
    ));

return $app;
The hostname and live.site section are mock hostnames, and the array keys local and production that point to them are identifiers for configurations to use. Let's change it to understand that "andrew" exists, and map it to my host name.
/**
 * ----------------------------------------------------------------------------
 * Detect the environment based on the hostname of the server
 * ----------------------------------------------------------------------------
 */
$app->detectEnvironment(
    array(
        'andrew' => array(
            'Andrews-MacBook-Pro.local'
        )
    ));

return $app;
That's it! On the live site, "database.php" will be used (since it will always be falled back to if a mapped hostname override can't be found, but on my local machine any configuration files that start with "andrew" will be used if they're present.
Using an environment variable
In some occasions if you don not want to rely on the hostname of the computer, you can also use an environment variable named "CONCRETE5_ENV" to tell the system which environment configuration to use. With Apache webserver this is particularly easy if you have the mod_env module installed and enabled.
This module allows you to define the "CONCRETE5_ENV" environment variable through server config, virtual host block, directory block or your .htaccess file at the root of the concrete5 installation. Please note if you are using the .htaccess configuration file, this file should not be stored in your version control system.
When using the "CONCRETE5_ENV" environment variable, you also do not need to edit the environment detection block in "application/bootstrap/start.php" because when using this variable, you are already defining the environment for concrete5 to be running in, which makes the detection useless.
An example of defining this through the virtual host block:
<VirtualHost *:80>
    ServerName your.local.addr
    DocumentRoot "/www/concrete5_installation"

    # Define c5 environment
    SetEnv CONCRETE5_ENV andrew
</VirtualHost>
Remember to reload your webserver process after modifying its settings to apply them.
The same way you could simply add the same directive to the .htaccess file at the root of your concrete5 installation:
# At the top of the .htaccess file
SetEnv CONCRETE5_ENV andrew
Do not add the directive to both locations! Only use the one that best fits your needs or use some of the other configuration blocks where this setting can be defined.
As mentioned above, you need to have mod_env installed and enabled for Apache webserver to be able to use this. If you get HTTP 500 error page after adding this configurations directive or your webserver does not start properly after modifying the settings, you probably have not installed or enabled that module.
If you are using nginx webserver, you can use the "env" configuration directive to achieve the same result. More on this at the nginx documentation.
Other things to note
Once you get this working with the database config file, you can extend it to other config files. Any configuration file found in application/config can use this behavior. Want your own custom concrete.php config file, tailored to your local environment? You can create andrew.concrete.php the same way you created andrew.database.php.