Customize dashboard editing popup for attributes with many fields
The Problem
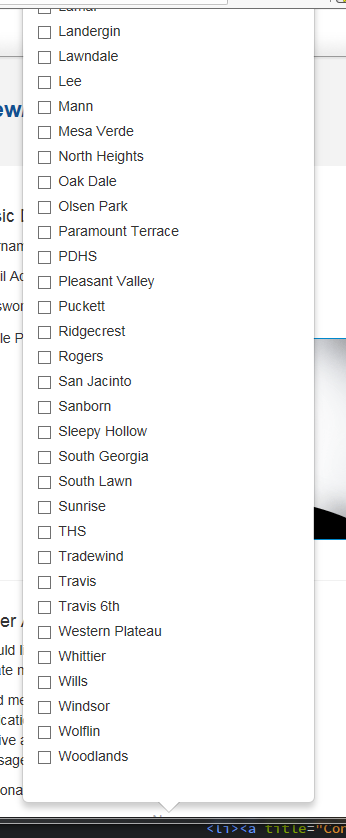
Here is a screenshot of a possible situation when editing attributes in the dashboard becomes difficult.

The top options are impossible to reach. I wanted to solve this problem and I knew it was easy with some CSS but I didn't want to modify the core. I had to find a way to override the core styling.
Figuring out the Solution
Figuring out the CSS
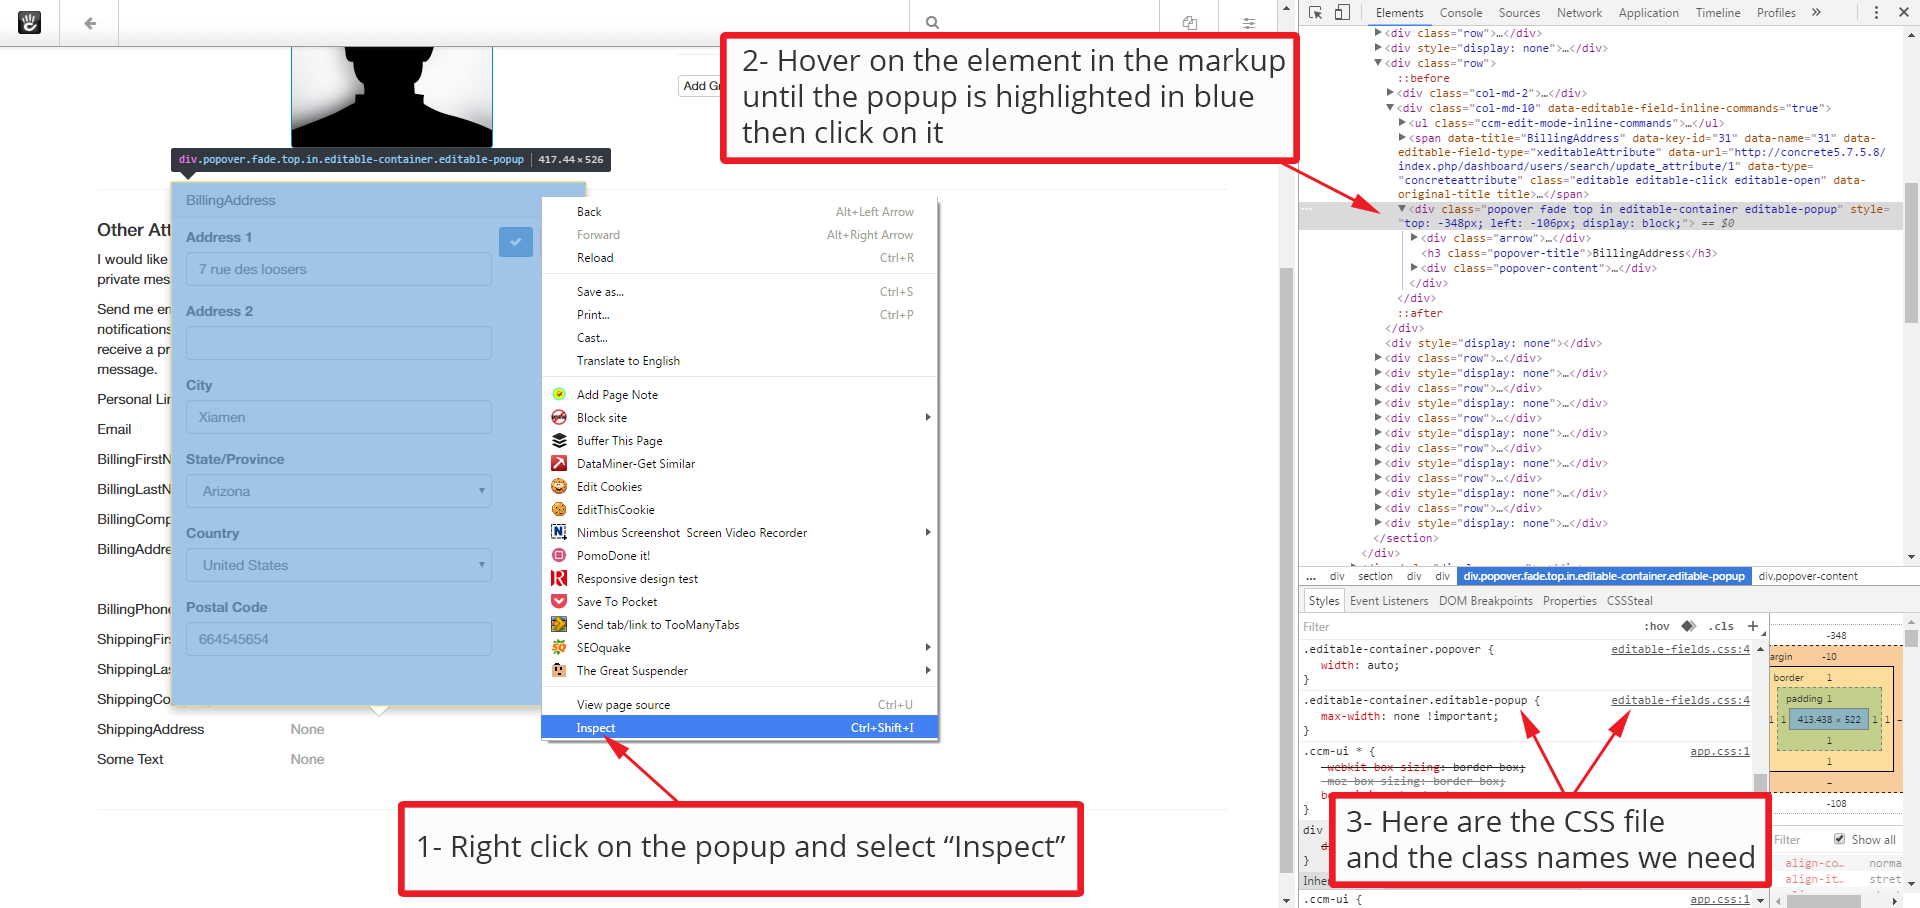
First I looked at how to do what was needed from a CSS point of view. I did that simply in Chrome's developer tools by inspecting the popup. I took note of its specific class names and how they were used in the core stylesheet
Doing that I figured out what CSS file was responsible for styling that popup. It's concrete/css/editable-fields.css

Finding out Where and How the CSS was loaded
I wasn't sure whether the CSS file was loaded using the asset system or if it was hard-coded (yes the core team does some weird things sometimes)
I did a search in the concrete folder to see where that css file was called from. I discovered it was registered as an asset in concrete/config/app.php. Line 673 to 675:
'core/app/editable-fields' => array(
    array('css', 'css/editable-fields.css', array('minify' => false))
),
What we learn from these 3 lines of code is that the file editable-fields.css is called as an asset under the label core/app/editable-fields.
This is important so I made a note of this.
Finding a Way to use the modified CSS
I needed a way to add to that CSS file or to load another CSS file to add my styling.
I looked in the developers' docs here and I found the page on registering an asset
Thanks to the information there I went to look into the custom startup file application/bootstrap/app.php and it is full of comments explaining how to do different things including replacing a core asset.
Minimizing Future Impact
One solution would have been to simply take the whole editable-fields.css file, add my styling to it and load my modified file as an asset instead of the original one.
But that didn't seem right as the core team modifies their core styling from time to time (v8 looking at you) and I wanted to habe the smallest impact possible.
I decided to create a CSS file that would do 2 things:
- Import the original editable-fields.css file
- add my styling just below the import
The last thing I had to decide on was where to put the file. I knew it had to be in the application folder but there is no CSS folder there so I decided to create a CSS folder inside the application/files folder and put the file there. I also called it editable-fields.css but anything would have been ok.
The Code
In the end this is what I had:
The CSS/Styling
The CSS file application/files/css/editable-fields.css
// Import the original CSS file
@import url("../../../concrete/css/editable-fields.css");
// Add the styling to allow a vertical scrollbar
.editable-container.editable-popup {
    max-height: 350px;
    overflow-y: auto;
    overflow-x: hidden;
}
You can modify the max-height to suit your need and you ca also probably find better looking solution with multi columns and other fancier solutions but this one works and it is solid.
Loading the CSS
I then added my asset replacing code in the application/bootstrap/app.php file
use \Concrete\Core\Asset\AssetList;
use \Concrete\Core\Asset\Asset;
$al = AssetList::getInstance()
// Remember the asset label we noted above? here it is
->getAsset('css', 'core/app/editable-fields')
->setAssetURL('/application/files/css/editable-fields.css');
Something threw me off a little is that in the docs it says:
The path specified in the register() function is relative to one of the following
- The application/ directory
- The packages/package_handle/ directory (if a package handle or package object is specified as part of the register() method.)
- The concrete/ directory
So since my CSS file was in application/files/css and the docs states that the path specified in the register() function can be relative to the application directory, at first I was calling my CSS file like so:
->setAssetURL('/files/css/editable-fields.css');
It didn't work at all and after a little head banging and lots of re-reading I figured out that since I was not using the register() function but the setAssetURL() function I probably needed to make it relative to my root instead so I added the application folder to the path
->setAssetURL('/application/files/css/editable-fields.css');
The Result
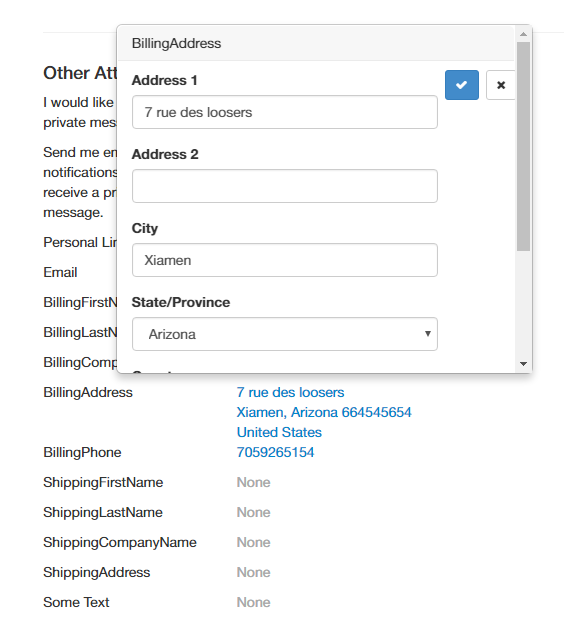
With that code in place, when editing attributes from the dashboard the popup height will be 350px tall or less and there will be a vertical scrollbar when needed.

Using the exact same method you probably could style many things differently in the dashboard but I really only recommend it if something is really a problem like we had here.