Another area of significant improvement in the version 9 customizer is in how the customizer treats fonts, and the types of styles associated with them. In version 8 and below the only way to access this style was through the use of the Type style. The Type style was very powerful, but it required the use of all the various sub-properties. If you had a type style that was editable, you had to specify text transform, font style, font size, color, etc... It was pretty inflexible. It wasn't possible to, say, create a variable just for something like font family.
Well, now it is.
The following styles which were part of the Type style are now their own properties, and work just like "Color" and "Size".
- Font Family
- Font Style
- Font Weight
- Text Decoration
- Text Transform
(The Type style is still around – we'll cover it soon.) In this example we're going to add a style for heading font families, and use the Font Family style type for it.
Body Font
In our theme, we've specified the body font family with a SASS variable in _shared-variables.scss:
$font-family-base: "Bellota Text";
This overrides any Bootstrap 5 defaults with our own custom font. We've also imported those fonts into shared variables with
@import url(//fonts.googleapis.com/css2?family=Bellota+Text:wght@400;700&display=swap);
Let's make this configurable from our customizer. The first step is to remove this $font-family-base from _shared-variables.scss and move it into the two _customizable-variables.scss files. Here's what presets/default/_customizable-variables.scss looks like:
$primary: #375d84 !default;
$secondary: #eb7724 !default;
$light: #fff !default;
$body-bg: #ffd89f !default;
$fun: #ec008c !default;

// Spacing variables
$container-margin-y: 3rem !default;

// Body Font
$font-family-base: "Bellota Text" !default;
(Don't forget to add !default to the declaration.)
New SASS
We don't even have to add any new SASS or SASS imports, because all of this is already handled by Bootstrap 5, since this is one of their variables.
Build Skins
Let's rebuild the skins to verify that the customizer still works.
npm run production
Add to Styles XML
Now we have to add $font-family-base to the styles.xml.
<style name="Base Font Family" variable="font-family-base" type="font-family"/>
to one of the style sets.
<?xml version="1.0"?>
<styles version="2.0" lang="scss">
    <set name="Base Colors">
        <style name="Primary" variable="primary" type="color"/>
        <style name="Secondary" variable="secondary" type="color"/>
        <style name="Light" variable="light" type="color"/>
    </set>
    <set name="Theme Custom Colors">
        <style name="Fun" variable="fun" type="color"/>
    </set>
    <set name="Body">
        <style name="Background" variable="body-bg" type="color"/>
        <style name="Container Margin-Y" variable="container-margin-y" type="size"/>
        <style name="Base Font Family" variable="font-family-base" type="font-family"/>
    </set>
</styles>
Add Webfonts to Styles XML
Next, we need to add any custom Google Fonts we're using to styles.xml. We don't have to do this as long as the fonts themselves aren't accessible via the customizer, but the moment we want to show Bellota Text or any other custom Google Font, we need to register them in the XML. Let's add Bellota Text and Fredoka One to styles.xml.
<webfonts>
    <preset identifier="default">
        <font type="google" name="Fredoka One" />
        <font type="google" name="Bellota Text" />
    </preset>
    <preset identifier="wilma">
        <font type="google" name="Fredoka One" />
        <font type="google" name="Bellota Text" />
    </preset>
</webfonts>
Add these directly below the <styles> node. Make sure to group the fonts below the presets. In this way you can actually have different Google Fonts accessible to the Font Family controls in different presets.
The final styles.xml should look like this:
<?xml version="1.0"?>
<styles version="2.0" lang="scss">
    <webfonts>
        <preset identifier="default">
            <font type="google" name="Fredoka One" />
            <font type="google" name="Bellota Text" />
        </preset>
        <preset identifier="wilma">
            <font type="google" name="Fredoka One" />
            <font type="google" name="Bellota Text" />
        </preset>
    </webfonts>
    <set name="Base Colors">
        <style name="Primary" variable="primary" type="color"/>
        <style name="Secondary" variable="secondary" type="color"/>
        <style name="Light" variable="light" type="color"/>
    </set>
    <set name="Theme Custom Colors">
        <style name="Fun" variable="fun" type="color"/>
    </set>
    <set name="Body">
        <style name="Background" variable="body-bg" type="color"/>
        <style name="Container Margin-Y" variable="container-margin-y" type="size"/>
        <style name="Base Font Family" variable="font-family-base" type="font-family"/>
    </set>
</styles>
Test Customizer
Let's test the customizer.
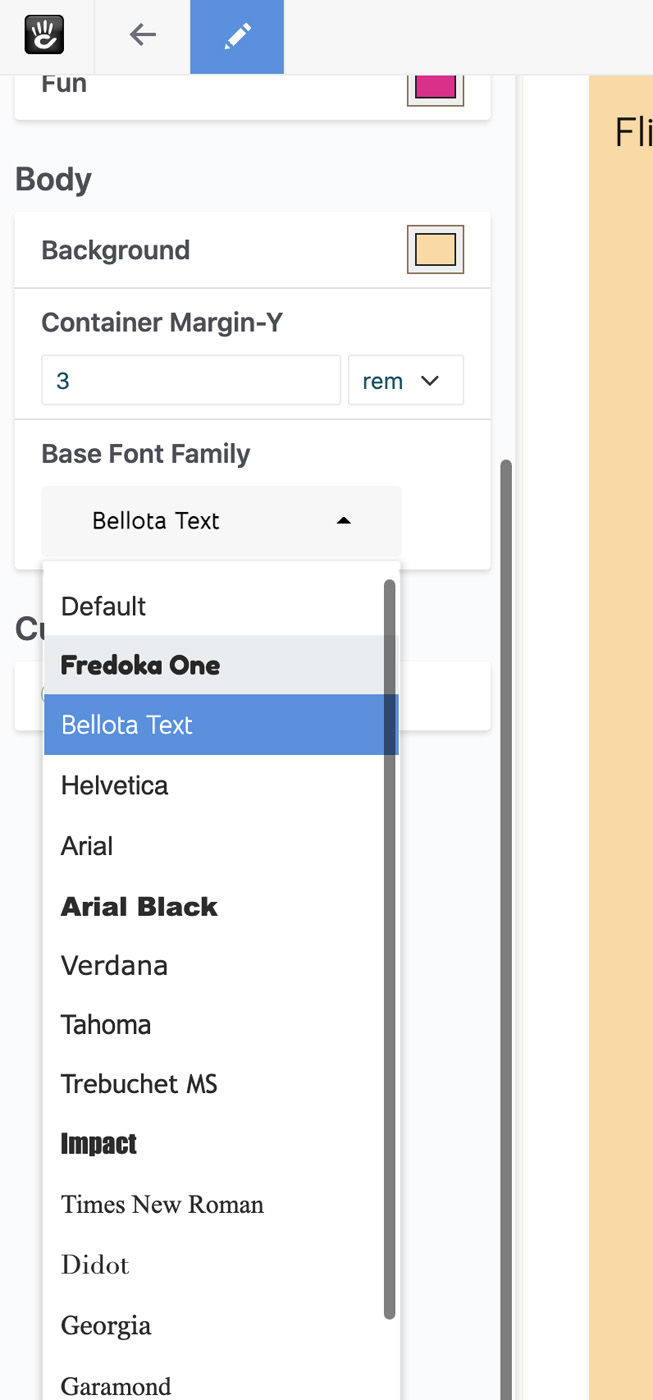
It works! Our value is being pulled in properly, and populated with the correct default value. Both fonts are showing up properly as available to be selected, and they're even rendering their type face properly in the select menu.
Let's change this value to something else, like Georgia.
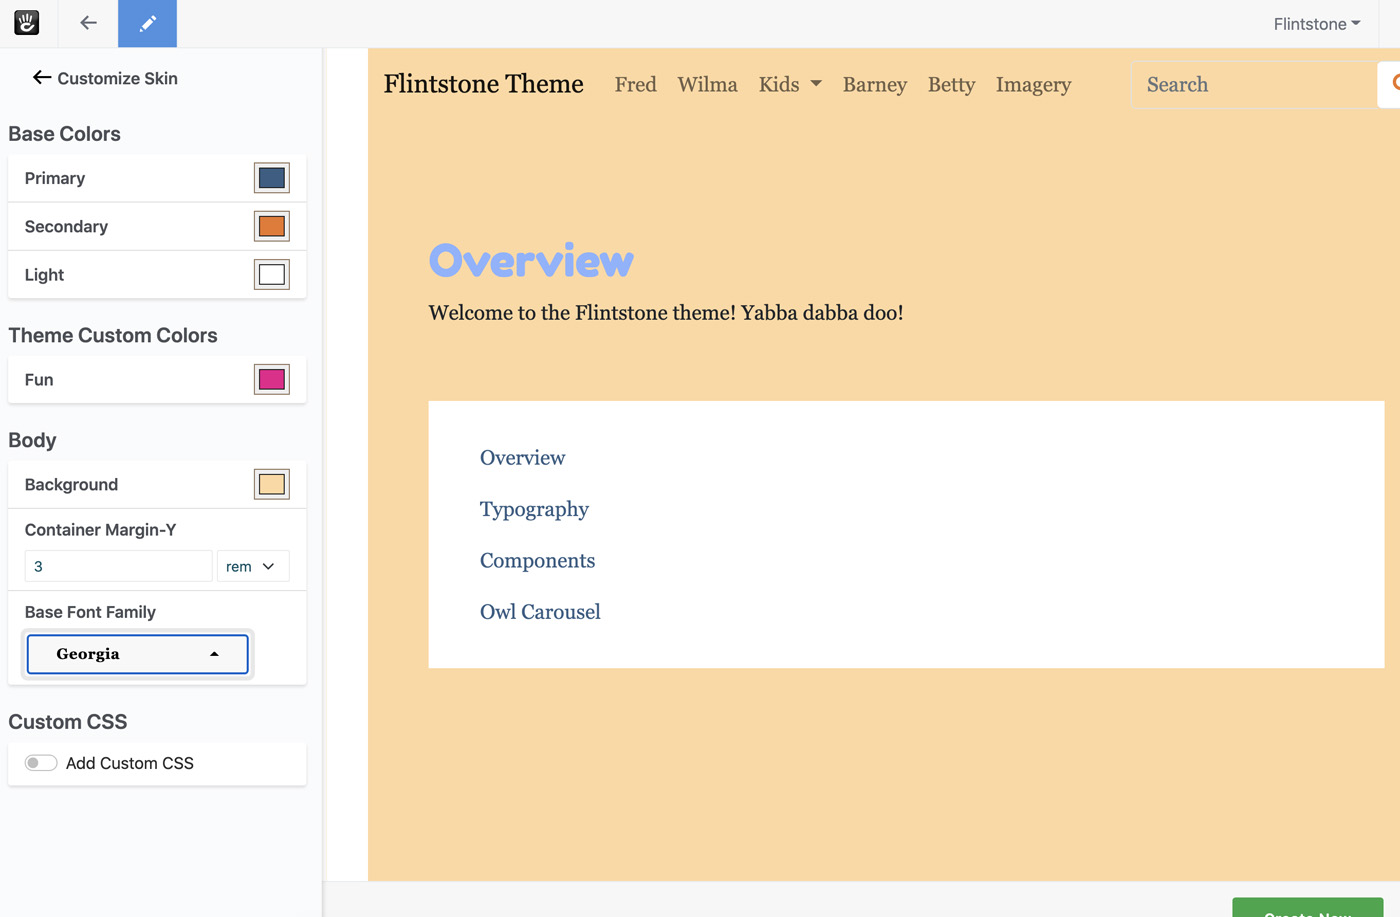
It works! Our page reloads the moment we change the value, and we get the new font family affecting all the various fonts.
Conclusion
That's it! We've added a font family style to our theme, and used it to control the entire base font of our theme.
Next, let's add a type container style that controls the heading within our site.