The File Object
The File Object
The Concrete\Core\File\File object is commonly used in Concrete CMS, representing files uploaded to the file manager. It's utilized by blocks like:
- File
- Image
- Image Slider
This object facilitates interaction with the File Manager, which handles the upload, import, and storage of files, converting them into File objects. Developers can focus on using the files without worrying about the underlying processes. The File Manager also manages file permissions, metadata, maintains file versions for rollbacks, and supports workflow, enhancing Concrete CMS as a Digital Asset Management System. The following sections will explore how to enable block integration with the File Manager, manually import files, and programmatically manage File objects.
Getting a File By ID
All File objects have a unique numerical ID. If you know the exact numerical ID of the page you want to work with, use this code:
$f = \File::getByID(1); // Retrieves the File object with an ID of 1.
Working with the File Object
Once you have a File object, there's a lot you can do with it. All methods on the Concrete\Core\File\File object are available to you, as well as all methods in the Concrete\Core\File\Version object. Every time you call a method on a File object, if the File class itself doesn't contain the method, the approved version of the File object will be retrieved, and that method will be run on it. For example, taking the $f File object above:
print $f->getFileID();
This retrieves "1" – by running the getFileID() method on the $f object itself.
print $f->getURL();
This retrieves http://www.example.com/1234/1234/1234/foo.txt – the URL of the file. The method getURL() doesn't exist on the \Concrete\Core\File\File object – it exists on the \Concrete\Core\File\Version object. The File object runs $this->getApprovedVersion() behind the scenes to retrieve the approved version of the File, and passes the method onto it.
Retrieving a Specific File Version
Most of the time you'll want to worry about the approved version of the File. After all, this is the version that has specifically been approved through the file manager (or, it's the most recent version if a specific approved version hasn't been selected.) Advanced applications might need more flexibility, however. If, for example, you know the approved version of the File isn't the most recent one, here's how you might work with them independently:
$approved = $f->getApprovedVersion(); // Retrieves the approved version of a File
$recent = $f->getRecentVersion(); // Retrieves the most recent version of a File
$specific = $f->getVersion(5); // Retrieves the version of the file with the specific version ID of 5.
$modify = $f->getVersionToModify(); // Returns a file version object that is to be written to. Computes whether we can use the current most recent version, OR a new one should be created
In all these cases, the returned object is an instance of a specific Concrete\Core\File\Version object. The API documentation details all of the methods available on this object.
Add File Manager Support to Blocks and Single Pages
Access the File Manager and File objects through the File Manager Service, using methods to create form elements that return File object IDs on submission.
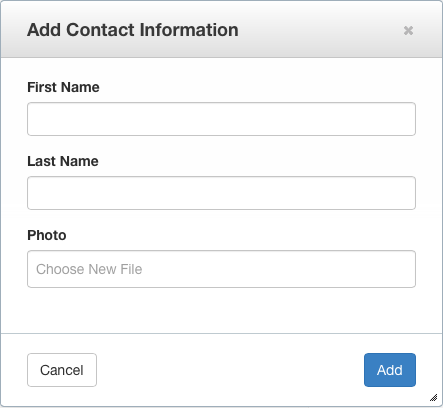
Example: Enhancing a Contact Information Block Template
Add a photo upload feature to a form template:
<div class="form-group">
    <label class="control-label" for="first_name">First Name</label>
    <input class="form-control" name="first_name" value="<?php echo $first_name?>" />
</div>
<div class="form-group">
    <label class="control-label" for="last_name">Last Name</label>
    <input class="form-control" name="last_name" value="<?php echo $last_name?>" />
</div>
<div class="form-group">
    <label class="control-label">Photo</label>
    <?php
        $service = Core::make('helper/concrete/file_manager');
        print $service->file('photo', 'photoID', 'Select Photo');
    ?>
</div>
- Clicking the form element opens the File Manager for file selection. The chosen file ID is stored in "photoID".

Add photoID Field to Database
Add a photoID field to your block's database table:
AXMLS (Most Common)
<field name="photoID" type="I" size="10">
    <default value="0" />
    <unsigned/>
</field>
Doctrine XML (Used in 5.7.5 and Greater)
<field name="photoID" type="integer">
  <unsigned/>
  <default value="0"/>
</field>
- Refresh the block type from the Dashboard to update the database.
Handle saving the file in your Block controller:
public function save($args)
{
    $args['photoID'] = ($args['photoID'] != '') ? intval($args['photoID']) : 0;
    parent::save($args);
}
Supporting Edit Mode
Pass the $photo File object into the file() method to prepopulate the form in edit mode.
<?php
    $photo = false;
    if ($photoID) {
        $photo = \File::getByID($photoID);
    }
?>
<div class="form-group">
    <label class="control-label">Photo</label>
    <?php
        $service = Core::make('helper/concrete/file_manager');
        print $service->file('photo', 'photoID', 'Select Photo', $photo);
    ?>
</div>
Limiting By Type
Limit file selection by type:
<?php
    print $service->image('photo', 'photoID', 'Select Photo', $photo);
?>
- Find other filtering methods in the File Manager Service API Documentation.
Custom File Selection and Multiple Selection
Basic Example
Launch the File Manager with JavaScript and set a custom callback:
<a href="#" data-launch="file-manager">Select File</a>
<script type="text/javascript">
$(function() {
    $('a[data-launch=file-manager]').on('click', function(e) {
        e.preventDefault();
        ConcreteFileManager.launchDialog(function (data) {
            alert(data.fID);
        });
    });
});
</script>
Retrieving File Details
Retrieve file details with a JSON object:
<a href="#" data-launch="file-manager">Select File</a>
<script type="text/javascript">
$(function() {
    $('a[data-launch=file-manager]').on('click', function(e) {
        e.preventDefault();
        ConcreteFileManager.launchDialog(function (data) {
            ConcreteFileManager.getFileDetails(data.fID, function(r) {
                jQuery.fn.dialog.hideLoader();
                var file = r.files[0];
            });
        });
    });
});
</script>
Selecting Multiple Files
Enable multiple file selection:
<a href="#" data-launch="file-manager">Select File</a>
<script type="text/javascript">
$(function() {
    $('a[data-launch=file-manager]').on('click', function(e) {
        e.preventDefault();
        ConcreteFileManager.launchDialog(function (data) {
            console.log(data.fID); // With multiple selection this will ALWAYS be a JS array.
        }, {
            multipleSelection: true
        });
    });
});
</script>
Working with Files Programmatically
Developers can use the Concrete CMS API for file operations like setting attributes, updating names, or changing storage locations.
Setting Attributes on an Existing File
For a file attribute 'is_featured' of checkbox type:
$file = \File::getByID(3);
$file->setAttribute('is_featured', true);
For a select attribute 'selected_color':
$file = \File::getByID(3);
$values = array('Red', 'Green');
$file->setAttribute('selected_color', $values);
Updating a File's Name or Description
To modify a file's title and description:
$file = \File::getByID(3);
$version = $file->getVersionToModify();
$version->updateTitle('New Title');
$version->updateDescription('New Description');
Setting a new Storage Location
To move a file to a different storage location, such as Amazon S3:
$amazon = \Concrete\Core\File\StorageLocation\StorageLocation::getByID(2);
$file = \File::getByID(3);
$file->setFileStorageLocation($amazon);
Or retrieve the location by name:
$app = \Concrete\Core\Support\Facade\Application::getFacadeApplication();
$amazon = $app[FileStorageLocationFactory::class]->fetchByName('Amazon S3')[0];
Setting a Password on a File
$file = \File::getByID(3);
$file->setPassword('supers3cret');
Add a File to a File Set
$file = \File::getByID(3);
$fs = \Concrete\Core\File\Set\Set::createAndGetSet('Name of a File Set', \Concrete\Core\File\Set\Set::TYPE_PUBLIC, 1);
$fs->addFileToSet($file);
Retrieve File Sets a File is in
$file = \File::getByID(3);
$file->getFileSets();
Returns an array of \Concrete\Core\File\Set\Set objects.
Deleting a File Version
$file = \File::getByID(3);
$version = $file->getVersion(1);
$version->delete();
Deleting a File
$file = \File::getByID(3);
$file->delete();
API
Explore more in the API documentation:
Accessing Physical File from File Object
The File object in Concrete CMS is used for metadata and programmatic operations, but sometimes accessing the actual file (or resource) is needed, such as:
- Creating a ZIP archive
- Streaming to external processes
- Initiating browser downloads
- Moving files across systems
- Image processing
To access the file resource:
$file = \File::getByID(3);
$resource = $file->getFileResource();
This returns a \Concrete\Flysystem\File instance. Methods available:
read()getTimestamp()getMimetype()getSize()delete()
For direct byte content access:
$contents = $file->getFileContents();
Example: File Size Formatting
To format file size:
$file = \File::getByID(3);
$fv = $file->getVersion();
$size = $fv->getFullSize();
$size = Core::make('helper/number')->formatSize($size);
Example: Creating a ZIP Archive
To create a ZIP archive:
$fileIDs = array(1,2,3);
$zip = new ZipArchive;
$res = $zip->open('/path/to/file.zip', ZipArchive::CREATE);
foreach ($fileIDs as $fID) {
    $f = File::getByID($fID);
    $zip->addFromString($f->getFilename(), $f->getFileContents());
}
$zip->close();
Core::make('helper/file')->forceDownload('/path/to/file.zip');
Concrete's file handling abstracts physical file paths due to diverse storage options like Amazon S3, ensuring consistent access even if the file isn't on the same server.