Single Pages
Single Pages
Overview
Single Pages in Concrete CMS are unique pages that differ from regular ones. Key distinctions:
- They're used in a singular spot, e.g., having multiple login pages is redundant.
- They don't appear in the page types list and can't be placed multiple times.
- Custom code usually expects single pages at a specific path.
- By default, their view templates aren't housed within a theme directory.
For instance, the Concrete login page is a single page, ideally located at /login. Concrete's dashboard pages are also single pages; they can have permissions, titles modified via the CMS, and even contain block areas.
Adding a Single Page
Suppose you're crafting a social networking tool and need a user picture upload page at:
http://www.example.com/index.php/media/
This should be a single page due to its custom nature. Create a "media.php" file in the application/single_pages/ directory. Naming dictates the URL path (e.g., media.php results in http://www.example.com/media). Use underscores for separated names like my_profile.php.
To add, navigate to the Concrete dashboard > Pages & Themes > Single Pages. Use the "Add a Single Page" form and input "media". Leave out ".php".
After adding, your single page appears at your site's root, editable through the CMS except for its handle and path. Upon visiting, you'll see a minimal content page since it's yet to be filled.
Content & the Single Page View Template
Single pages use the view.php template of the current theme, providing both header and footer. To view this, access concrete/themes/elemental/view.php. The line:
echo $innerContent;
places your single page content within the template. If you need more control, add a same-named file to your theme. This overrides the default single page.
Paths & Single Pages
For multiple single pages under a section, instead of:
application/single_pages/media.php
Use:
application/single_pages/media/view.php
It's still accessible at /media. Add more pages like:
application/single_pages/media/add.php
application/single_pages/media/organize.php
Access them at /media/add and /media/organize.
Extending Site Sections
Extend existing functionality using single pages. For a new dashboard page at:
http://www.example.com/index.php/dashboard/my_business_forms/
Add:
application/single_pages/dashboard/my_business_forms.php
Add via the dashboard, and it appears in dashboard navigation.
Adding Interactivity
Single Pages are ideal for custom, interactive segments of your site. They handle complex issues, like multifaceted forms or data processing. Once set, data submission to a controller script may be necessary.
Controllers
For added functionality beyond rendering single page contents, use a controller. This PHP file operates behind the single page view template, allowing processing and data passage into the template while distinguishing between processing and rendering code.
Creating a Controller
For a single page like application/single_pages/media/view.php seen at http://www.yoursite.com/index.php/media/, make a controller at application/controllers/single_page/media.php with:
<?php
namespace Application\Controller\SinglePage;
use Concrete\Core\Page\Controller\PageController;
class Media extends PageController
{
}
Overriding a Core Controller
To override a core controller, say the register page, copy its controller into application/controllers/single_page/register.php and use:
<?php
namespace Application\Controller\SinglePage;
use Concrete\Controller\SinglePage\Register as CoreRegisterController;
class Register extends CoreRegisterController
{
}
Dashboard Page Controller
For a dashboard page at /index.php/dashboard/ticketing/order, your controller at application/controllers/single_page/dashboard/ticketing/order.php should look like:
<?php
namespace Application\Controller\SinglePage\Dashboard\Ticketing;
use Concrete\Core\Page\Controller\DashboardPageController;
class Order extends DashboardPageController
{
}
Note: Extend the dashboard page controller for compatibility with the dashboard theme.
URL Routing to Single Page Controllers
URLs to Methods
Controller methods match URL routes. For http://www.example.com/media/, a view() method in the controller is activated. URLs like http://www.example.com/media/add or /media/list activate the add() and list() methods respectively.
Method Parameters
URL http://www.example.com/media/list/15 routes to the list() method, which must accept a parameter:
public function list($albumID = null)
{
}
For filtering by year and month at http://www.yoursite.com/search/2015/02/, use:
public function view($year = null, $month = null)
{
}
Optional Methods
on_start(): Runs before any URL-based methods.on_before_render(): Executes after URL-based methods, pre-rendering.
Note: When using on_start() or on_before_render() in a dashboard controller, ensure calling parent::on_start() and parent::on_before_render() respectively.
Concrete controllers separate code from content while retaining the features of regular PHP. They allow data transfer from the controller to the page view.
Passing Data Between Controller and Page View
To send data from a controller to a view, use $this->set('key', $value);.
Example
For displaying photo albums on the media page (https://www.example.com/media/), if the album data is fetched using the class \Foo\Media\Album, the controller might look like:
namespace Application\Controller\SinglePage;
use Concrete\Core\Page\Controller\PageController;

class Media extends PageController
{
    public function view()
    {
        $list = \Foo\Media\Album::getList();
        $this->set('albums', $list);
    }
}
The data, now in $albums, is accessible in the application/single_pages/media/view.php template. Here's an example of how to display the albums:
<ul>
<?php
foreach($albums as $album) { ?>
    <li>
    <a href="<?=URL::to('/media', 'view_album', $album->getAlbumID())?>"><?=$album->getAlbumName()?></a>
    </li>
<?php } ?>
</ul>
Clicking an album link might lead to a URL like https://www.example.com/media/view_album/4. To handle this, the view_album() method in the controller should be:
public function view_album($albumID = null)
{
    $selectedAlbum = \Foo\Media\Album::getByID($albumID);
    $this->set('albumID', $albumID);
    $this->set('album', $selectedAlbum);
}
Both $albumID and $album variables are available in the media page view.
Posting to the Current Page's Controller
To submit a form back to the current page's submit() method in the controller, use:
<form method="post" action="<?=$controller->action('submit')?>">
</form>
Rendering Custom Views from a Single Page Controller
The Easy Way
The easy way to render a different view based on a single page controller is to simply not do it at all; instead, just use an if statement or a switch() statement within the view based on the active controller method. Consider this code, found in application/single_pages/media/view.php
<?php
if ($view->controller->getTask() == 'view_album') { ?>

<?php t('The selected album is %s', $albumID);?>

<?php } else { ?>

<ul>
<?php
foreach($albums as $album) { ?>

    <li><a href="<?=URL::to('/media', 'view_album', $album->getAlbumID())?>"><?=$album->getAlbumName()?></a></li>

<? } ?>
</ul>

<?php } ?>
If the active controller method is view_album, the top half of the if statement will be run. If not, the bottom list will be rendered.
The More Elegant Way
Instead of using an if statement, move the view that had been within the "view_album" task into a completely separate page view template found at single_pages/media/albums.php.
Then, at the bottom of the view_album() method in the controller, add a render() statement switching the page view to the newly created albums.php
public function view_album($albumID = null)
{
    $selectedAlbum = \Foo\Media\Album::getByID($albumID);
    $this->set('albumID', $albumID);
    $this->set('album', $selectedAlbum);
    $this->render('/media/albums');
}
Albums does NOT have to be a valid and installed single page for this to work.
Replace vs. Render
In the example above, the page view from the single page is swapped from view.php to albums.php. The items set in the controller by view_album() are retained, and any on_before_render() from the current controller will still be run. Only the underlying page template rendered is changed.
If instead of calling render() you call replace(), then the current controller method will be aborted, and the controller and view from the updated path will be used instead.
Creating Dashboard Pages in Concrete CMS
Dashboard pages in Concrete CMS are single pages found inside "single_pages/dashboard". Once placed there, they appear in the Dashboard.
Controller for Dashboard Pages
For a dashboard page's controller, extend Concrete\Core\Page\Controller\DashboardPageController and not Concrete\Core\Page\Controller\PageController. For instance, for a page at Dashboard > System & Settings > Game:
namespace Application\Controller\SinglePage\Dashboard\System;
use Concrete\Core\Page\Controller\DashboardPageController;

class Game extends DashboardPageController
{
    public function view()
    {
    }
}
Handling Errors
The DashboardPageController class offers a protected $error variable, which is an instance of Concrete\Core\Error\Error. To display errors:
public function view()
{
    if ($foo != '1') {
        $this->error->add('This is error 1');
    }
    if ($foo != '2') {
        $this->error->add('This is error 2');
    }
    if ($this->error->has()) {
        // proceed with processing
    }
}
Displaying Messages
$message and $success are special variables. When set, they're automatically shown in the template:
public function view()
{
    $this->set('message', 'My regular message');
    $this->set('success', 'My success message');
}
Design Tips
- Use success, error, and message alerts to inform users about action outcomes.
- Dashboard incorporates some Bootstrap 3 Styling. Design forms and UI using these styles.
- Position important action items in the button header, group with Bootstrap button groups:
<form method="post" action="<?=$controller->action('submit')?>">
    <div class="ccm-dashboard-header-buttons btn-group">
        <!-- Your buttons here -->
    </div>
</form>
- For lengthy forms, include the button footer for consistent styling:
<form method="post" action="<?=$view->action('update_sitename')?>">
    <fieldset>
        <!-- Form content -->
    </fieldset>
    <div class="ccm-dashboard-form-actions-wrapper">
        <div class="ccm-dashboard-form-actions">
            <button class="pull-right btn btn-success" type="submit">Save</button>
        </div>
    </div>
</form>
The specified classes ensure buttons are correctly positioned on the page.
Adding Single Pages to Packages
For a deep dive, see packaging a theme. It covers the Concrete CMS package format and the package's Controller file.
To support your custom single page (e.g., /dashboard/system/game/) in a package:
Set up required directories in your package:
mkdir -p packages/game_system/single_pages/dashboard/system
mkdir -p packages/game_system/controllers/single_page/dashboard/system
Follow theming instructions to create
packages/game_system/controller.php.Add the view logic for your single page at
packages/game_system/single_pages/dashboard/system/game.php.Create the controller at
packages/game_system/controllers/single_page/dashboard/system/game.phpensuring the namespace does NOT start withApplication.namespace Concrete\Package\GameSystem\Controller\SinglePage\Dashboard\System; use \Concrete\Core\Page\Controller\DashboardPageController; class Game extends DashboardPageController {}In the package controller, reference the
\Concrete\Core\Page\Singleclass:use \Concrete\Core\Page\Single as SinglePage;Install the single page in your package's
install()method:public function install() { $pkg = parent::install(); SinglePage::add('/dashboard/system/game', $pkg); }
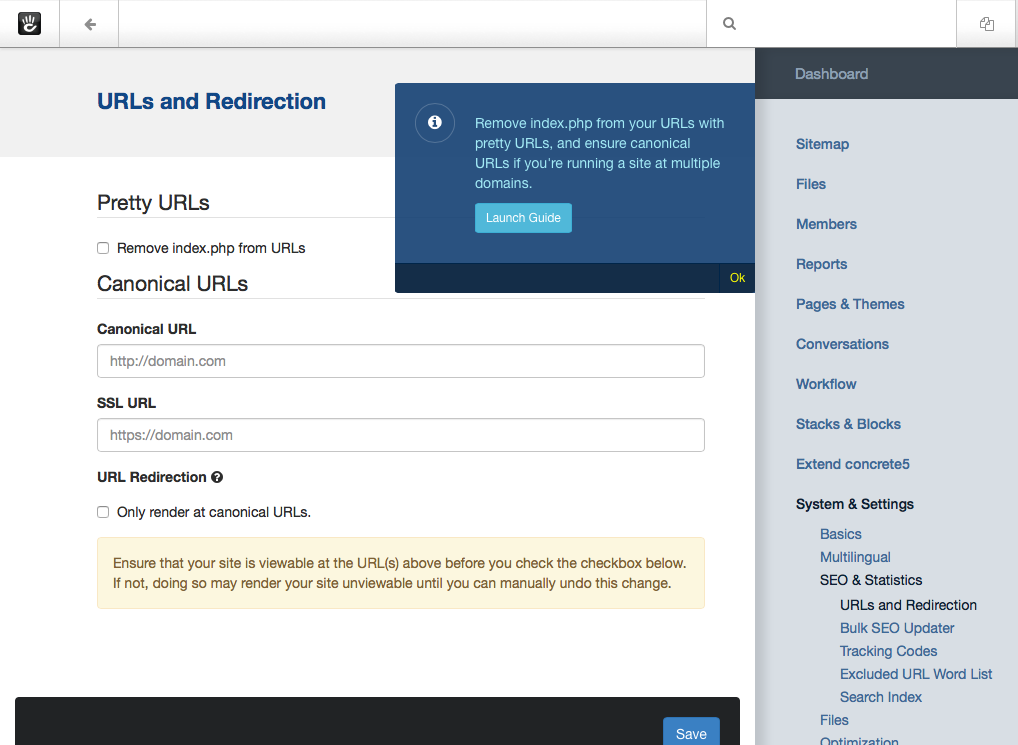
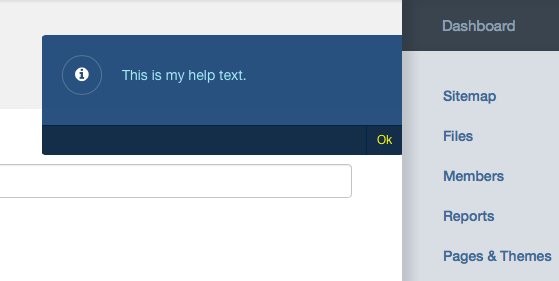
Dashboard Page Help Integration
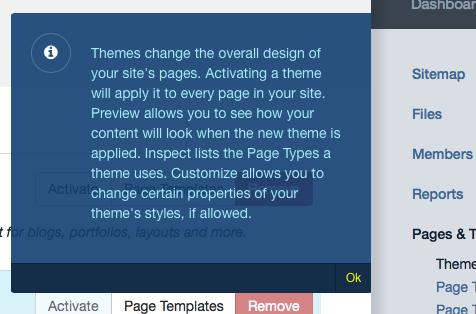
Core Dashboard pages typically have a Help Launcher icon.
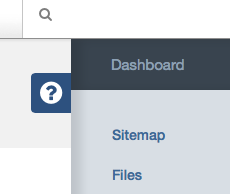
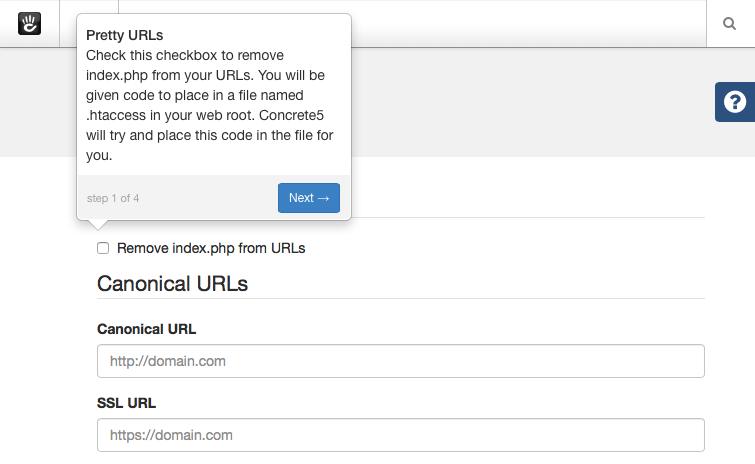
Clicking it provides relevant information about the page, and might contain a button for an in-depth Guide.
Embedding Help in Dashboard
To easily embed a help launcher and description:
<?php
Core::make('help')->display('This is my help text.');
?>
This instantly adds a clickable help launcher with your provided text.
Central Help Management
Although embedding help directly is straightforward, sometimes centralizing all help strings is preferred. This is useful if a single entity manages help across various interfaces.