Managing Licenses
Understanding how licenses and projects relate is a key concept behind using the Marketplace. Once you're familiar with how the system works, you'll find it to be an easy way to manage stuff you've purchased.
Licenses
When you buy an add-on or theme from the Concrete CMS Marketplace, you're purchasing a license to use it on one website. To see a list of all the licenses you own, visit your profile's licenses page.
Sites
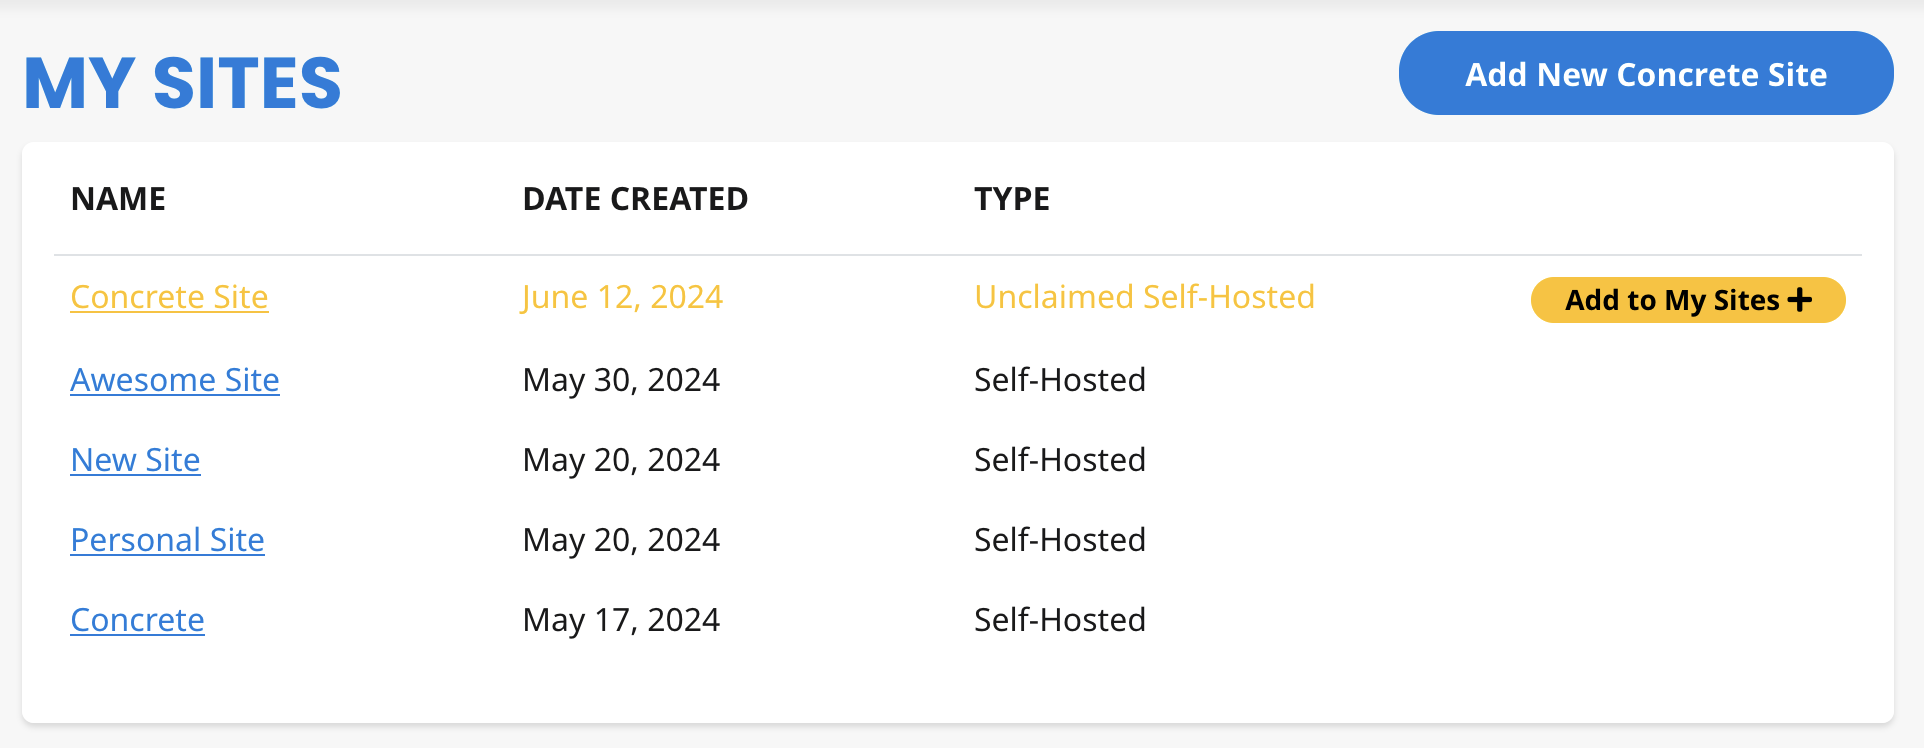
Each website you connect to the Concrete Community is represented as a "Site" in your user profile. You can see a list of all your connected Concrete sites by visiting your profile's sites list page.
Assigning a License to Your Project
Go to your profile's sites list page and click the name of your site. This will take you to the project page we want to work with.
On the site detail page, scroll down until you see the list of licenses currently assigned to this project.
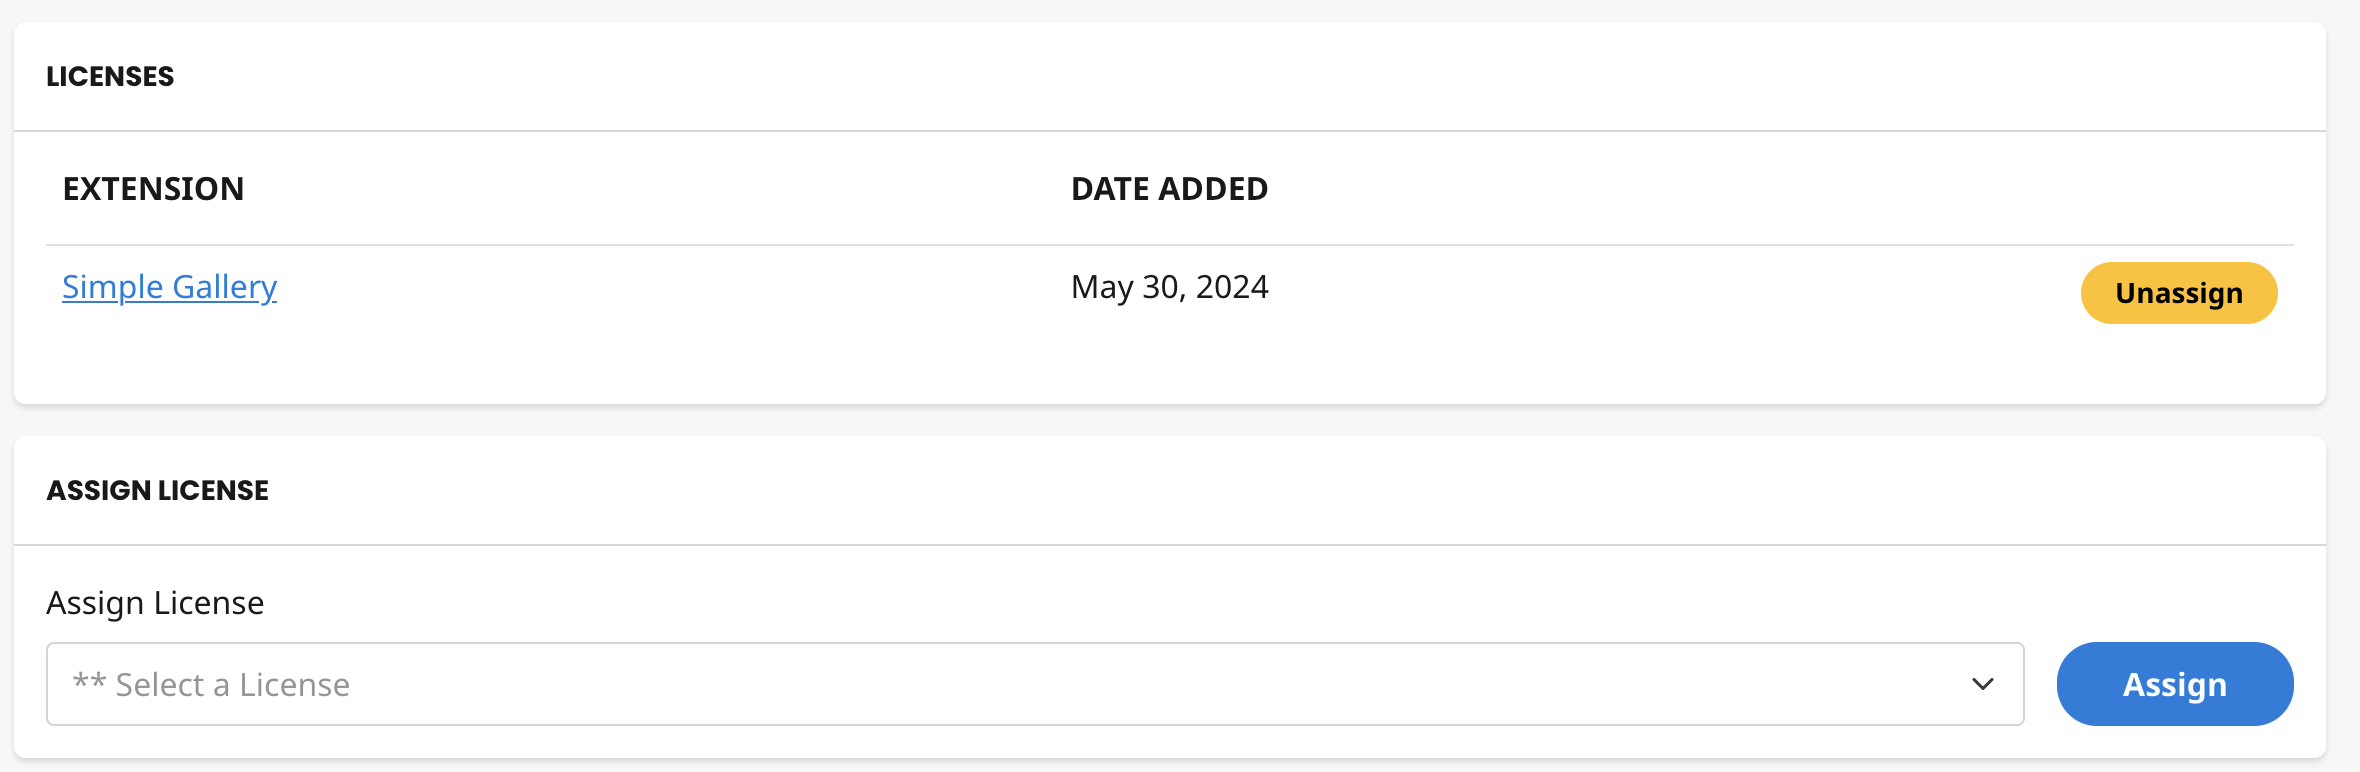
Below the list, find a section title "Assign License" and a drop down menu titled "Select a license." This menu lists every available license. An available license is one that is not assigned to any project.
To assign a license to your site, choose the extension you want to use on your site from the drop down menu and click the "Assign" button. The license is now assigned to your project.
To complete the installation process, log in to your site's dashboard and go to the Extend Concrete section of the dashboard. If you came to the Marketplace from that section, there will be a shortcut link at the top of the Marketplace to return to your site.

The add-on, theme, or integration should now be available for download.
What if I don't see my license on the list?
Is the license already assigned to a site? On your site's licenses page you will find a column that specifies which site the license is assigned to.
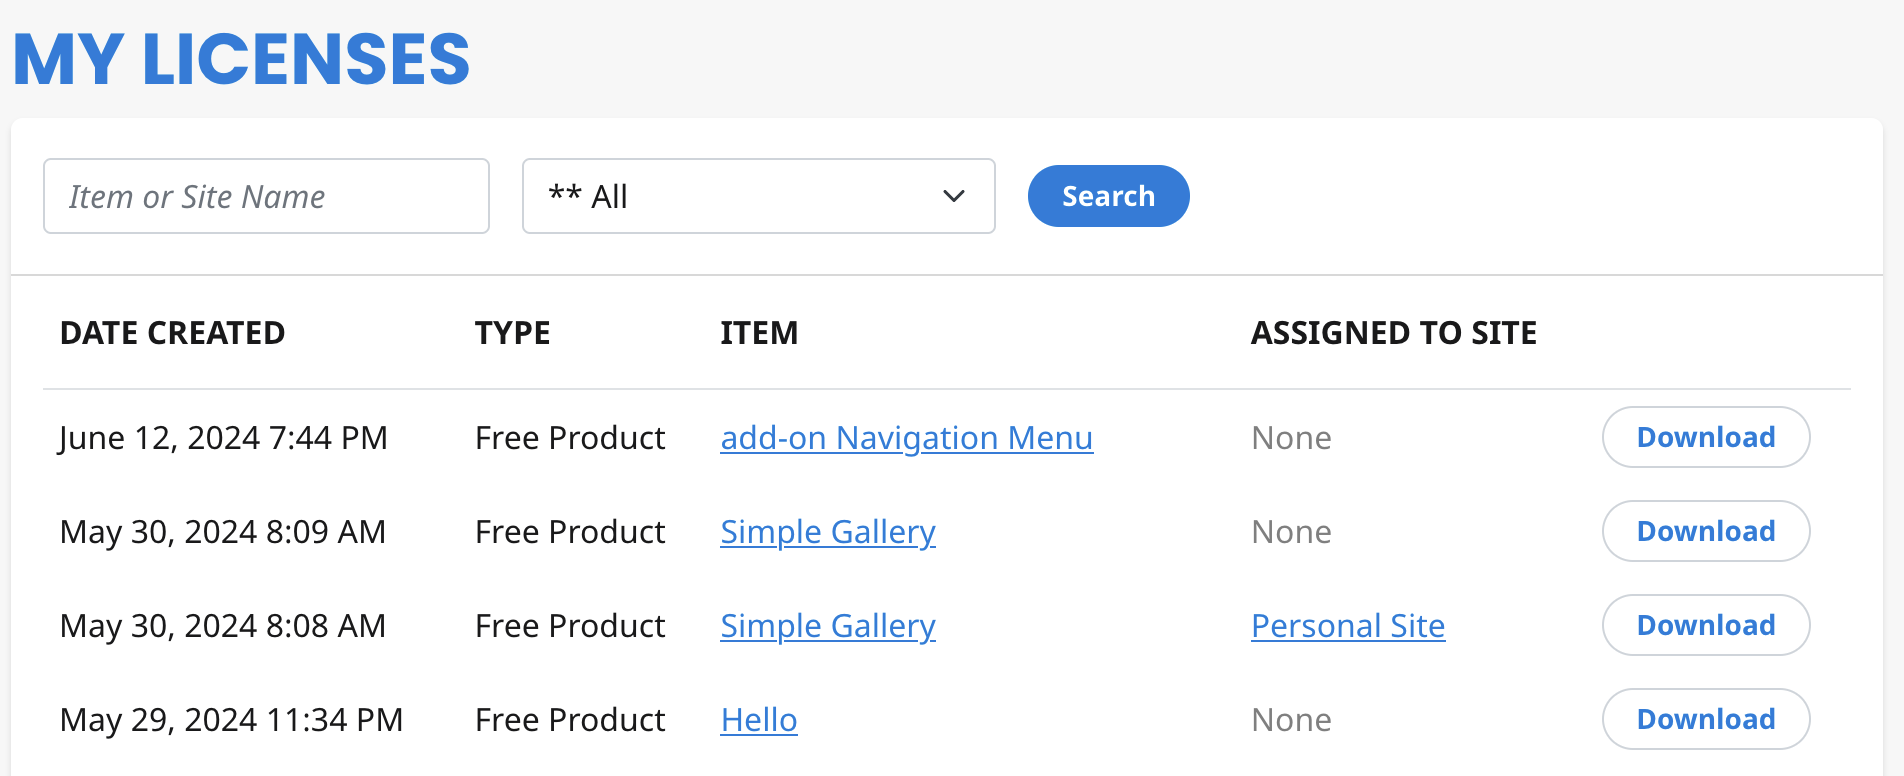
If it's not assigned to a site, "None" will be listed and a "Download" link will be present. This is a great way to figure out which site is using a particular extension.
If you need to transfer a license from one project to the other, please check out this how-to: Transfer a License.
Unassigning and Transferring a License
If you accidentally assign an license to the wrong site and want to assign it to a different one, here's a step by step outline of how to do this:
Release a License
-
Log in to market.concretecms.com
-
View your active sites
-
Click on the name of your license-donating site to be taken to its site detail page.
-
On the site page, you'll see a list of extension licenses. Click the yellow button labeled "Unassign".
- Now assign the license to license-receiving site. Go back to your list of sites. Click the name of your site to visit its site detail page. Select your license from the list under "Assign License" and click the Assign button.
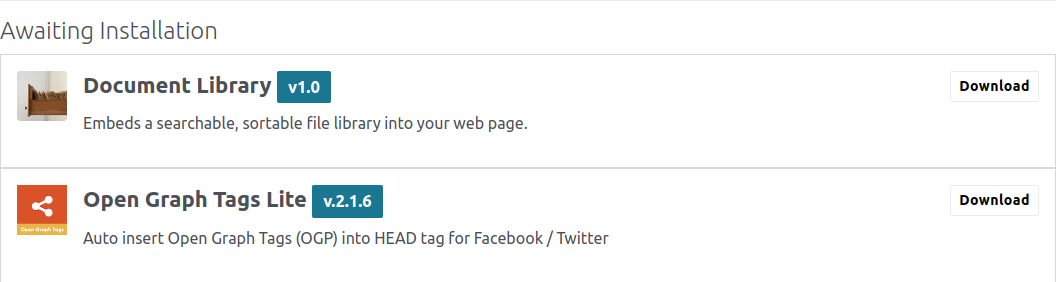
- On the license-receiving site, go to Dashboard > Extend Concrete. Your add-on should appear under "Awaiting Installation."