Maintenance Tasks
Introduction to Maintenance Tasks
Maintenance Tasks in Concrete CMS are essential operations that help ensure your website runs smoothly and efficiently. These tasks can be managed through the Dashboard or via the command line interface (CLI). They perform routine operations such as clearing caches, reindexing content, and generating sitemaps. These tasks help maintain optimal performance and ensure that your website’s data is up-to-date. In version 9, the traditional “Jobs” have been replaced with “Tasks,” offering improved functionality and user experience.
These tasks can be executed directly from the Dashboard or via the command line interface (CLI).
Running Tasks via the Dashboard
- Access the Tasks Interface:
- Navigate to the Dashboard.
- Go to System & Settings > Automation > Tasks.
- Here, you’ll find a list of all available tasks installed on your site.
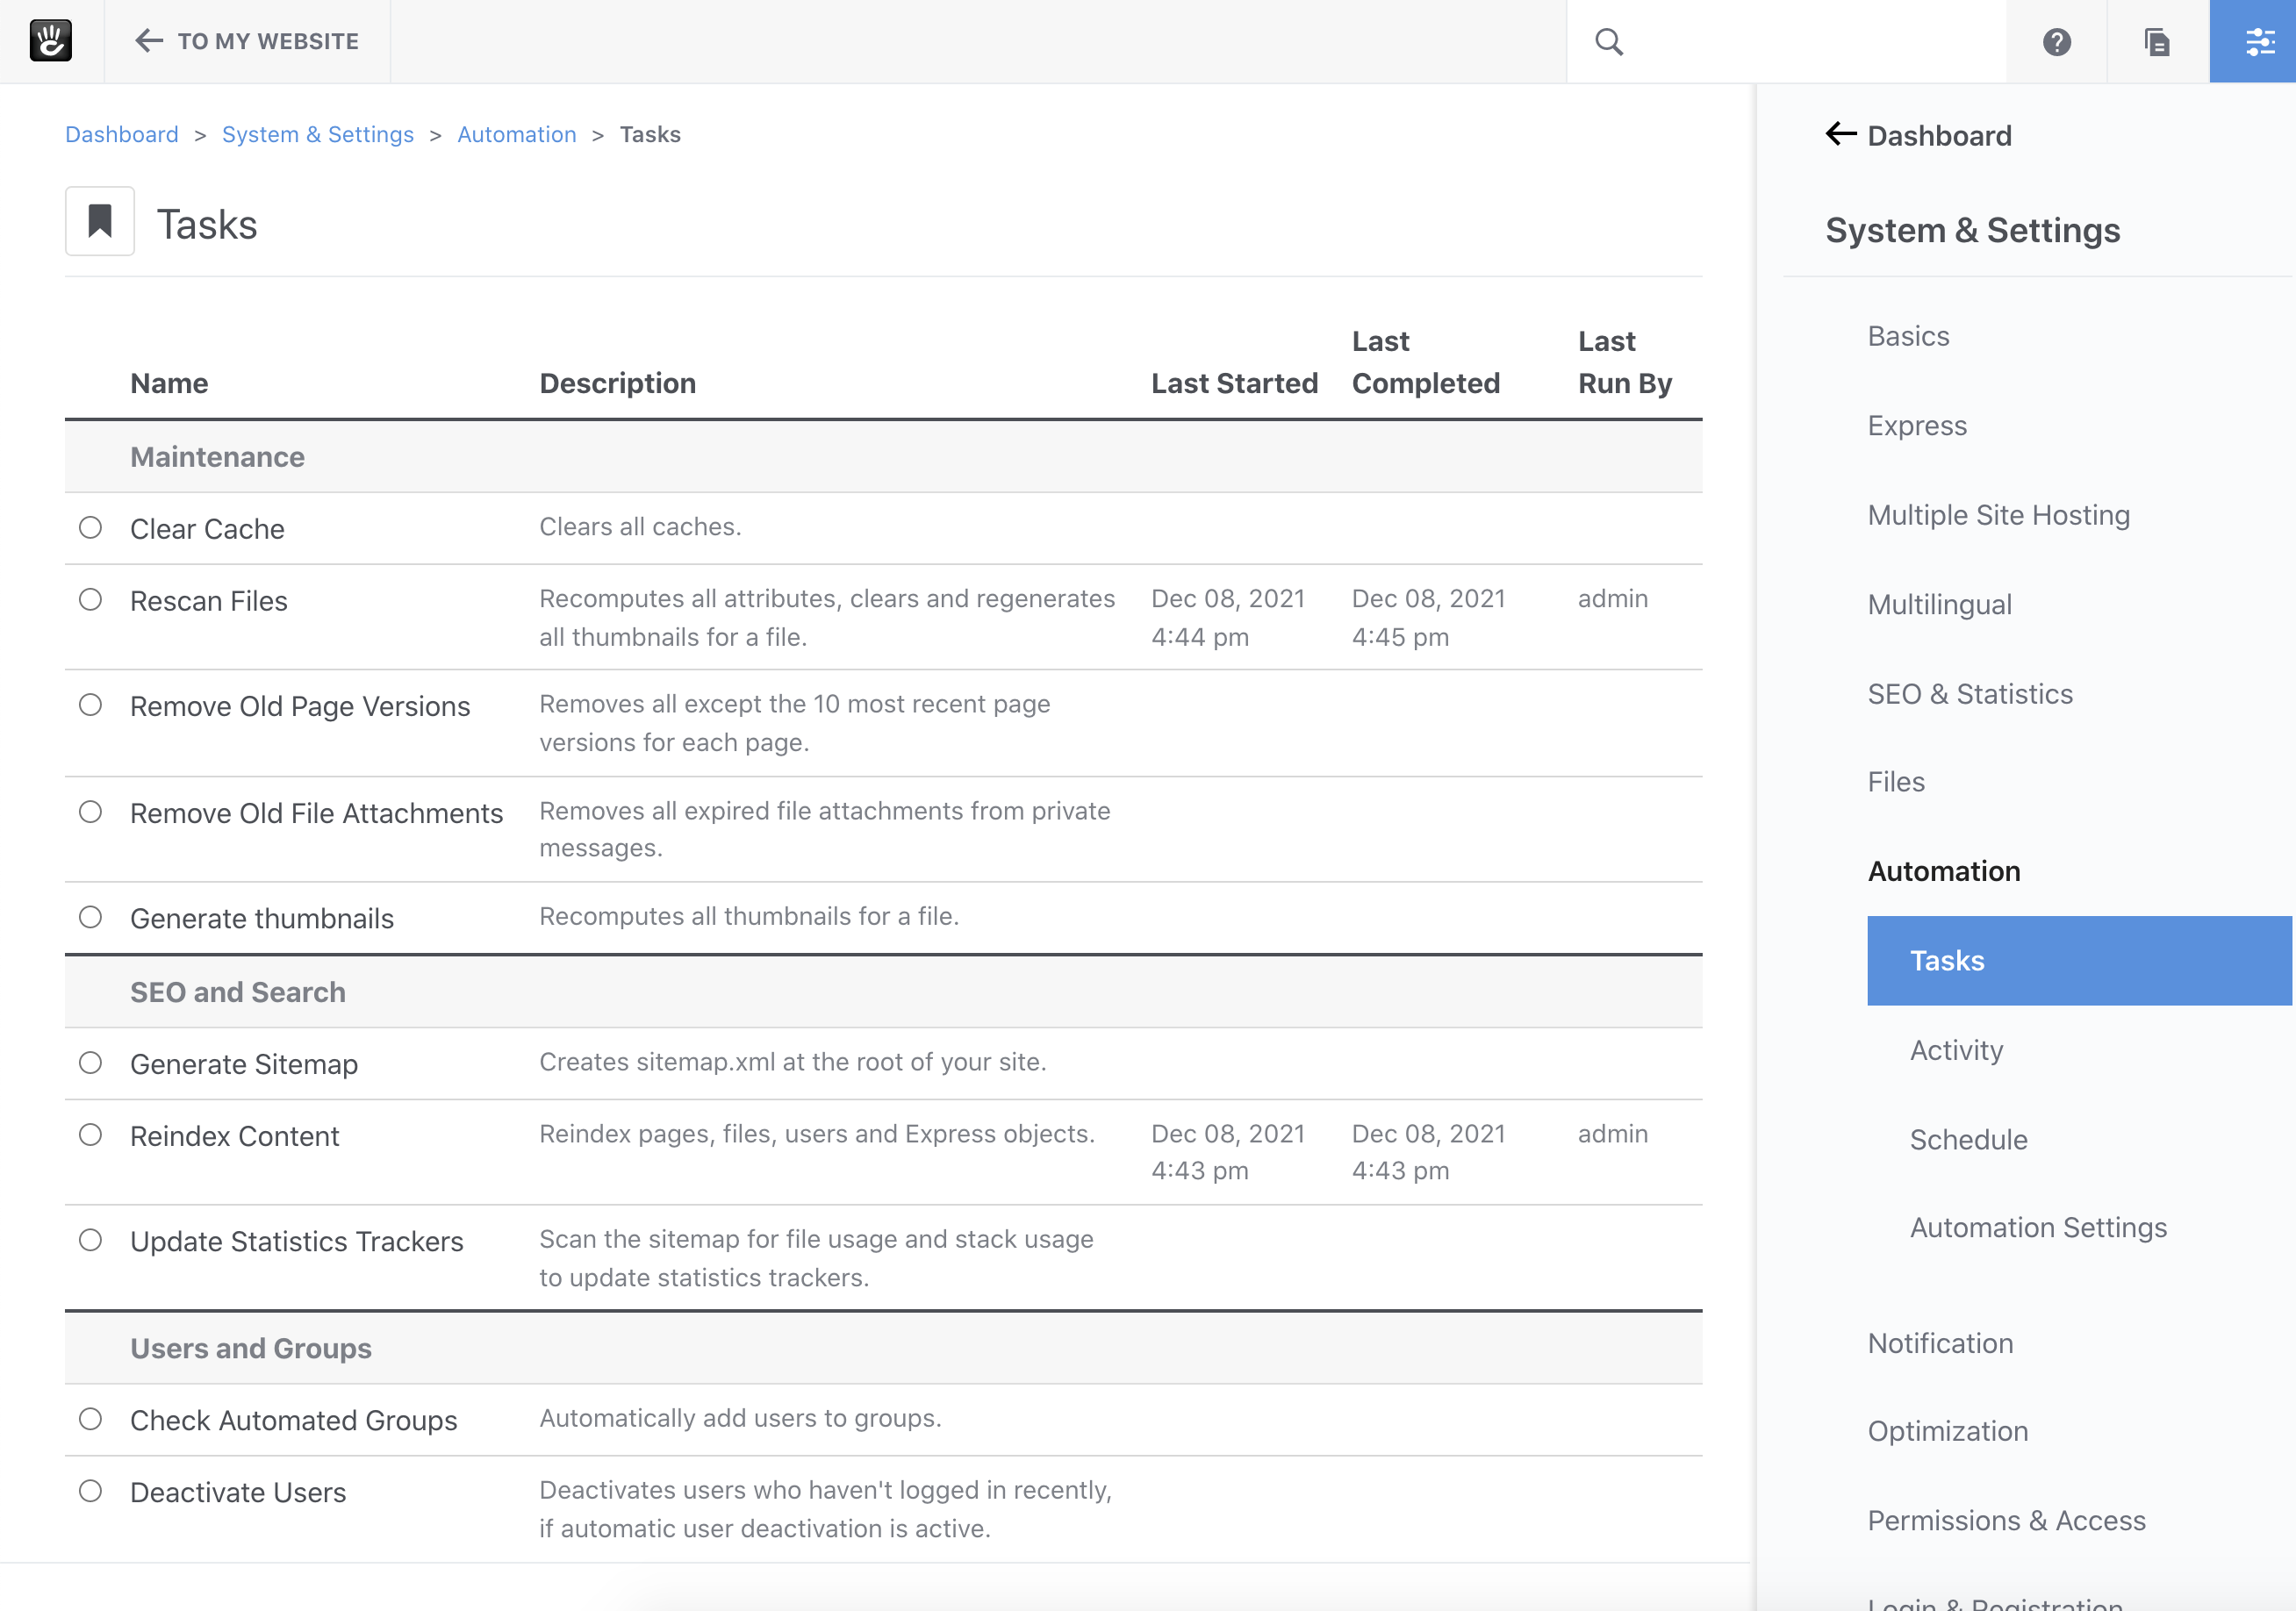
- Select and Configure a Task:
- Choose a task by clicking on its corresponding radio button. For example, to reindex all pages, select Reindex Content.
- After selection, any input options specific to the task will appear below the task list. The options for the Reindex Content task are shown below. Configure options as needed.
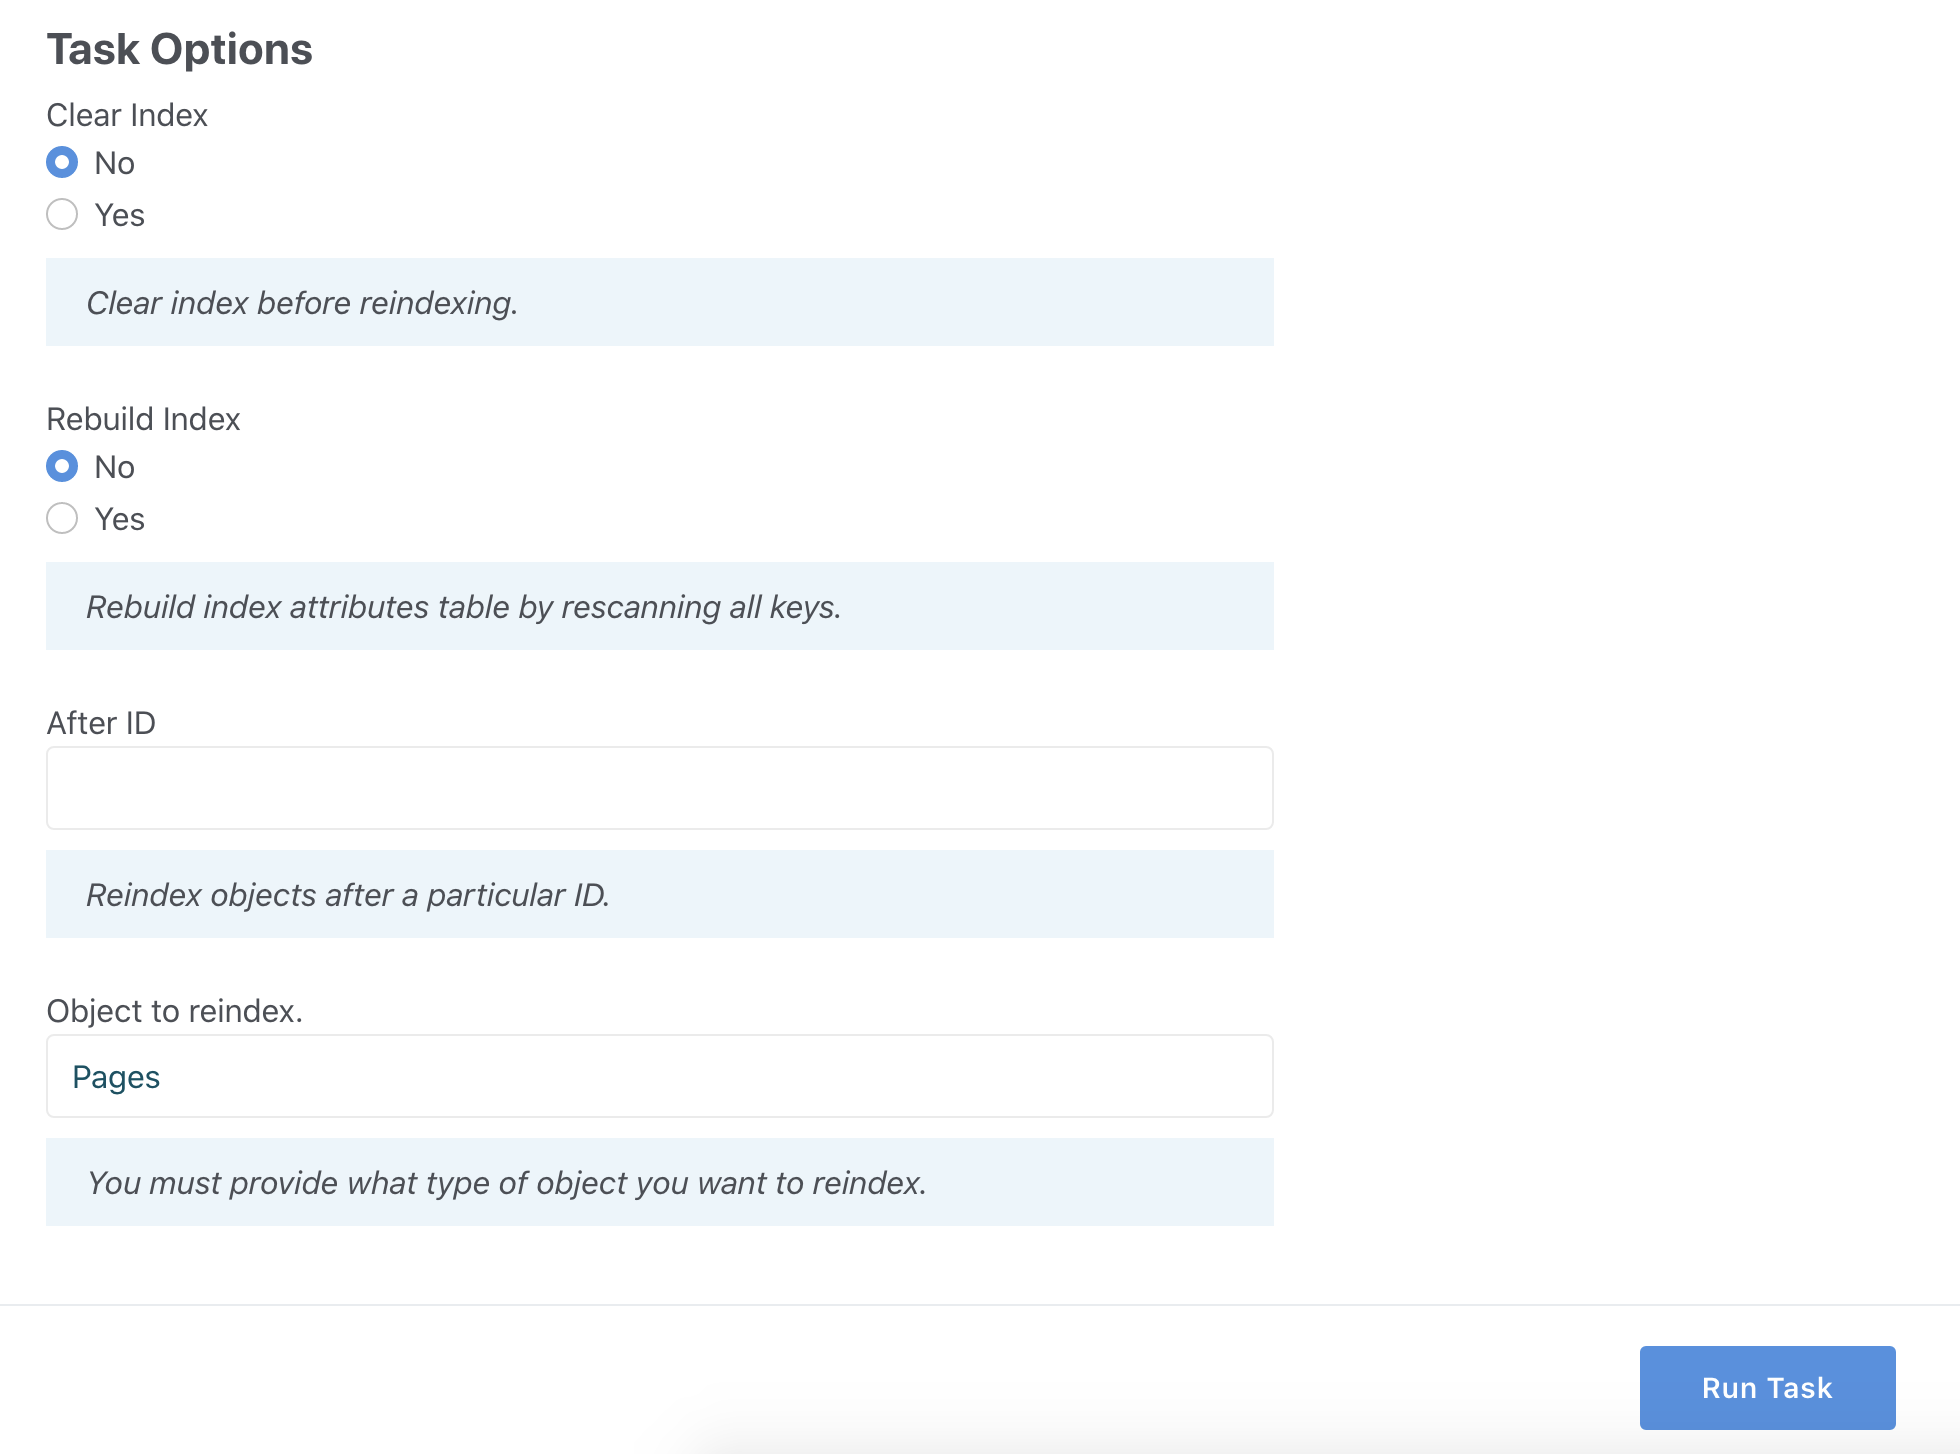
- Execute the Task:
- Once configured, click Run Task to initiate the process.
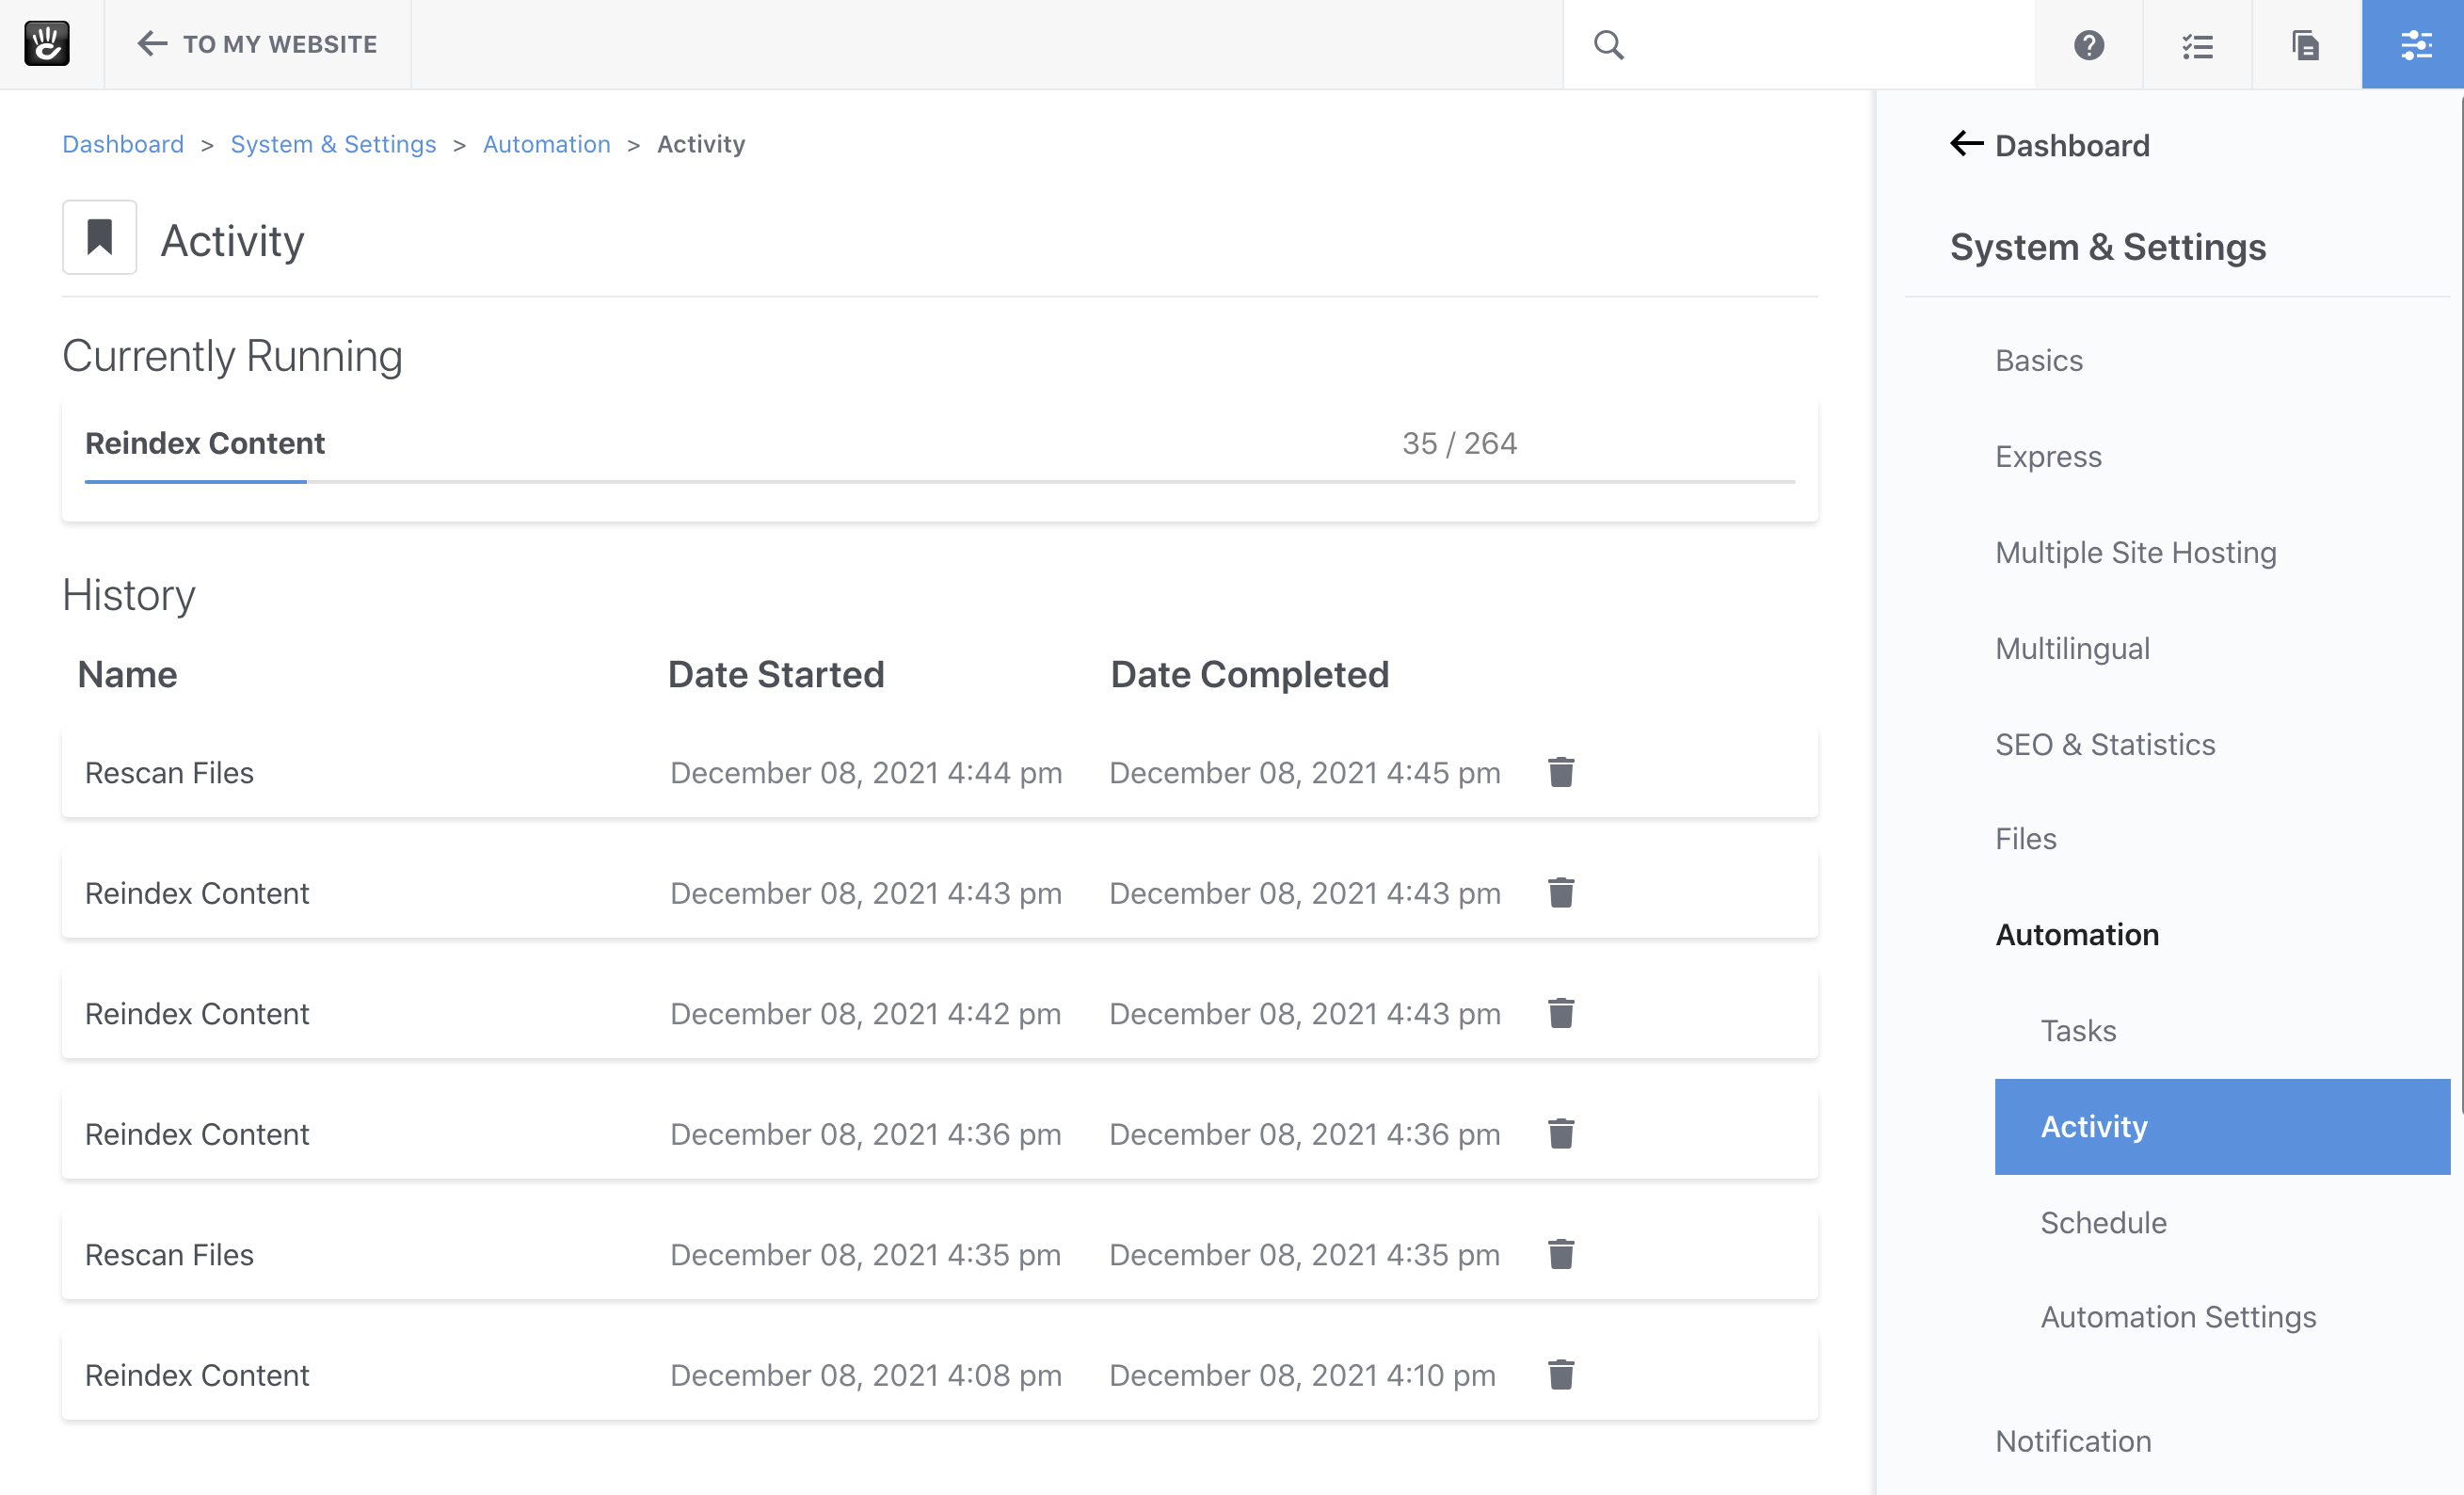
- You’ll be redirected to the Task Activity page, where you can monitor the task’s progress.
Understanding Task Types
- Synchronous Tasks: Execute immediately, providing instant feedback. For example, the Clear Cache task runs synchronously, and you’ll wait while it completes.
- Asynchronous Tasks: Run in the background, allowing you to continue other activities. The Generate Sitemap task is an asynchronous, non-batched task, meaning it operates without user intervention and doesn’t require batching.
- Batch Processing Tasks: Handle large sets of data by processing them in segments. The Reindex Content task is a batch processing task; it gathers all pages into a batch and executes them asynchronously.
Running Tasks via the Command Line Interface (CLI)
- Access the CLI:
- Open your server’s terminal.
- Navigate to your Concrete CMS site’s root directory.
- List Available Tasks:
-
Run the command:
concrete/bin/concrete -
This will display a list of available commands, including tasks:
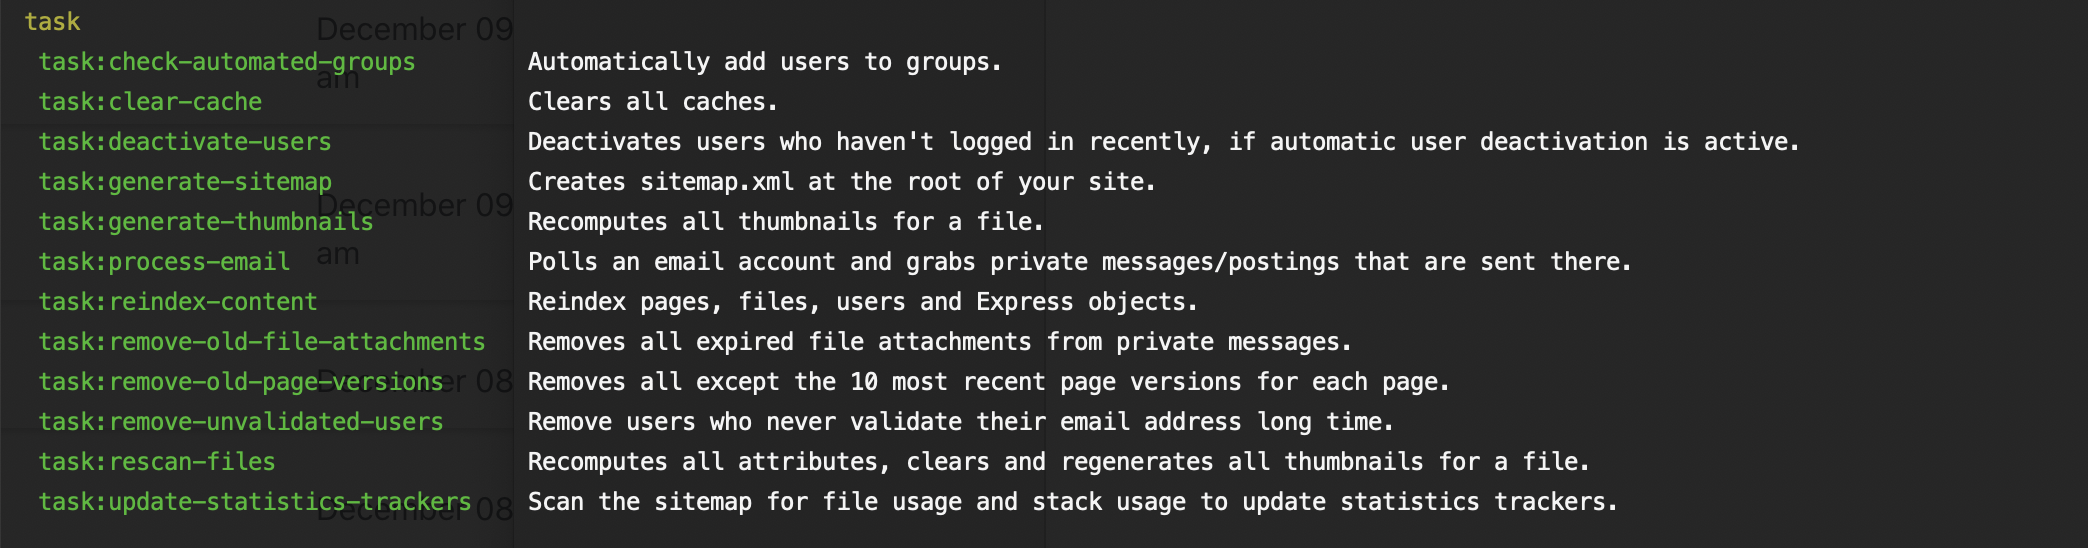
-
- Get Help for a Specific Task:
-
To view options for a task, use the following format:
concrete/bin/concrete task:task_handle --help -
Replace
task_handlewith the specific task’s handle. For example:concrete/bin/concrete task:reindex-content --help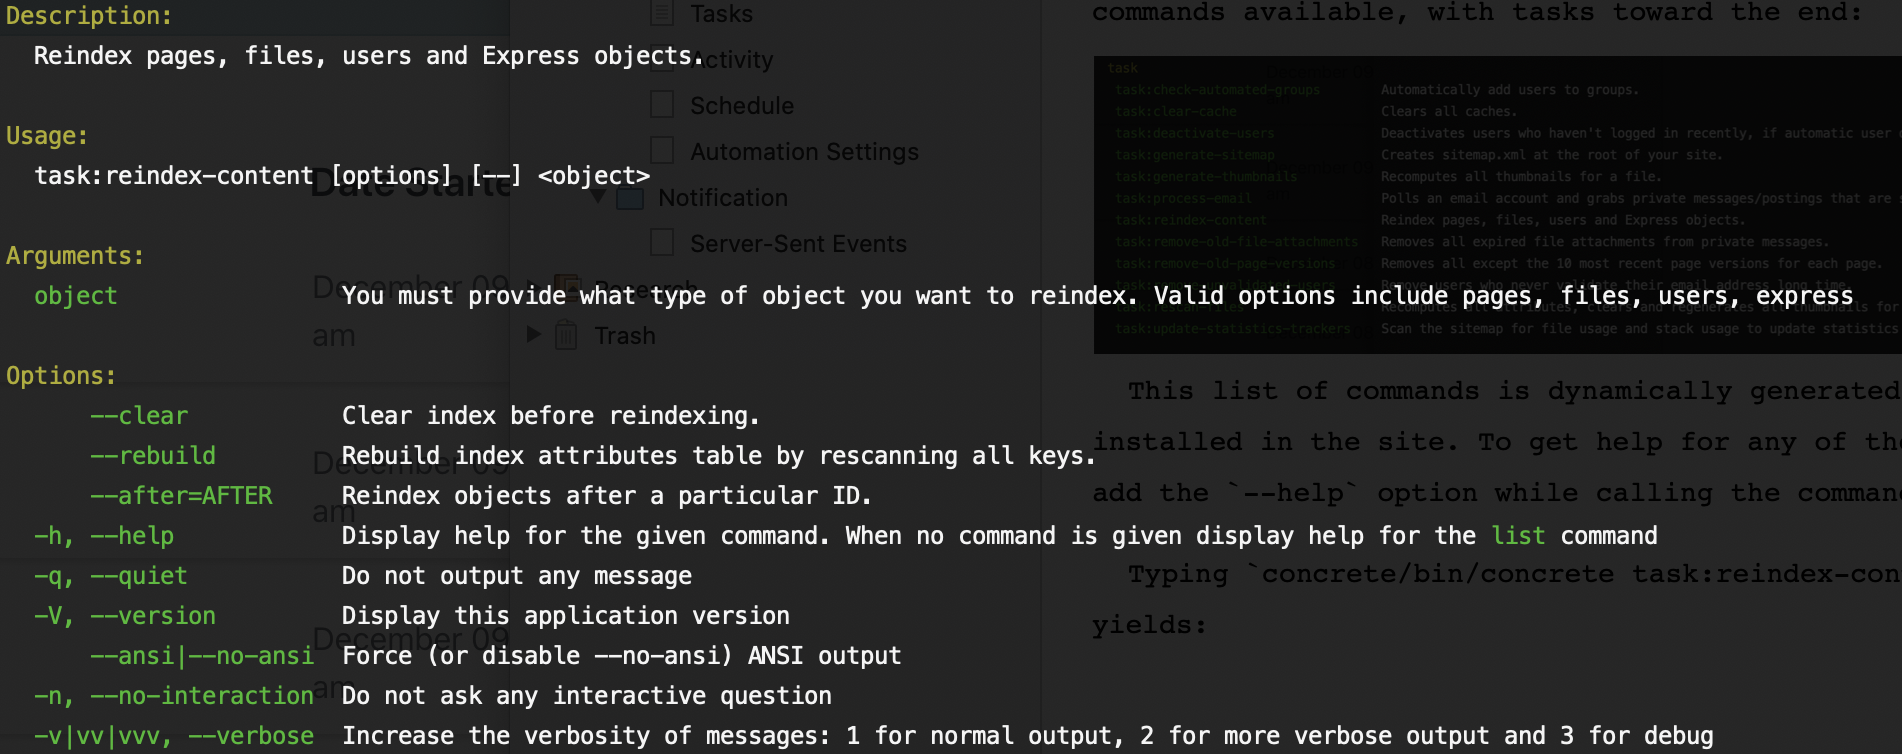
-
- Run a Task:
-
Execute a task with its options. For instance, to reindex content and clear the index prior to reindexing, use:
concrete/bin/concrete task:reindex-content --clear --rebuild pages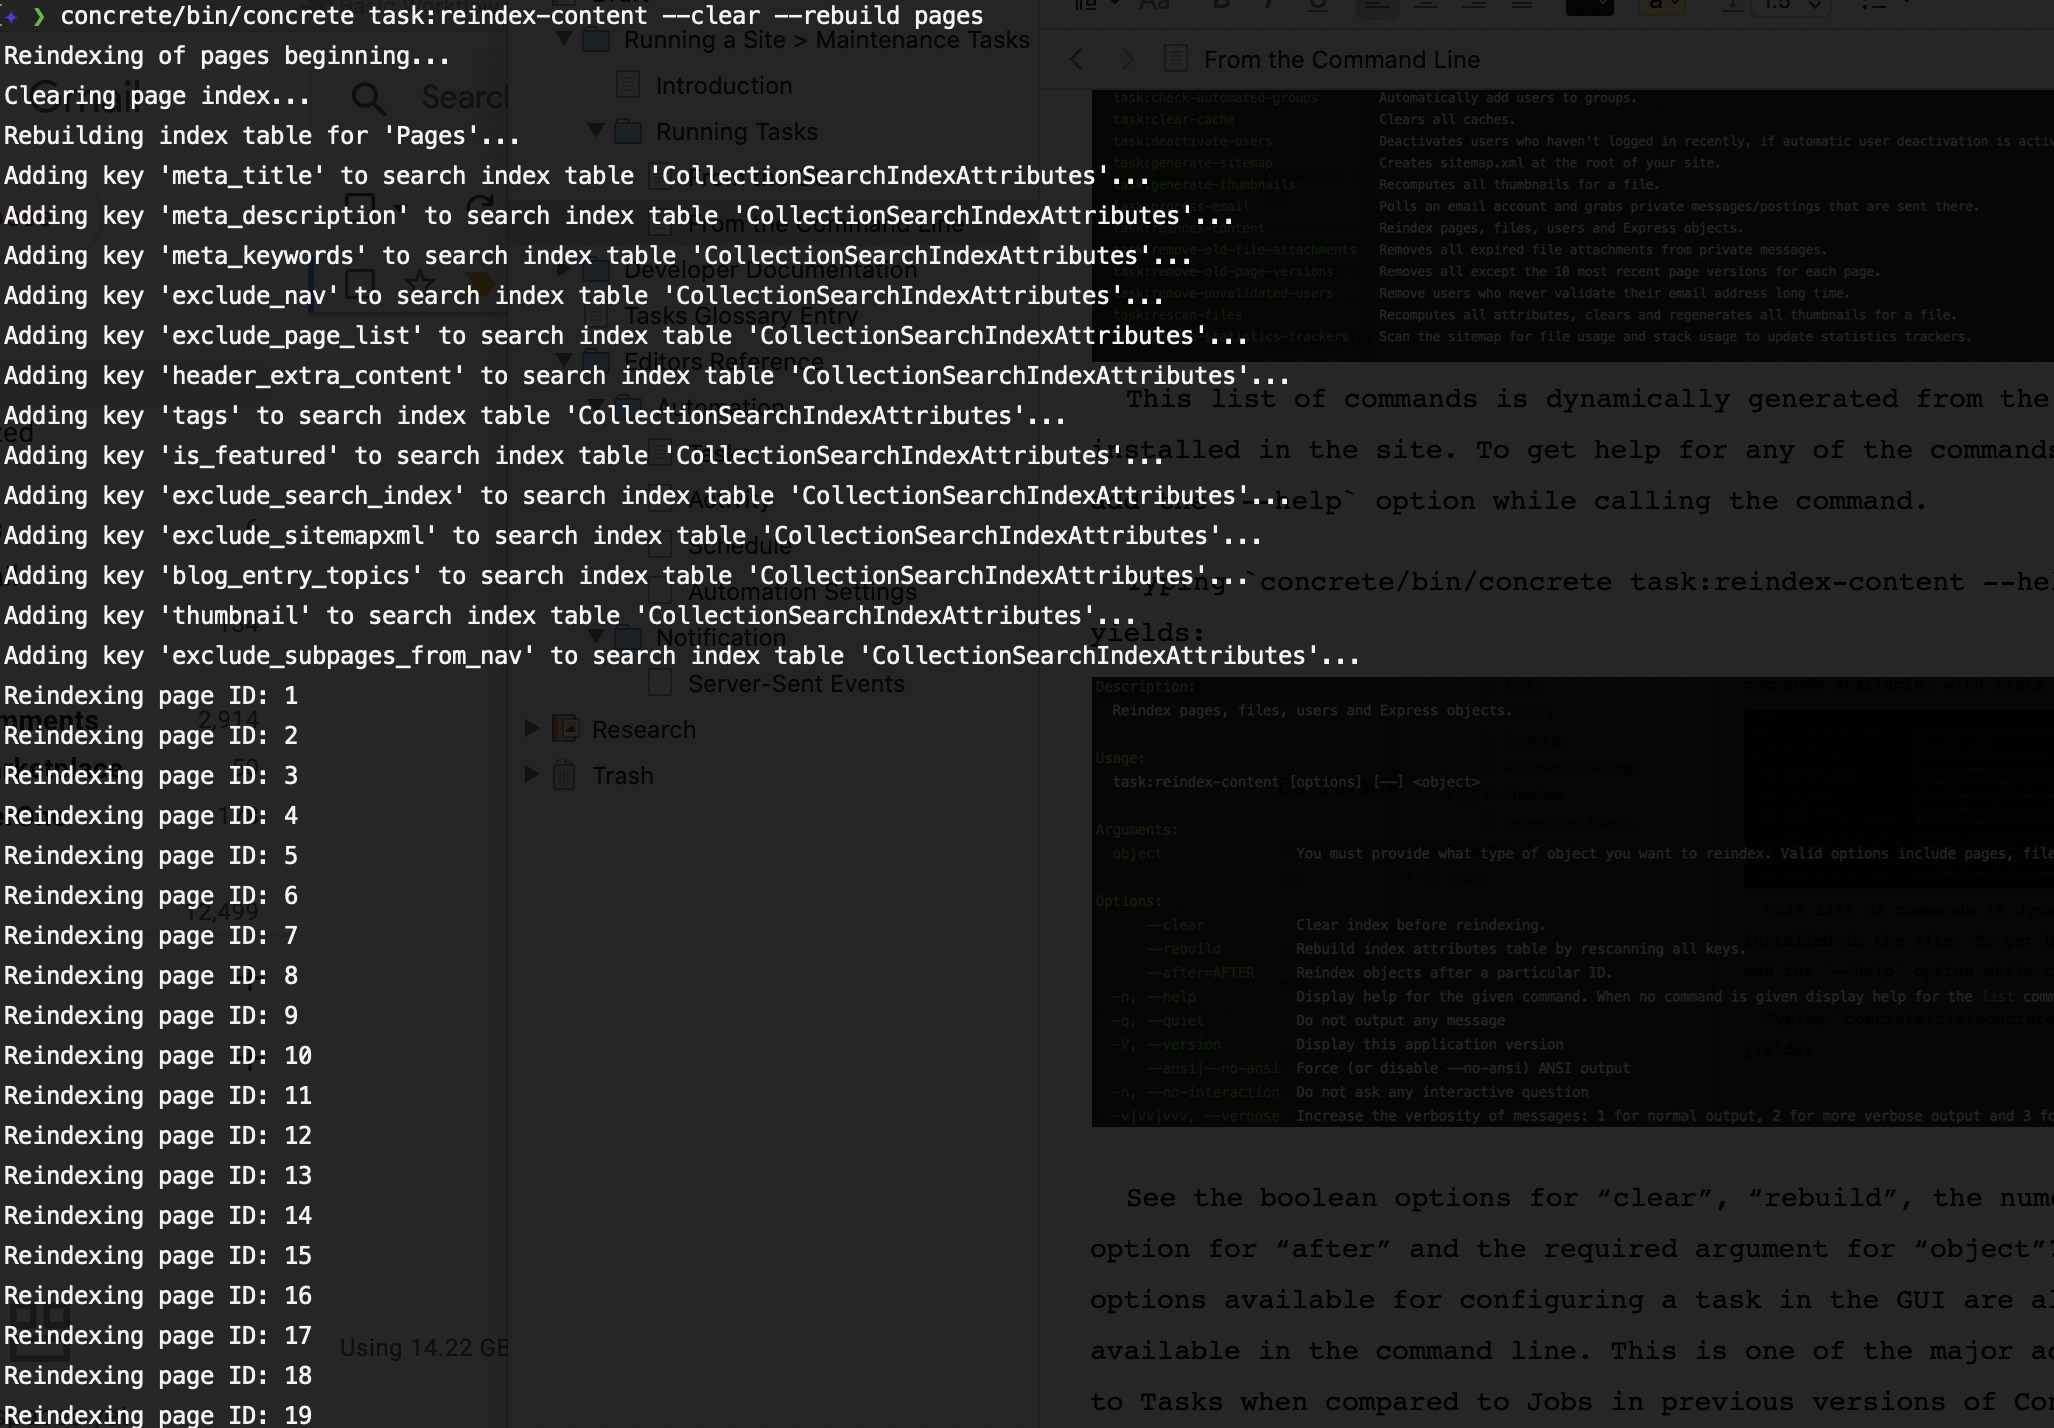
-
Monitoring Running Tasks
To view tasks currently in progress:
- In the Dashboard, go to System & Settings > Automation > Activity.
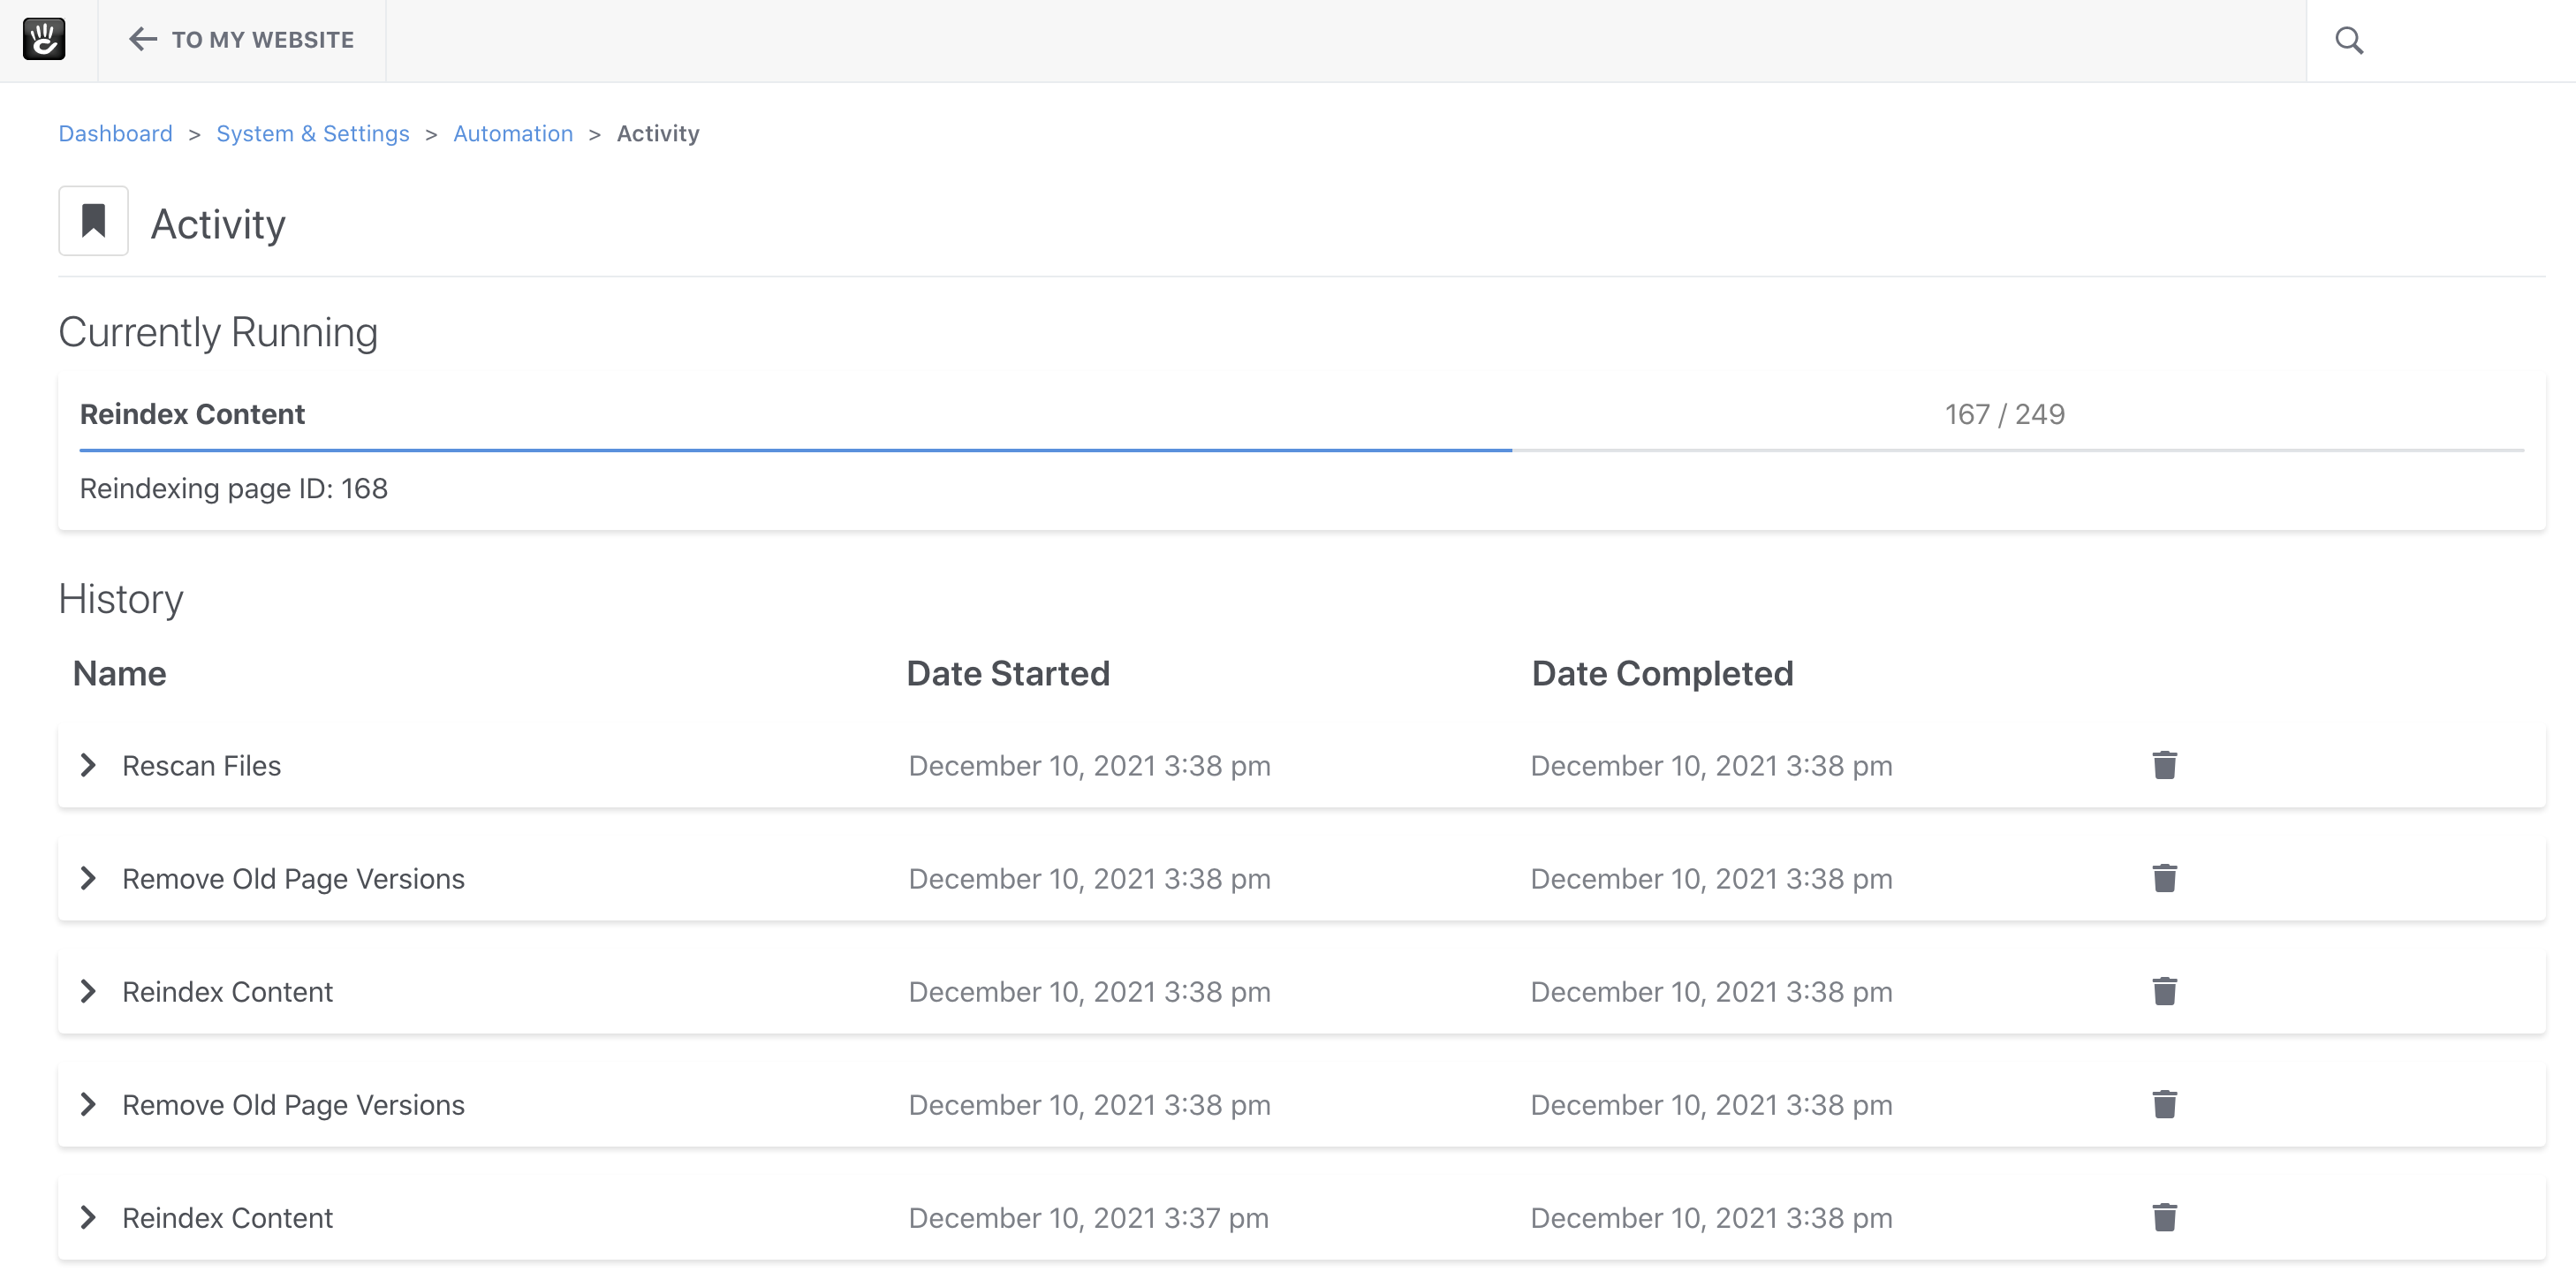
- This page displays all running and recently completed tasks, along with their statuses.
Additionally, when tasks are actively running, an icon appears in the toolbar between the Help and Pages panels: 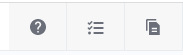
Task Logging
By default, only basic information—such as which tasks have been executed and their execution times—is available in the Activity Dashboard. To access comprehensive logs, you need to enable Task Logging.
Enabling Task Logging
- Access Automation Settings:
- Navigate to the Dashboard.
- Go to System & Settings > Automation > Automation Settings.
- Configure Task Logging:
- Locate the Task Logging option.
- Toggle the setting to On.
- Specify Log Storage Path:
- Enter a directory path for storing task logs.
- Important: Ensure this directory is secure and located outside the publicly accessible web root to prevent unauthorized access.
- Save Settings:
- Click Save to apply the changes.
Note: Task logs are stored as files rather than in the database due to their potential size.
Viewing Task Logs
Once Task Logging is enabled, detailed logs for each task become accessible:
- Navigate to Activity Dashboard:
- Go to Dashboard > Reports > Activity.
- Identify Logged Tasks:
- Tasks with available logs will display a caret icon next to them.
- Hovering over these tasks will highlight them.
- Access Log Details:
- Click on the task entry to expand and view the full log output.
- This log provides the same detailed information as seen during real-time command-line execution.
Advanced: Improving Performance with a Dedicated Queue Worker
For tasks that process large amounts of data, running a dedicated queue worker can enhance performance:
-
In the Dashboard, go to System & Settings > Automation > Automation Settings.
-
Enable Manual Queue Listening.
-
On your server, start the queue worker by running:
concrete/bin/concrete messenger:consume async
This setup allows tasks to be processed more efficiently, reducing the time required for completion.
Advanced: Task Scheduling
To automate tasks at specific intervals:
Using the Command Line:
-
Access your server’s crontab configuration.
-
Add an entry for the desired task. For example, to run the “Reindex Content” task every Friday at midnight:
0 0 * * FRI concrete/bin/concrete task:reindex-content pages
Using the Dashboard:
-
Ensure the scheduler is enabled by navigating to System & Settings > Automation > Automation Settings and enabling the Scheduler.
-
Add the following entry to your server’s crontab to run the scheduler every minute:
* * * * * concrete/bin/concrete concrete:scheduler:run -
In the Dashboard, go to System & Settings > Automation > Tasks.
-
Select the task to schedule and enter the desired cron expression in the Schedule field.
-
Save the schedule to automate the task accordingly.
Advanced: Live Feedback with Mercure
To receive real-time updates on task progress:
- Install and configure a Mercure hub on your server.
- In the Dashboard, navigate to System & Settings > Notification > Server-Sent Events.
- Enter the Mercure hub URL and a JWT token for authentication.
- Save the settings.
With Mercure configured, you’ll receive live feedback on task execution, enhancing your ability to monitor and manage tasks effectively.
By following this guide, you can efficiently manage maintenance tasks in Concrete CMS version 9, ensuring your website remains optimized and up-to-date.