Automation
Concrete CMS offers a comprehensive Automation system to manage and streamline various maintenance tasks, ensuring your website operates efficiently.
Note: for further details and examples of running and scheduling Tasks, see the Maintenance Tasks page in the Running a Website section.
Accessing the Automation Features
To manage automation features, navigate to the Dashboard:
- Log in to your Concrete CMS site.
- Go to Dashboard > System & Settings > Automation.
Here, you’ll find the following sections:
- Tasks
- Activity
- Schedule
- Automation Settings
Tasks
The Tasks section displays a list of all automated tasks installed on your site. These tasks can be executed manually or scheduled to run automatically.
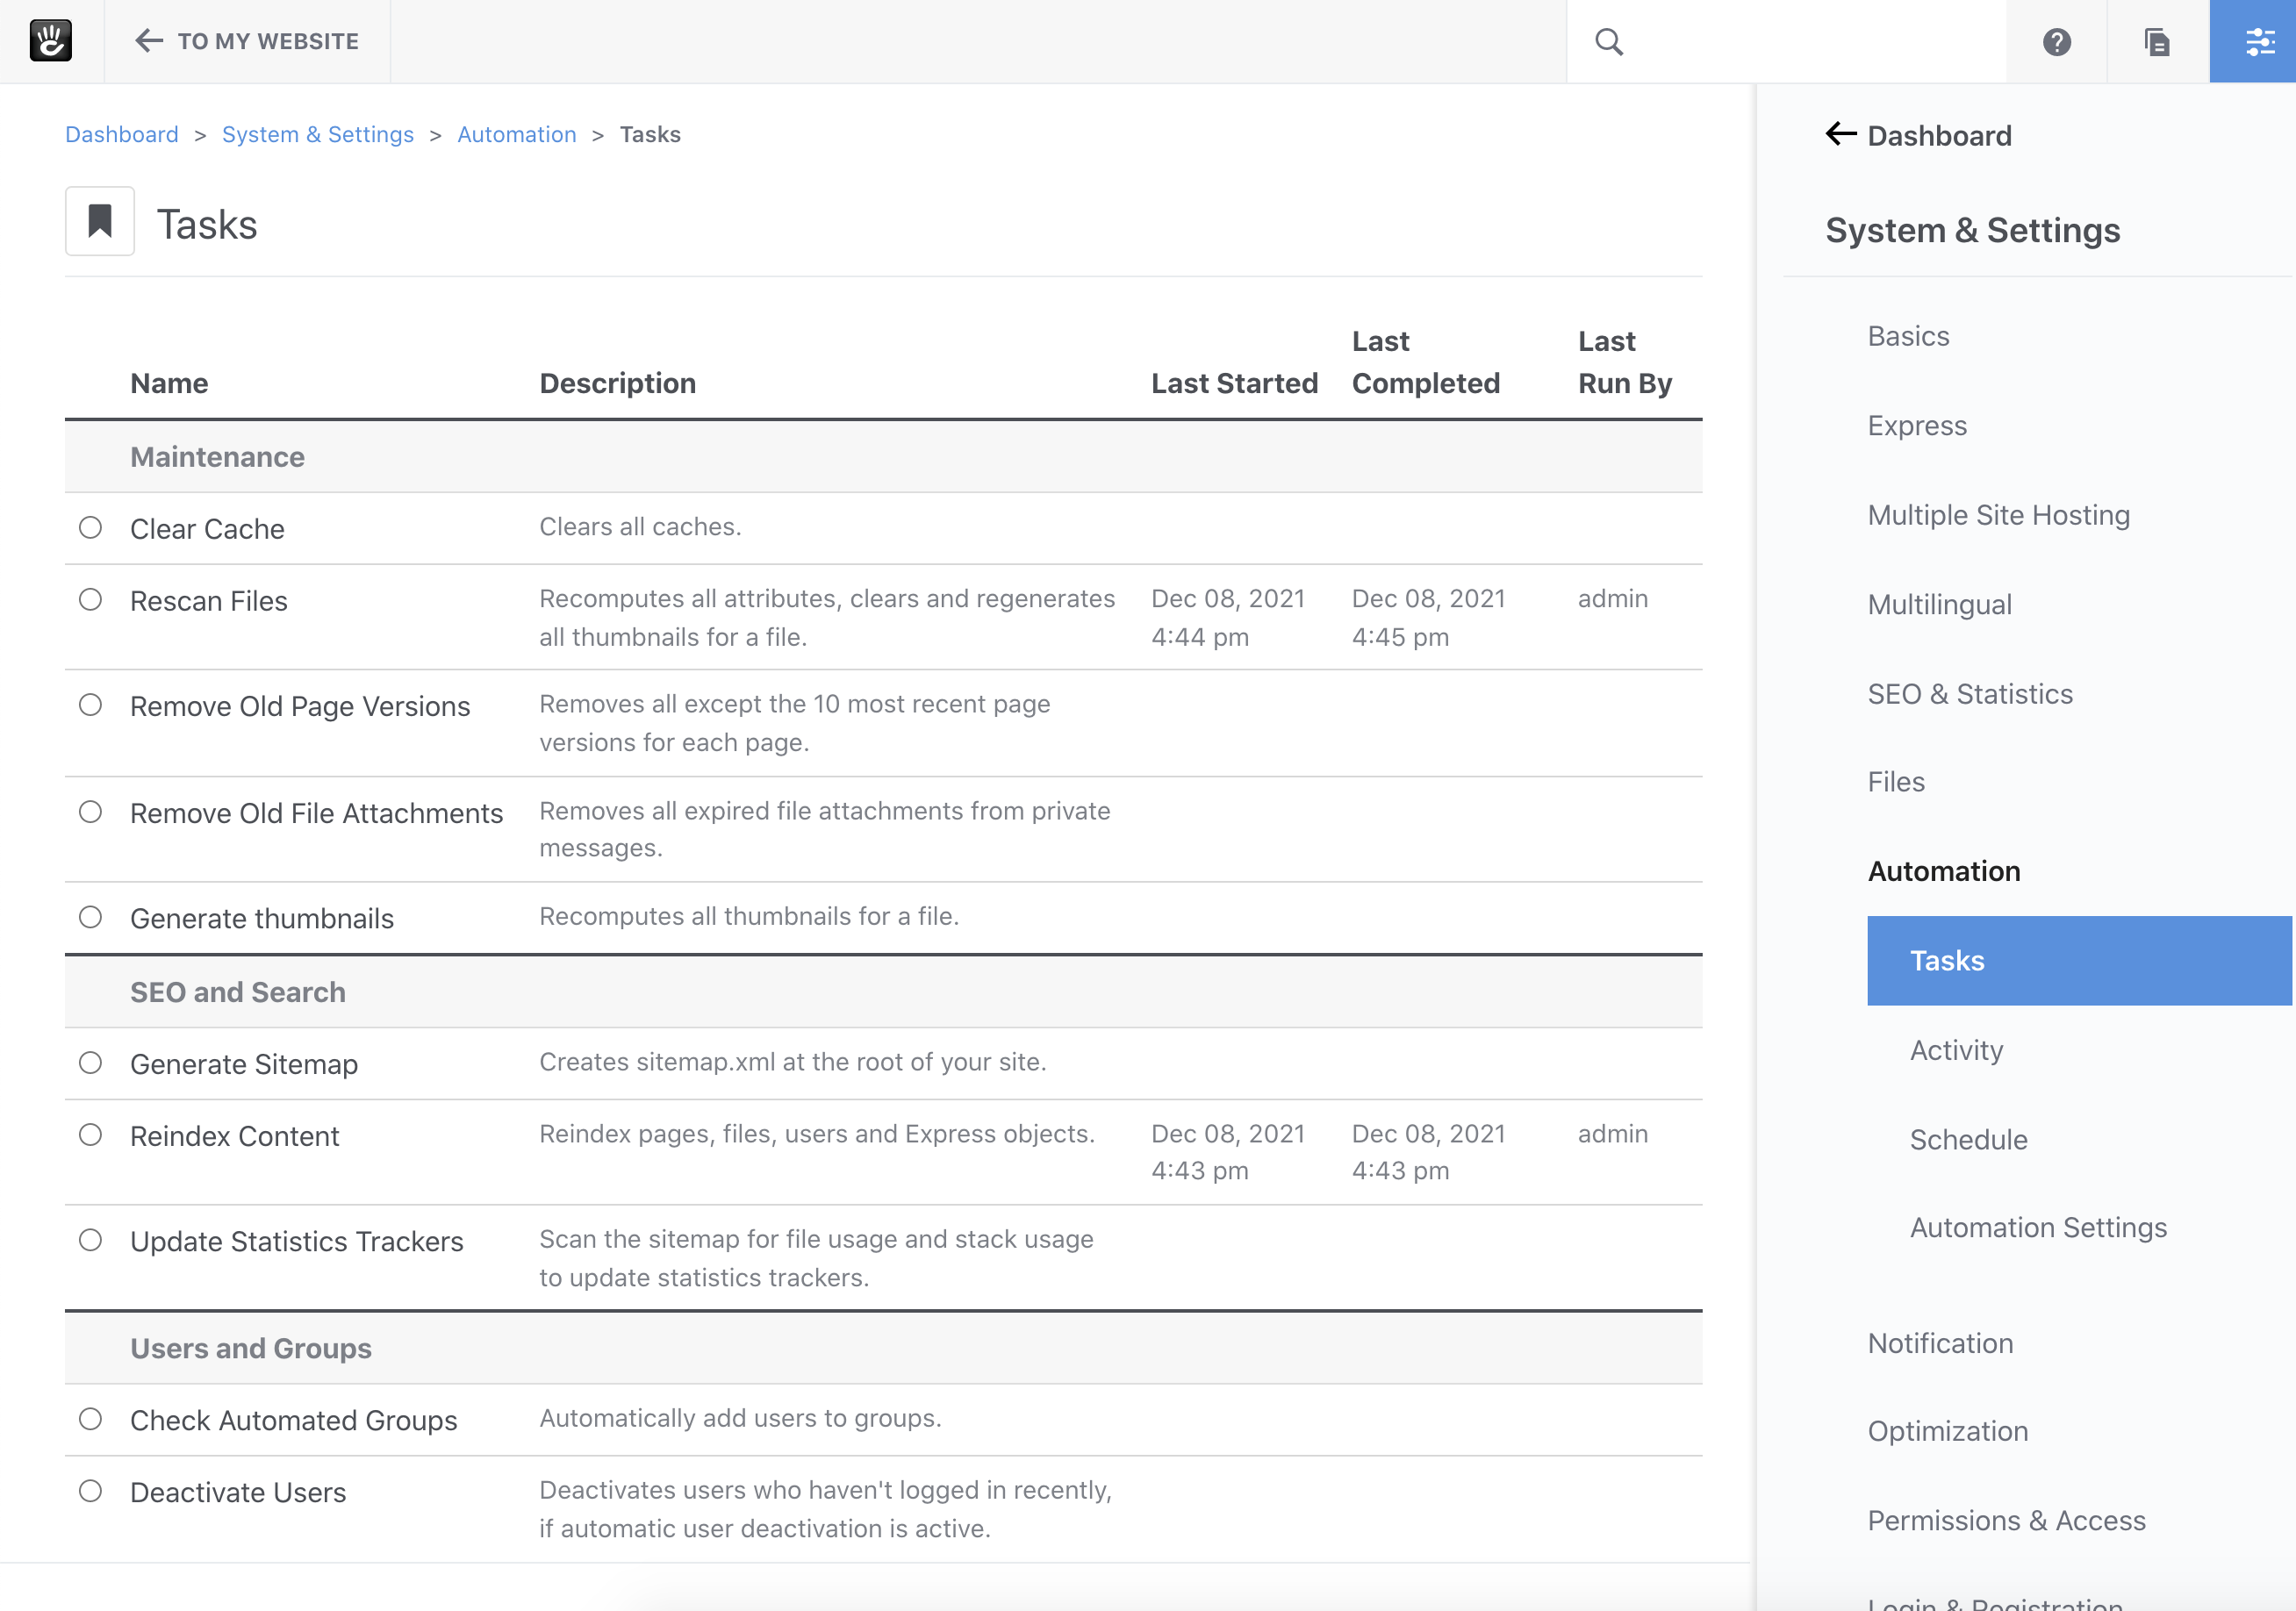
Core Tasks
Concrete CMS includes several core tasks:
-
Clear Cache: Clears the site cache to ensure that the most recent content is displayed.
-
Rescan Files: Rebuilds thumbnails, reindexes content, and processes files.
- Input Option: After File ID – Enter a file ID to rescan files sequentially after the specified ID. Useful if a previous operation timed out.
-
Remove Old Page Versions: Deletes all except the 10 most recent versions of each page to conserve database space.
- Input Option: After Page ID – Enter a page ID to process pages sequentially after the specified ID.
-
Generate Sitemap: Creates a
sitemap.xmlfile in your web root based on your site’s structure and content. -
Reindex Content: Reindexes pages, files, users, or Express objects to update search indices.
- Input Options:
- Clear Index: Yes/No – Clears the index before reindexing.
- Rebuild Index: Yes/No – Rebuilds the schema of the attribute index table.
- After ID: Enter an object ID to process items sequentially after the specified ID.
- Input Options:
-
Deactivate Users: Deactivates users who haven’t logged in recently, if automatic user deactivation is active.
-
Process Email: Polls an email account to retrieve private messages or postings if mail importing is used on the site.
-
Remove Unvalidated Users: Removes users who haven’t validated their email addresses within a specified timeframe.
Activity
The Activity page displays all currently running and previously executed tasks. This log helps monitor task performance and troubleshoot issues.
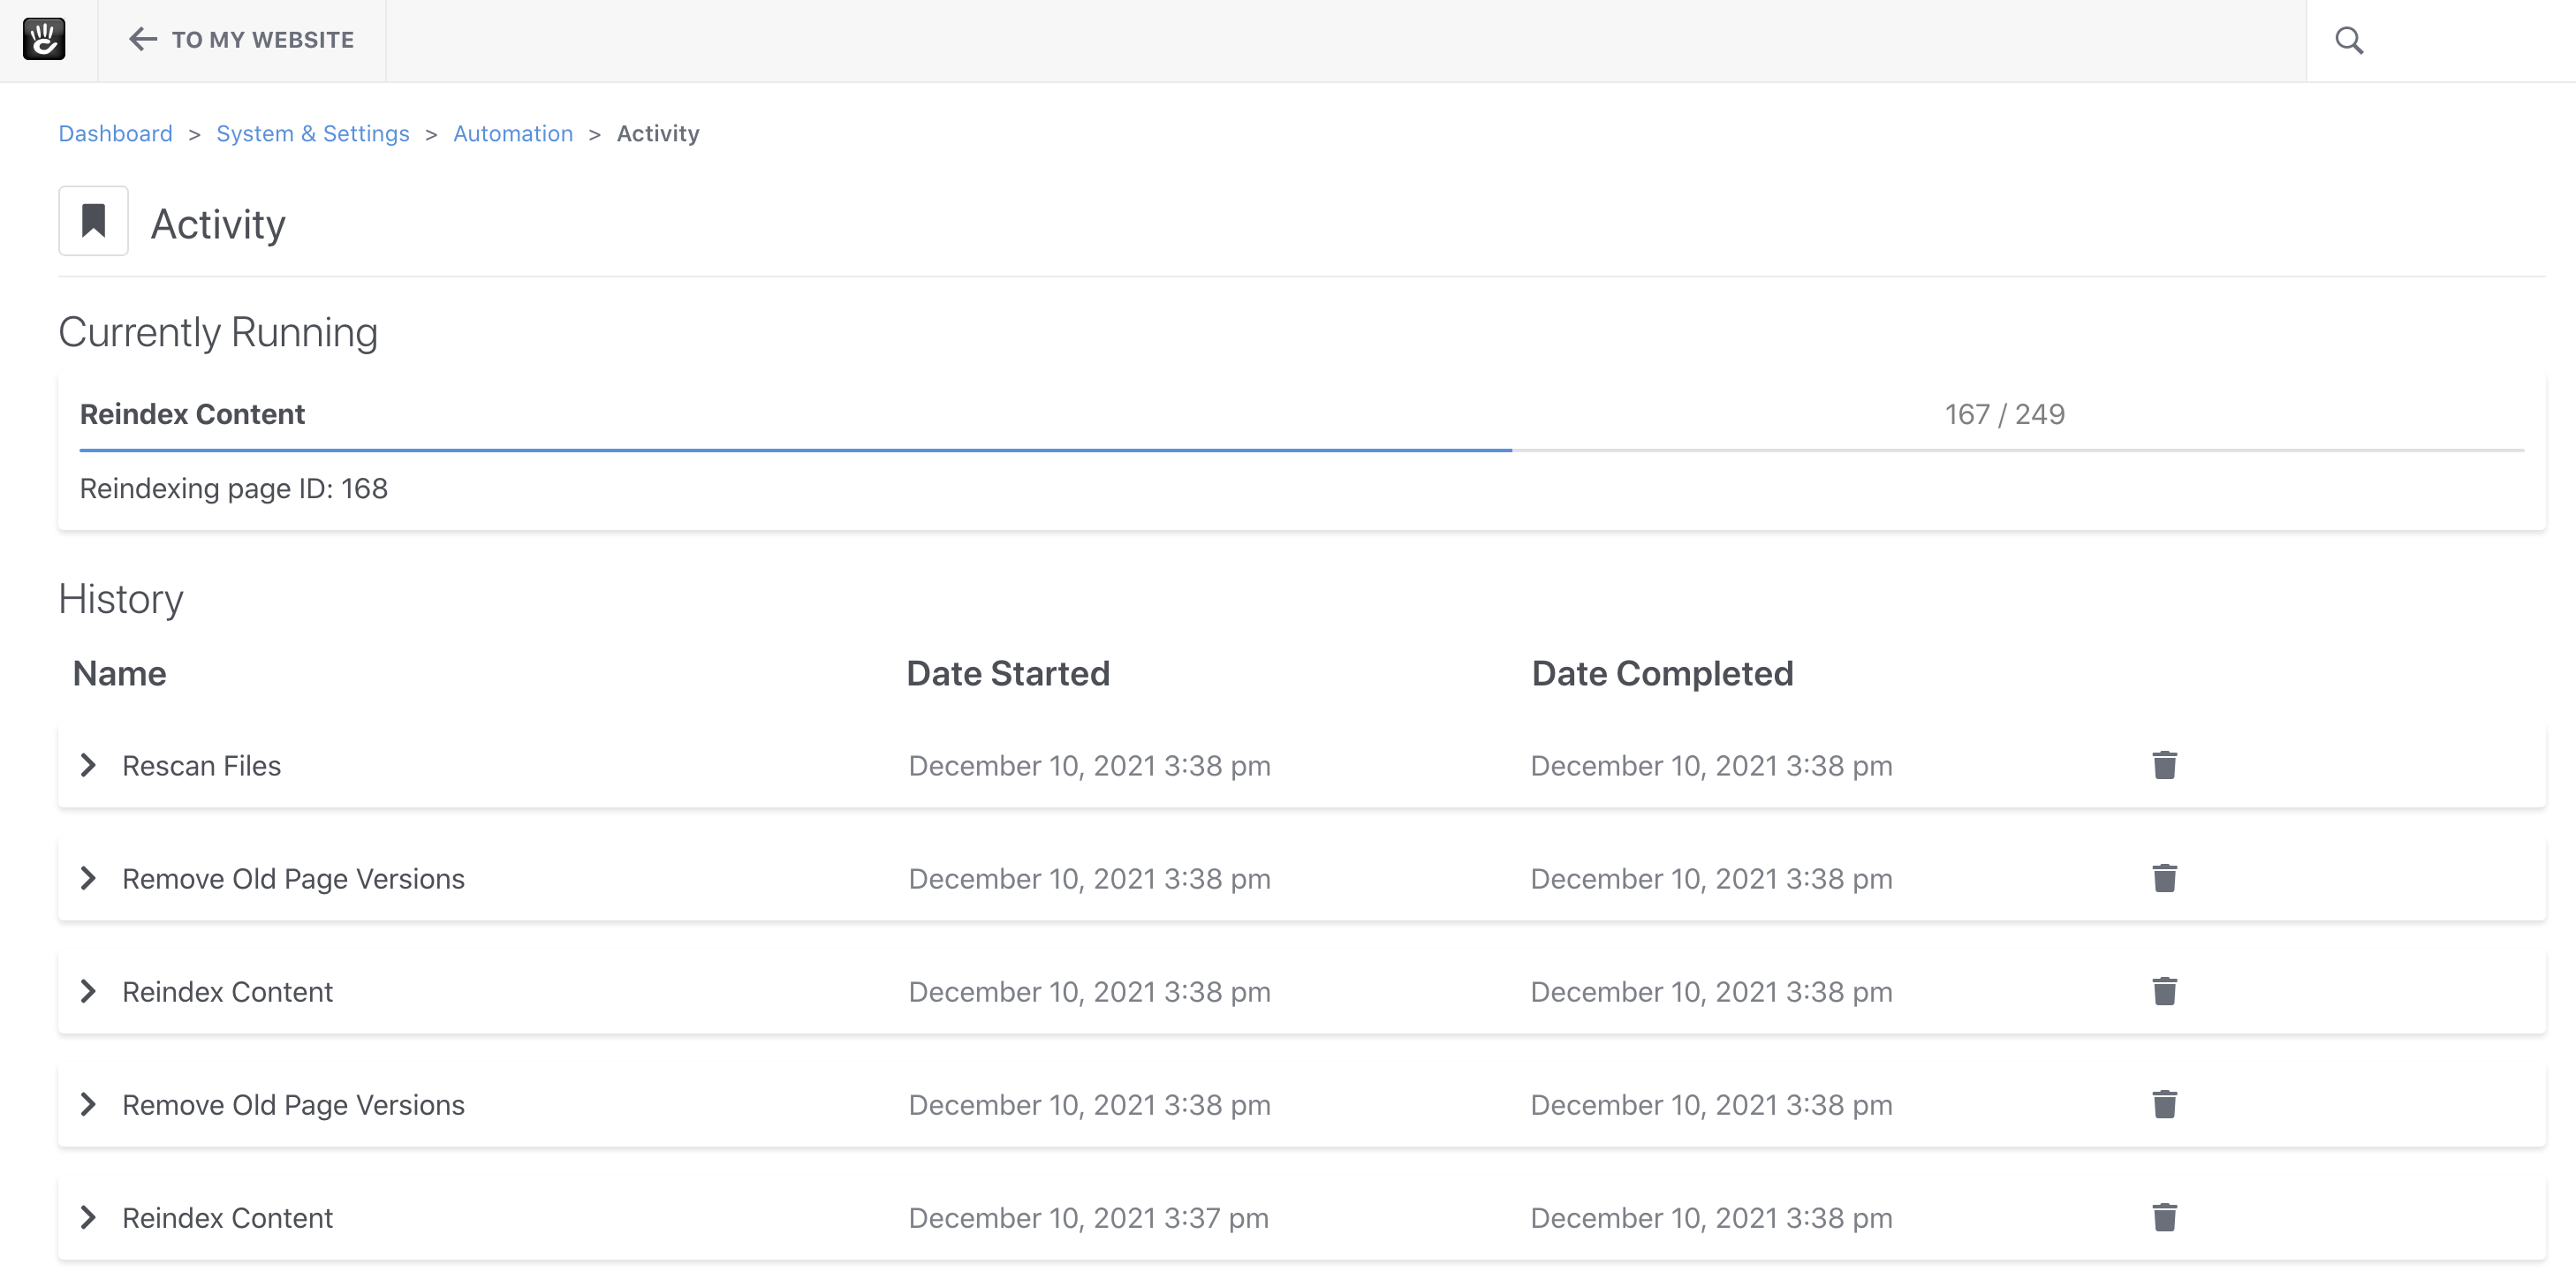
Features:
- View task execution history.
- Identify any errors encountered during task runs.
- Remove specific task entries by clicking the trash icon.
Schedule
The Schedule page lists all tasks that are set to run automatically at specified intervals. Task scheduling can be enabled and configured in the Automation Settings.

Managing Scheduled Tasks:
- View all scheduled tasks and their next run times.
- Remove a scheduled task by clicking the trash icon, which halts its future executions until rescheduled.
Automation Settings
The Automation Settings section allows you to configure advanced settings for task execution and queue management. Adjusting these settings can improve the performance and responsiveness of the automation system.
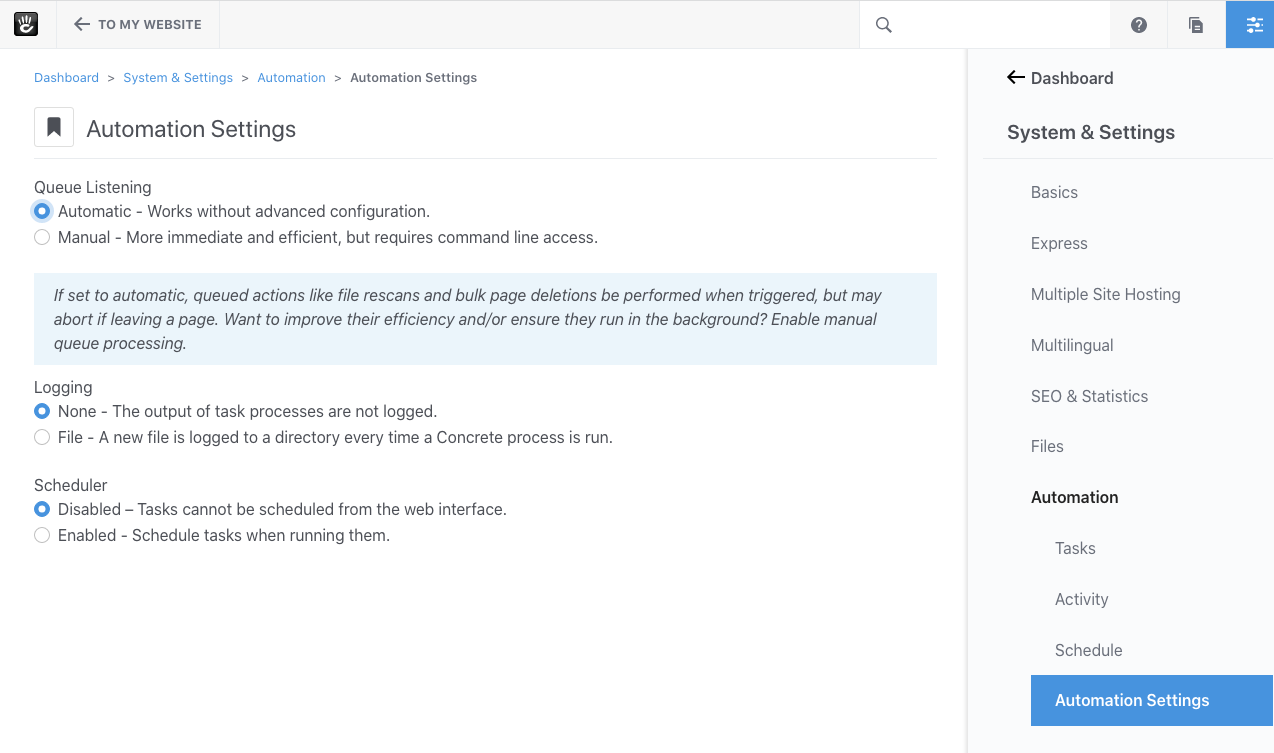
Key Settings
- Queue Listening:
-
Automatic: Queued actions are performed when triggered but may abort if you navigate away from the page.
-
Manual: Requires running a command-line worker to process queued actions in the background.
Important: If set to manual, ensure that at least one worker is running. This may require server configuration or running the worker manually.
-
- Logging:
-
None: No task output is logged.
-
File: Logs task output to a specified directory.
Important: Ensure that log files are stored in a non-public directory to prevent unauthorized access.
-
- Scheduler:
-
Enabled: Allows tasks to be scheduled using cron syntax.
Important: If enabled, ensure that the scheduling worker runs every minute. This requires adding a cron entry on your server.
-
Running Tasks from the GUI
To manually run tasks:
- Navigate to Dashboard > System & Settings > Automation > Tasks.
- Click on the task you wish to run.
- Click the Run button.
This is useful for immediate execution of tasks without waiting for scheduled intervals.