Advanced Permissions
Introduction
Advanced Permissions allows for much finer control over permissions in Concrete CMS. It also includes Workflows, a feature which enhances collaboration and provides notifications for certain actions.
Enabling Advanced Permissions
Advanced Permissions is not enabled by default. To enable it, navigate to Dashboard > System & Settings > Permissions & Access > Advanced Permissions. Click Enable Advanced Permissions in the page that appears.
Keep in Mind
Advanced Permissions is Permanent
Once Advanced Permissions have been enabled on a site, you cannot revert to Simple Permissions. Advanced Permissions introduces changes to your site's database that cannot be undone. If you're not sure if Advanced Permissions are necessary for your site, we suggest you back up your database before enabling this set of features.
The admin Superuser
Regardless of how permissions are set, the "admin" superuser will always have access to deleting, moving, changing permissions, and otherwise editing pages. If you manage to break something, you should be able to restore access by logging in as admin and changing your settings back.
Note that admin is the default account that was created when you set up your Concrete CMS site. It's a special user, not simply a user in your Administrators group.
Inspect Page Permissions
To inspect a page's permissions, click the page settings (gear) icon and click Permissions.
Assign Permissions
This setting is defining how permissions for this page are set:
By Area of Site (Hierarchy)
This option sets the page to inherit the permissions that are set for the page above the current page.
Note that the access entities from the page above (in this case: Home) are listed. But the available permissions items are plain black text, not links, and cannot be edited. If we want to change access for this page, we'll need to edit permissions on the page above, or set the page to assign permissions differently.
From Page Type Defaults
This this option applies the permissions that are set on the applied page type's Page Type Defaults.
Note that once again we can't edit these permissions directly from the page. To change them, we'll need to edit the Page Type Default permissions, or set the page to assign permissions manually.
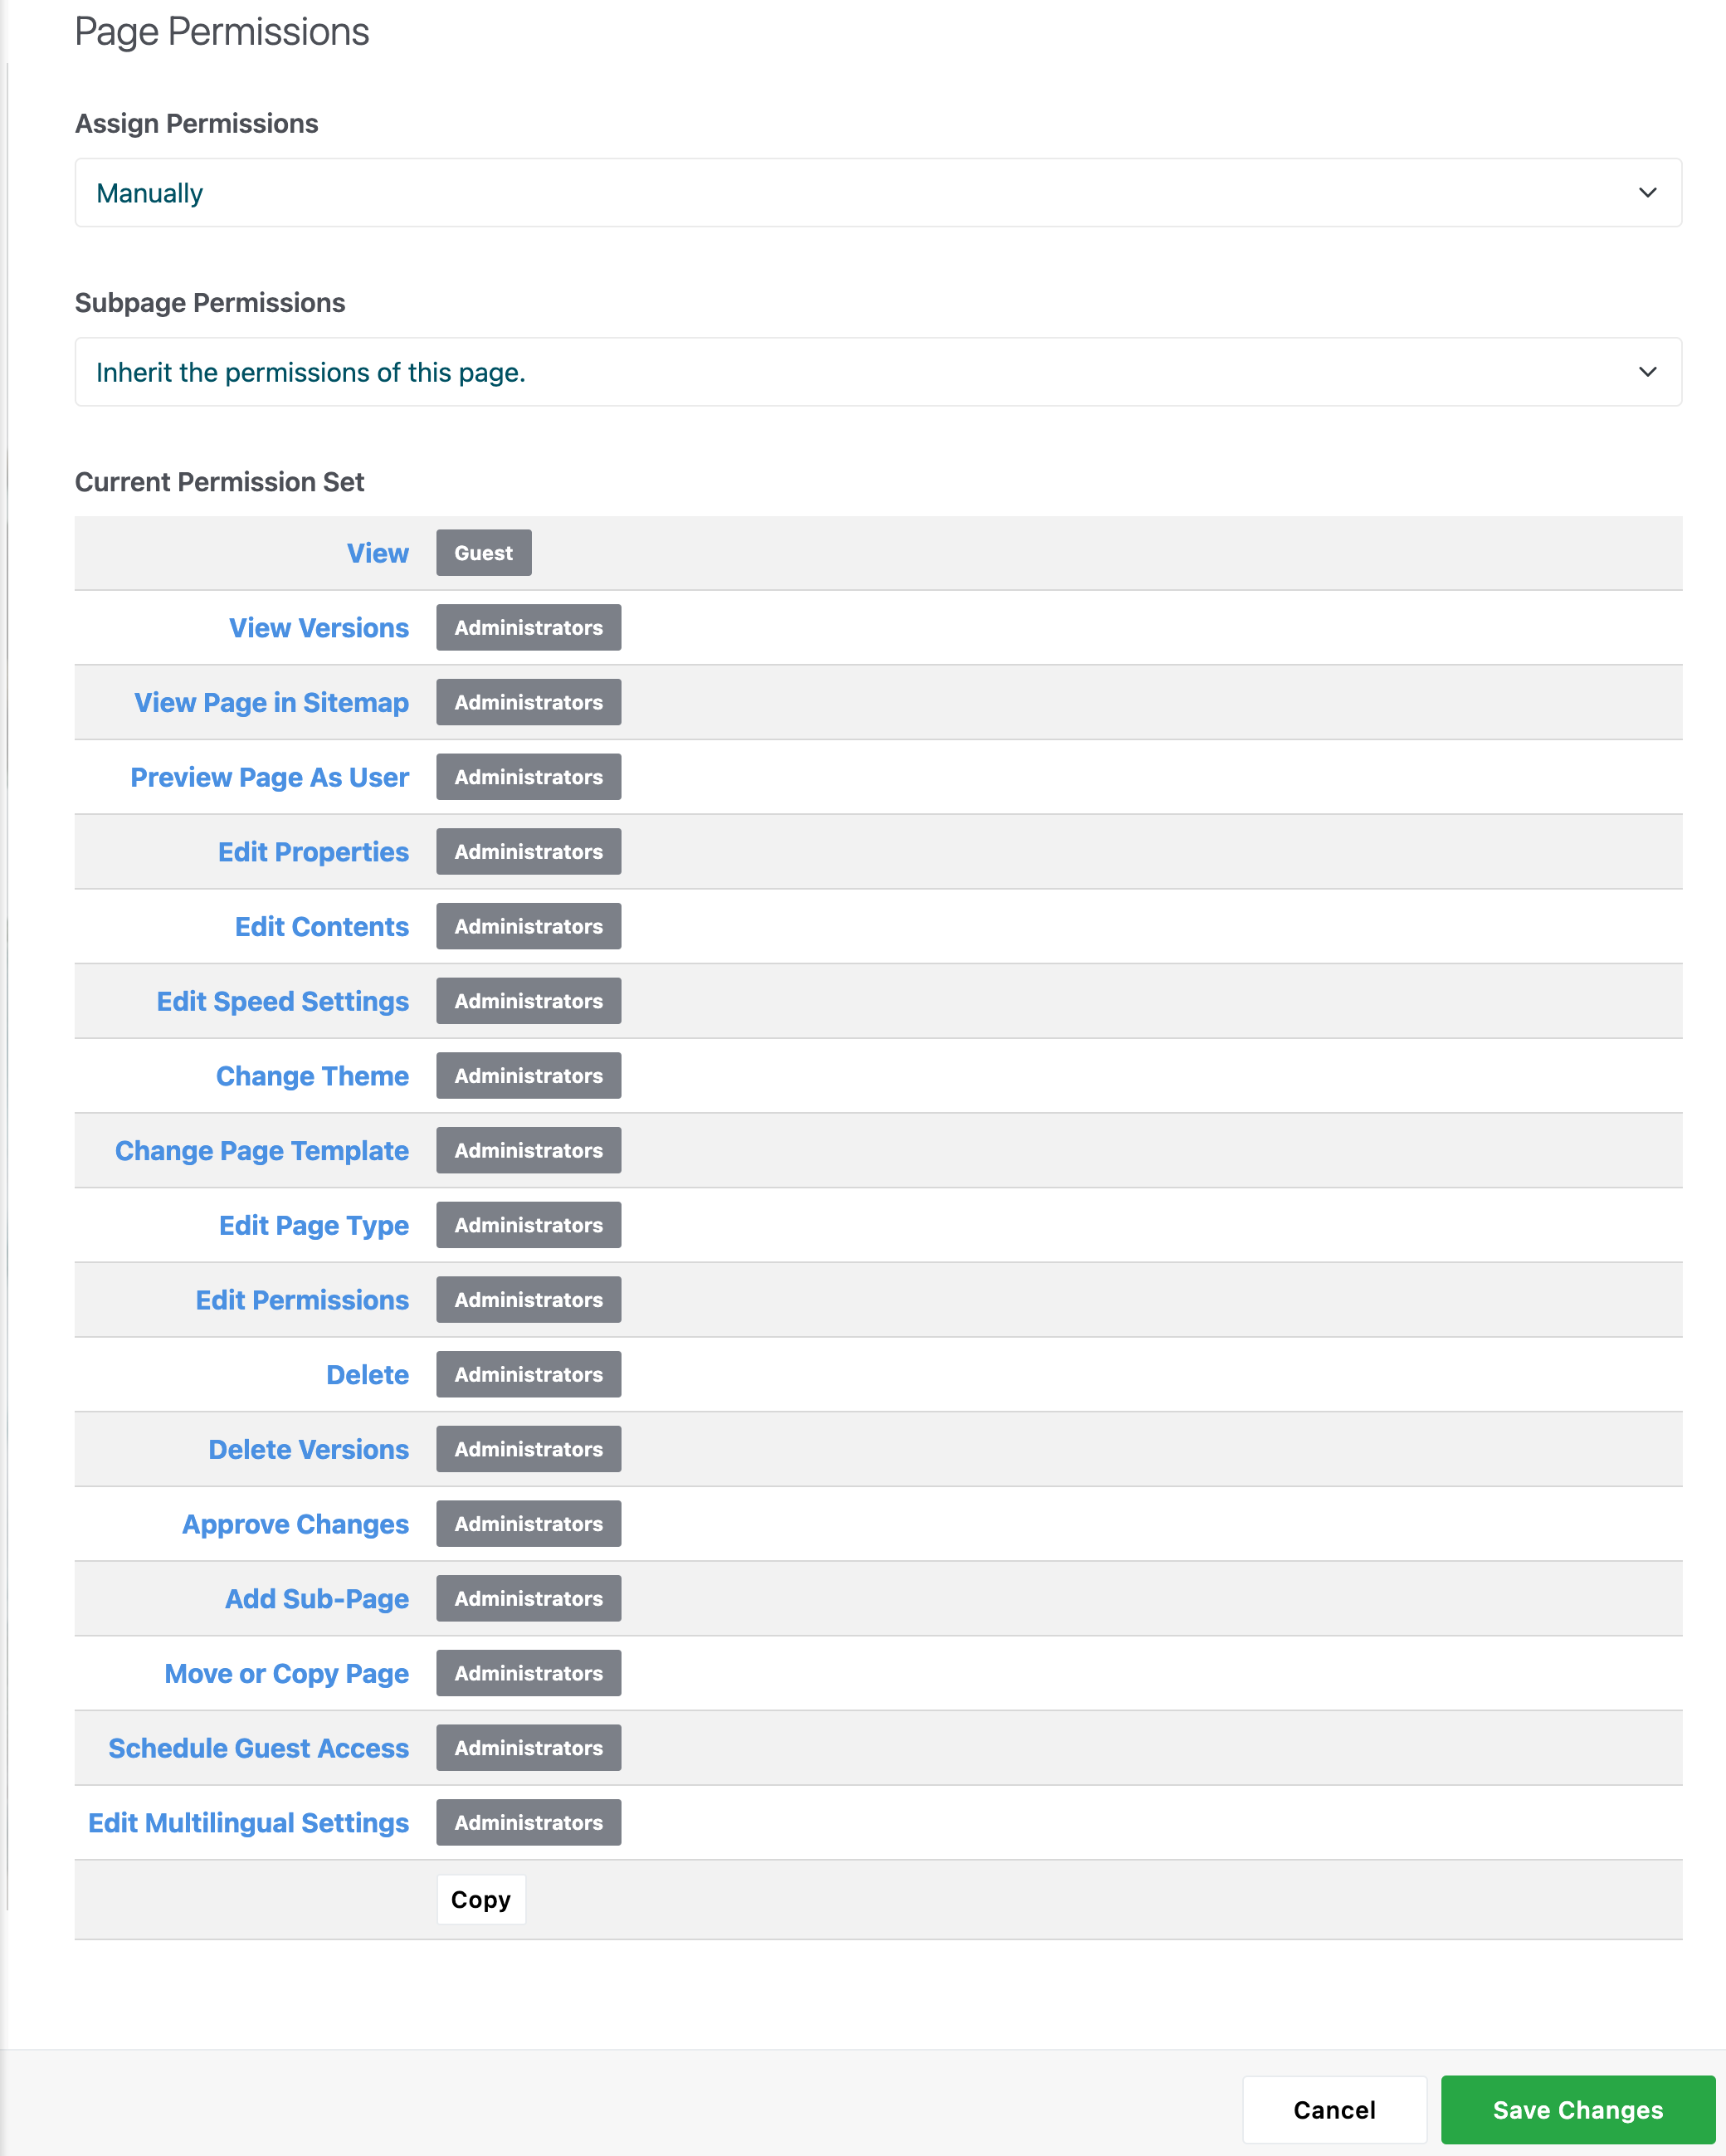
Manually
This mode allows manual selection of permissions for the current page. If pages below the current page are set to be assigned By Area of Site (Hierarchy), and the Subpage Permissions setting is set to Inherit the permissions of this page they will inherit the permissions set for the current page.
Note that each of the permissions items we can set on this page are now rendered as blue links. We can click any of these items to add access entities.
Subpage Permissions
This selector sets how pages located below the current page will inherit permissions by default. New pages created below this level will inherit these permissions as well.
Inherit page type default permissions
Sets subpages of the current page to inherit default permissions specificed by their selected page types.
Inherit the permissions of this page
Sets subpages of the current page to inherit permissions set from the current page.
Edit Permissions
Permissions may be edited by clicking on the name of the permission in the list on any page set to assign permissions manually.
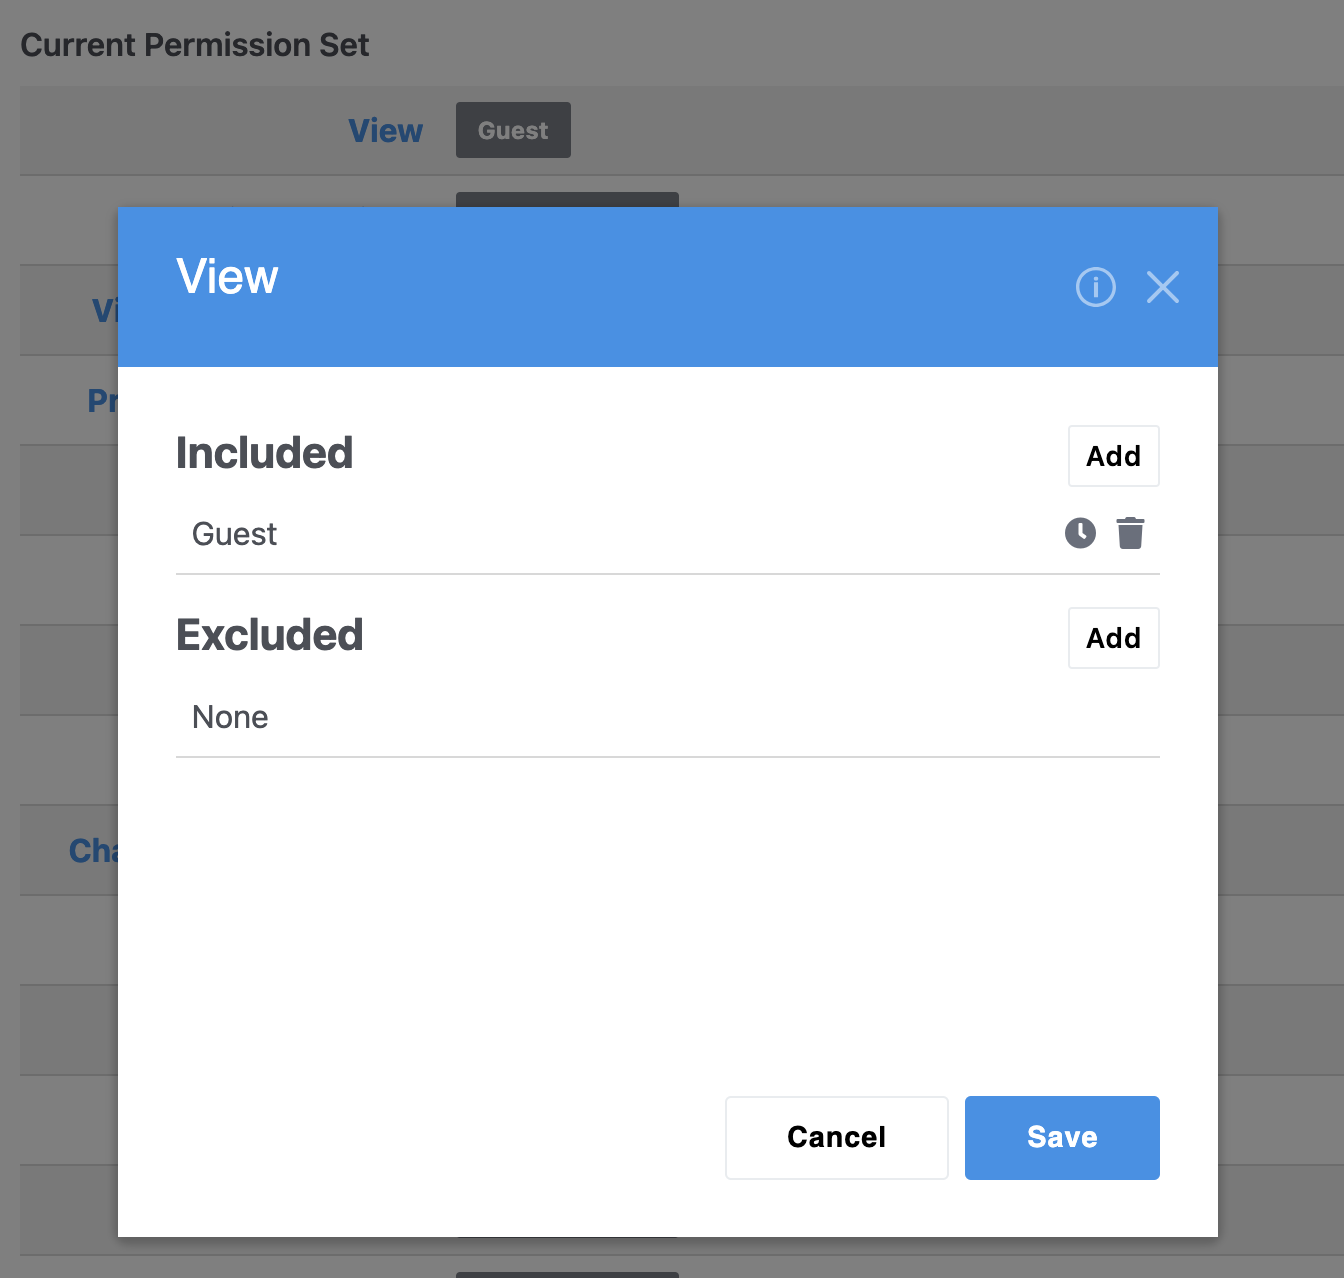
Access Entities are the users, groups and combinations that you want this permission to apply to. Upon clicking a permission's link, you'll see a list of access entities currently selected for this permission.
Each access entity is added under Included or Excluded, thereby allowing or denying the entities from accessing this particular permission:
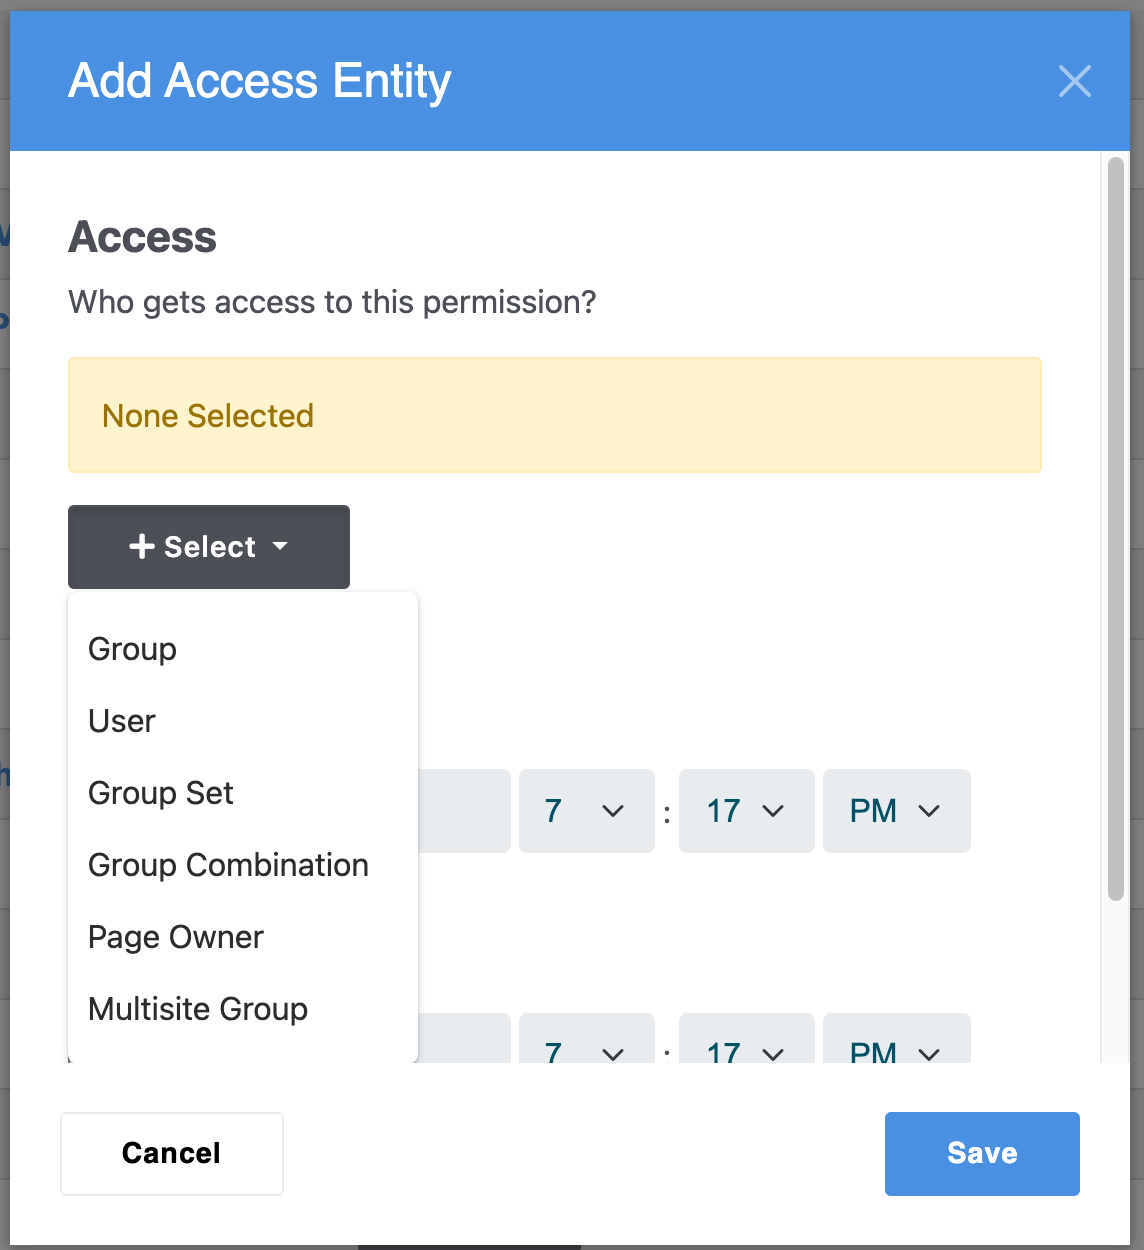
Click the Add button to show the Add Access Entity dialog. To add an entity, click the Select dropdown menu, and then choose from Group, User, Group Set, Group Combination, or Page Owner.
In the example above we've granted access for any users in the Editors or Contributors groups. We've also specifically excluded an individual user named "intern" from being able to access this permissions item (View Versions). When inspecting a page's Permissions, excluded access entities appear in red.
Tip: Exclusion overrides inclusion
It's important to note that in the example above, "intern" won't be able to access this permissions item, even if ther user is a member of the groups which have been granted access.
Entity Types
Each type of entity can be included or excluded in a permission.
User
These entities are the individual user accounts set up in your site.
Group
The permission can also be applied to a specific group of users (as defined by Dashboard > Members > Groups). The permission will apply to all members of the group.
Group Set
Group Sets are used to gather separate groups into a single entity. Group sets are defined at Dashboard > Members > Group Sets. A user will have access to this permission item if they are a member of any group in the set.
There are two additional permissions-related options:
Group Combination
Includes members of two or more groups who belong to all of the groups. For example, if Group A contains User 1, and Group B contains User 1 and User 2, only User 1 will be included when Group A and Group B are used in a Group Combination.
Page Owner
This allows the setting of permission to the user who is currently set as the owner of the page.
Timed Permissions
The controls in the Time Settings section allow the selected permission to be valid only during a specified time frame.
For example, it may be desired for one group of users to only have access to edit a page during certain hours of the day, or even for a period of several days.
To set a permission to apply for only a specific period of time, click the clock icon next to the access entity you've selected:
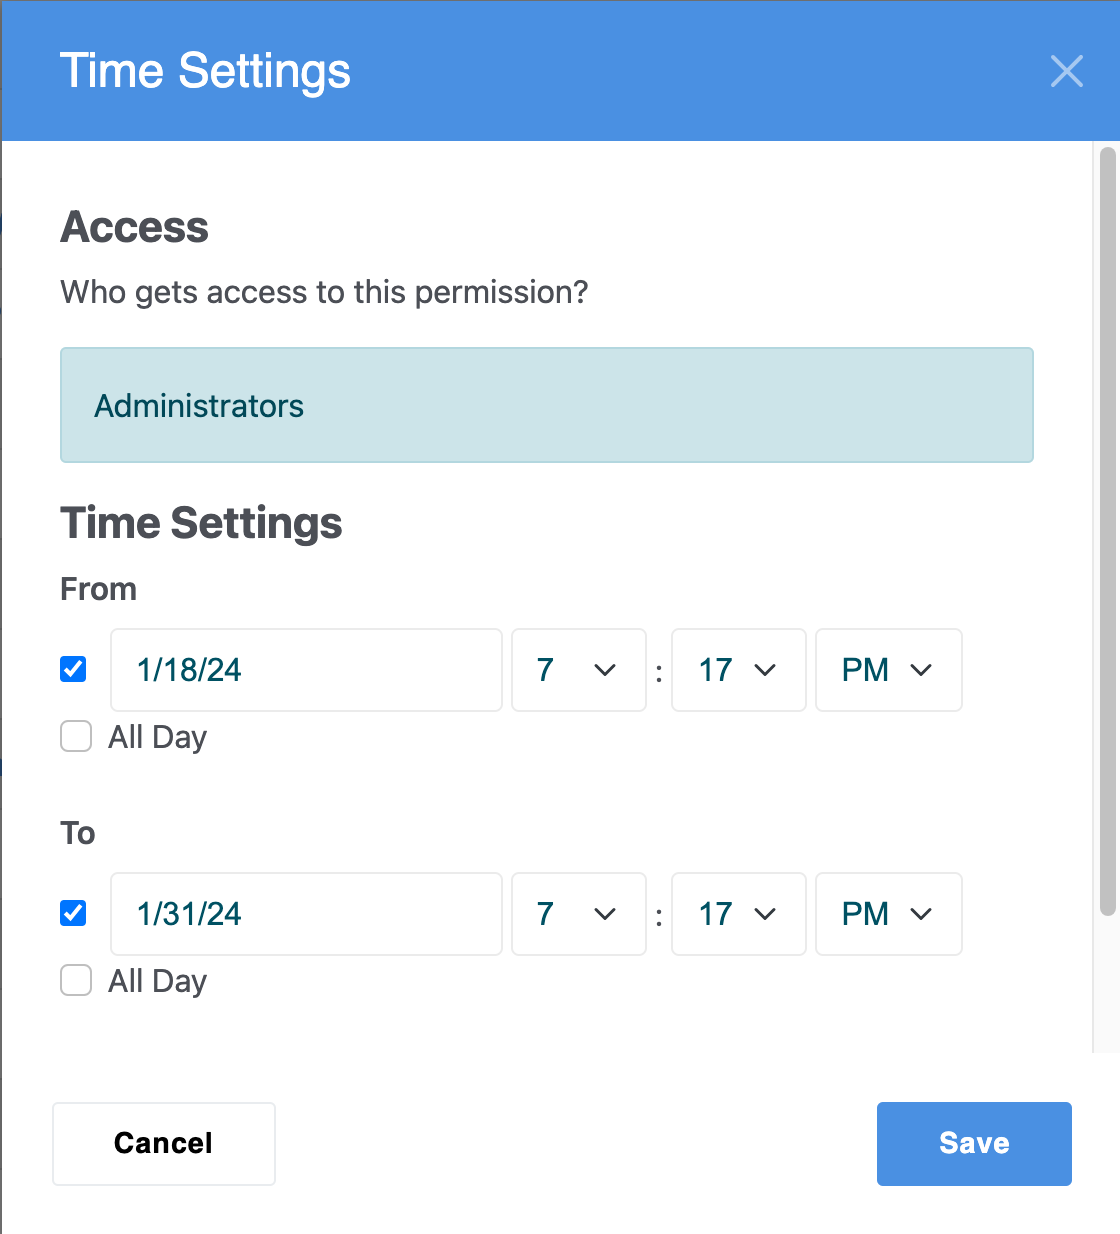
Repeating Time Settings
Timed permissions can also be set to repeat the timed access setting every day, week or month.

Copying permissions
Copy settings to another permissions item
Individual permission settings can be copied within the list by simply dragging the onto another permissions item.
Simply mouse over a permission setting and a green "plus" icon will appear. Drag the permission to another item in the list and release. You can add the copied settings to any item.
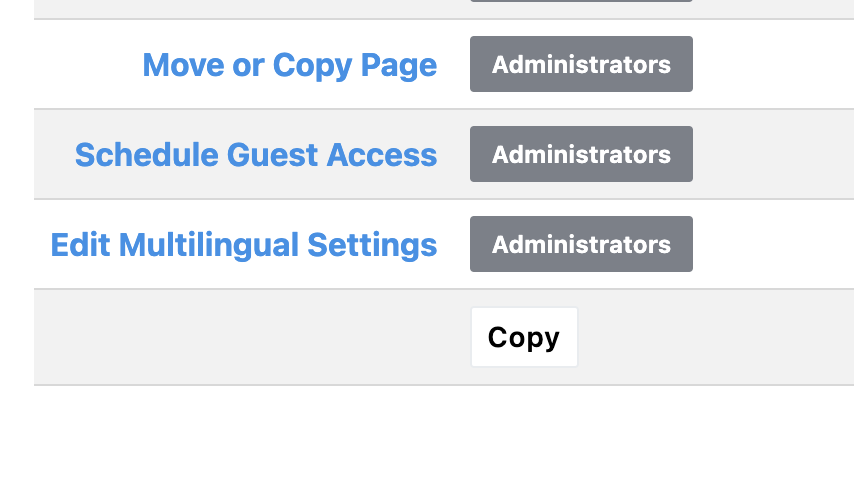
Copy all permissions to another page
Permissions can also be copied and pasted from one Permissions page to another. At the end of the list of permissions items, locate the "Copy" button and click it to copy all the permissions for the current page:
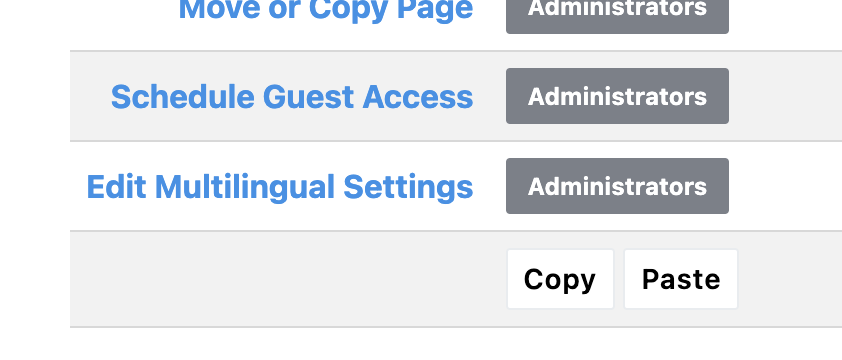
Navigate to the page you want to apply the permissions to, view its permissions and go to the bottom of the list. You'll now see a second button. Click Paste to apply all the permissions you copied from the first page to the current page.
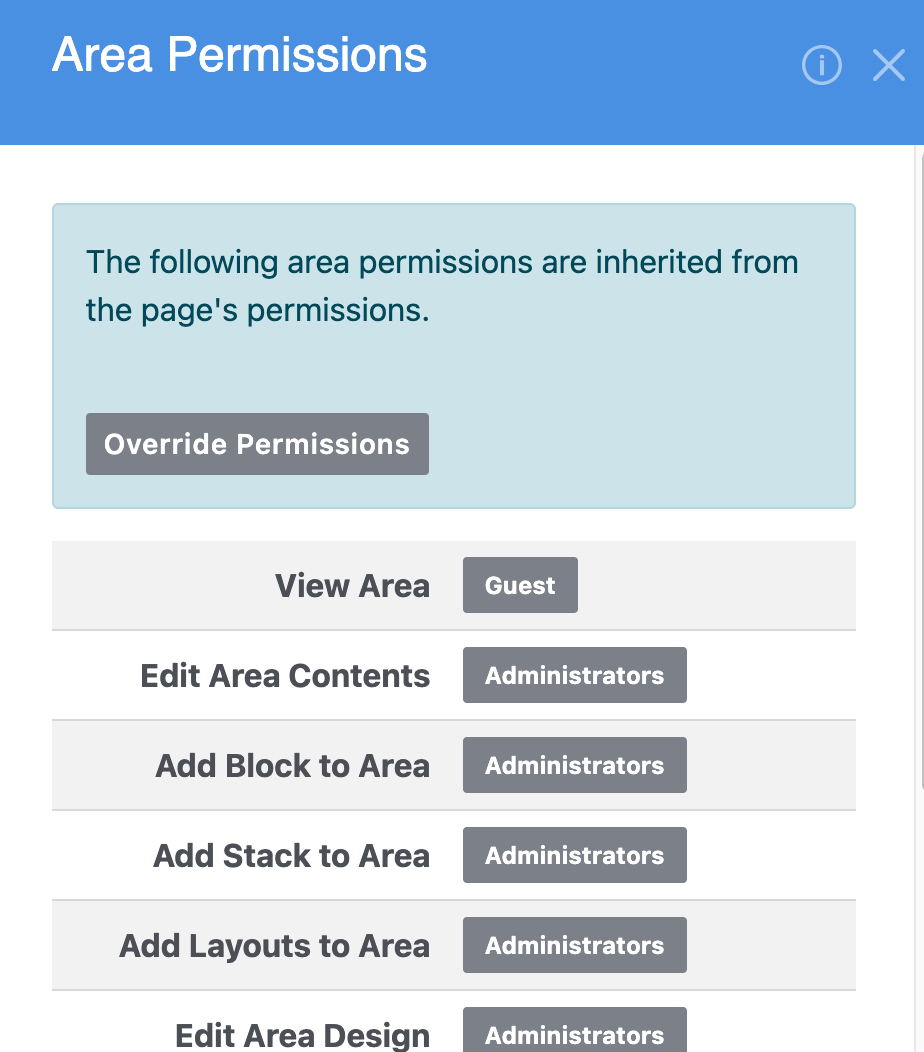
Setting Area Permissions
Permissions may be set for content areas in each page. These permissions include viewing the area, adding blocks and stacks, editing the design, layouts, and deleting content.
To set area permissions, click the Add to box below the area and choose Set Permissions. The interface for managing area permissions is the same as the page permissions interface.
Restrict Block Types in an Area
You can use advanced permissions to restrict what blocks can be added to individual areas and further refine those permissions by group.
For example, if you have a header area that should only ever have an image slider in it, you can easily set the permissions on that area so that the Editors group can only add the image slider block and no other block types. Perhaps you want Administrators to have the ability to make an exception and add any block type-- that's easy too. Advanced permissions lets you define what blocks each group on your site can add.
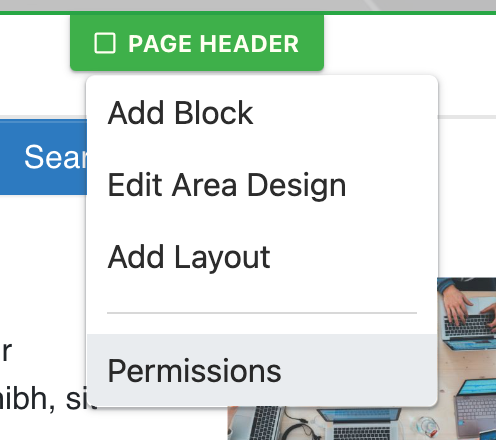
Click on the page area tab you want to restrict (do this on the page in edit mode or on the page type default if you want it applied to all pages of that page type) and choose Permissions.
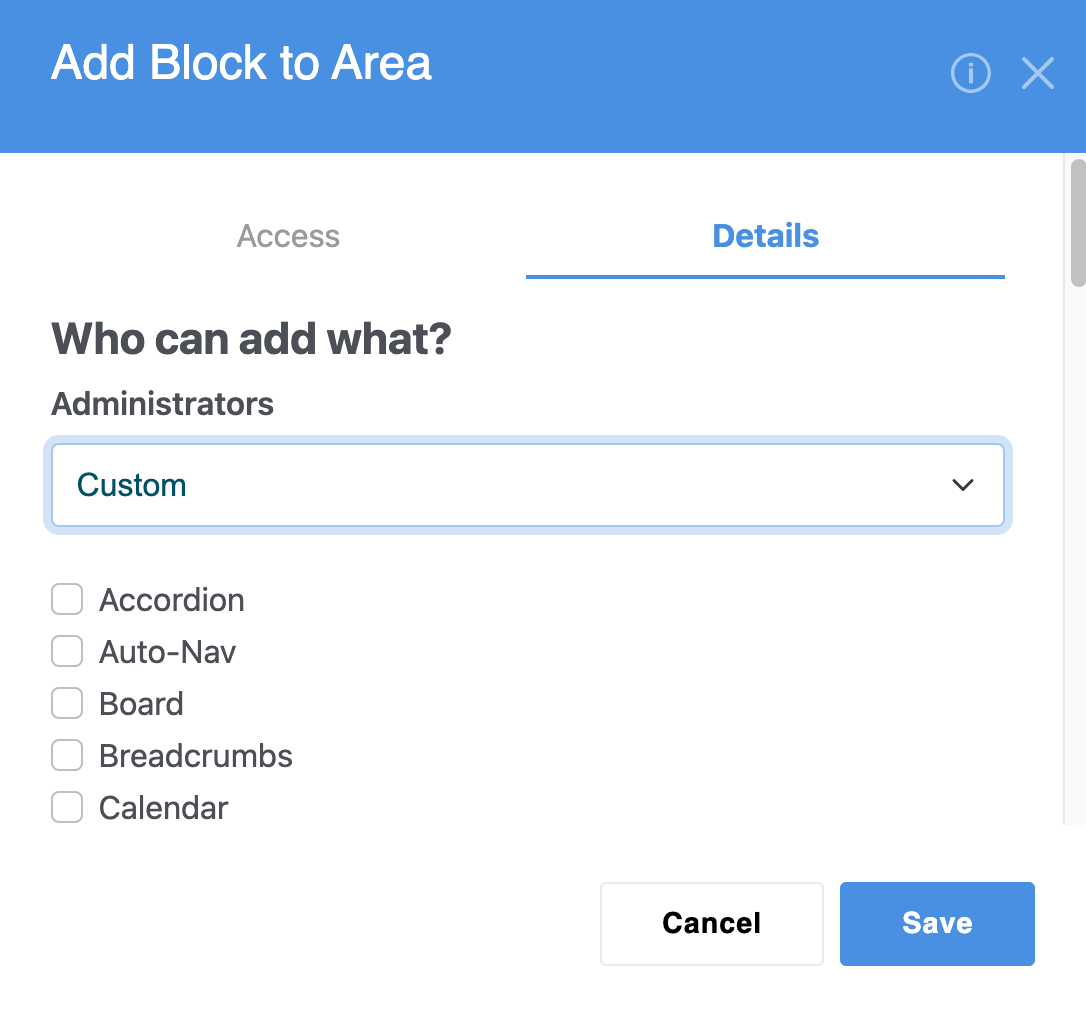
Override the current permissions and choose Add Blocks to Area.
Then there's a Detail tab where you can, by user group, define custom permissions for what blocks can be added to that area (so if Administrators need to be able to add any block but Editors and Authors can only add a specific block, you can define that level of complexity as well).
Block Permissions
Block permissions function very similar to area permissions, but include permissions such as viewing, editing, changing the template, deleting, and design.
Setting Block Permissions
To set block permissions, click the block and choose Set Permissions. As with area permissions, the interface for managing block permissions is the same as the page permissions interface.
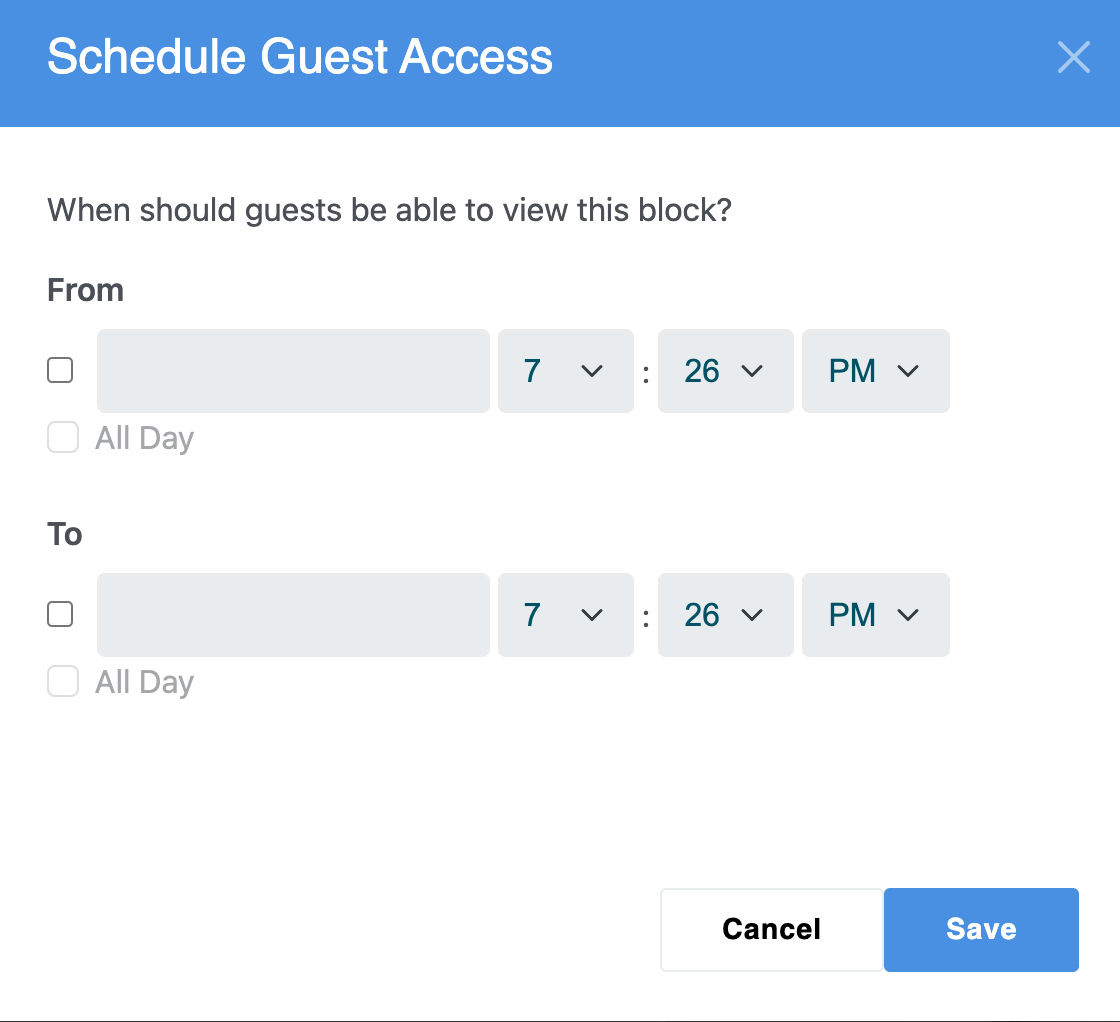
Schedule Guest Access
Advanced Permissions includes a feature to schedule guest access for a particular block. This can effectively show or hide a block to users in the "Guest" group-- which includes unregistered anonymous visitors to your site.
To use this feature, click on the block, select Schedule Guest Access, and then specify a time range in which guests should be able to view the block.
The interface for Schedule Guest Access is similar to the interface for setting timed permissions on pages.